
Add a TEBR
- Navigate to Environment > Requests.
- Click the TEBR tab.
- Click
 . To edit an exiting TECR, see Edit TEBR.
 - The ‘TEBR’ pop-up displays. Fill in the fields as follows:
Details Tab
‘Information’ Section
| Fields | Description |
|---|---|
| ID | Auto-generated field. |
| Requester | Non-editable; displays the user details who created this TEBR. |
| Title | Mandatory; Enter a title for the TEBR. |
| Description | This is a rich-text area. Enter a detailed description for the TEBR. |
| Type | Select the TEBR Type from the drop-down. You can customize the Type using TEBR Type Customization. Selecting a Type will also select a workflow if workflows have been enabled. |
| Status | Select TEBR status from the drop-down. If the TEBR Workflow is enabled in the TEBR Status Customization, the drop-down options depend on the TEBR Type you have selected and its Workflow. If TEBR Workflow is disabled, all Statuses will be selectable. Customize the TEBR Statuses from TEBR Status Customization. |
| Time Slot | Select a Time Slot from the drop-down. Administrators can create time slots using the TEBR Time Slots Customization. If a date in the past is selected and the Do not allow past dates to be selected checkbox is selected on the TEBR Mandatory Details Customization, you will need to change the date to the future to save. |
| Start Date/Time – End Date/Time | Selecting a time slot displays the start/end date and time. You can change the booking request date and time here. |
| Assignee | Mandatory; Select a User or User Group from the drop-down menu. Hover your mouse cursor over the User Group to view the group members. |
| Attachments | Save the TEBR to add an attachment. You can attach URLs and/or Files to a TECR. Click on the number displayed to open the ‘Attachments’ pop-up. On this pop-up, you can view, add and edit the attachments. For details, see Quick Tips. |
| Watchers | Watchers are external users who made the booking in ServiceNow, or Plutora Users, or Plutora User Groups, who want to be informed of TEBR updates. If you are adding a new TEBR, click |
‘Additional Information’ Section
The Additional Information section contains custom fields, which administrators have added using TEBR Custom Fields Customization. These fields will vary between each Plutora installation. Please consult your administrator for the procedure for filling in these fields.
If you do not find the custom field you are looking for, ensure that you have the required permission to see a custom field tab’s fields. The permission is set in TEBR Custom Fields Customization.
‘Project/Release Details’ Section
To fill in the Project/Release Details panel:
- Select the Booking with Project/Release to create a TEBR with Release. The following fields will be enabled:
- Project/Release Name: Select a release from the drop-down. Only Releases that do not have an End State will appear in the menu.
- The Project/Release Description field will fill with the Release’s Description.
Selecting a Release will add the Release’s Systems to the TEBR in the ‘System Details’ section.
The TEBRs that have a Release linked to them are displayed in the My Environment Booking tab. This is where you access and act upon (approve/reject) the booking request. For more details, see Manage My Environment Booking.
- Select the Booking with Environment Only option if you need a placeholder Environment Booking. In this case, the TEBR will be created without Release. Selecting this option will disable the other fields in this section.
‘System Details’ Section
Add the Systems that are impacted by this TEBR in this section. Click ![]() and drag and drop Systems to the respective Systems Subtype.
and drag and drop Systems to the respective Systems Subtype.
For more details, see Manage System Details.
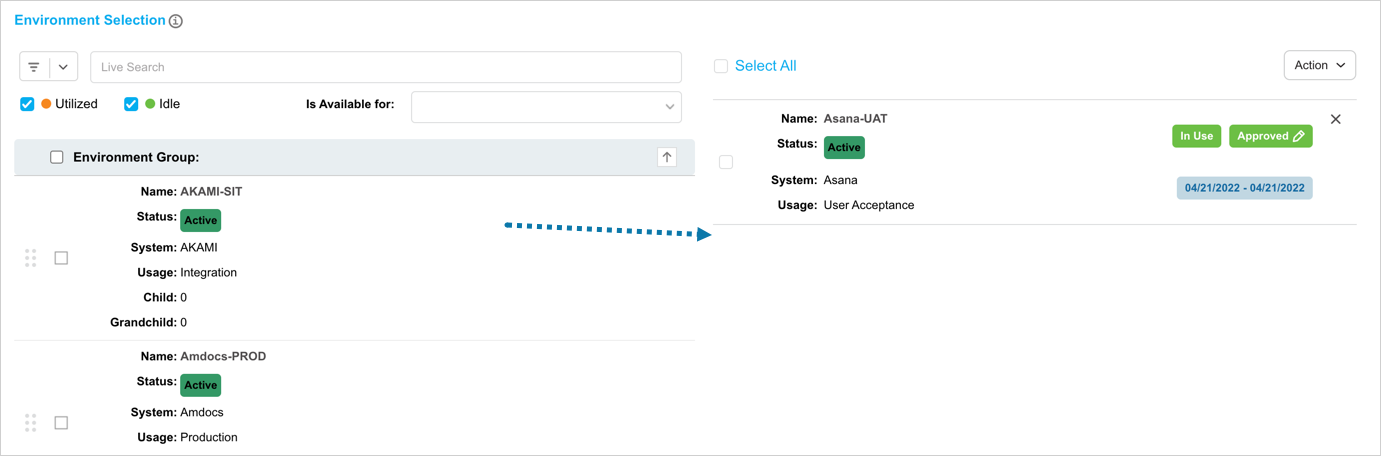
Booking Status and Availability
- Automatically approved: If the Environment booking is automatically approved, it will have the status ‘In Use’ when booked.
- Shared Environments: If an Environment is shared, it will lack the availability information and only displays the booking status.
- If the Environment’s Status has the Unbookable checkbox selected in the Environment Status Customization, or has already been booked, you will not be able to book it.
- Environments that cannot be booked will display
 .
. - The availability of the Environment for each Phase is displayed when you select the Phase from the Is Available for drop-down menu.
- Environments can have child and grandchild Environments. Dragging and dropping an Environment with child and grandchild Environments will drop the parent Environment, and the child and grandchild Environments.
- Environments panel (on the left) shows Environments organized into Environment Groups and allows you to drag and drop and book whole Environment Groups (or the Environments inside them).


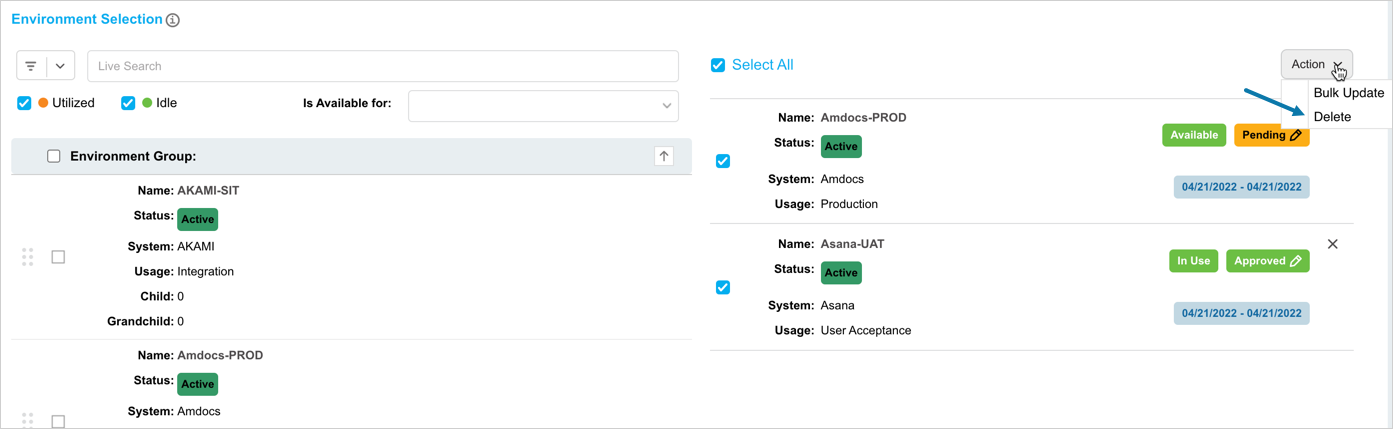
Bulk Update
To Bulk Update the bookings in a TEBR:
- Select two or more Environment(s)/Group(s)
- Click
 .
. - Click Bulk Update.
| Options | Fields |
|---|---|
| Dates |
|
| Status | Change the booking status from the drop-down. If drop-down option is not available, it means you do have the required permission to change the status. |
- Click
 .
.

Remove Bookings
To delete one or more bookings:
- Select the Environment(s)/Group(s).
- Click .
- Click Delete.
The Environment(s)/Groups(s) booking(s) will be removed.
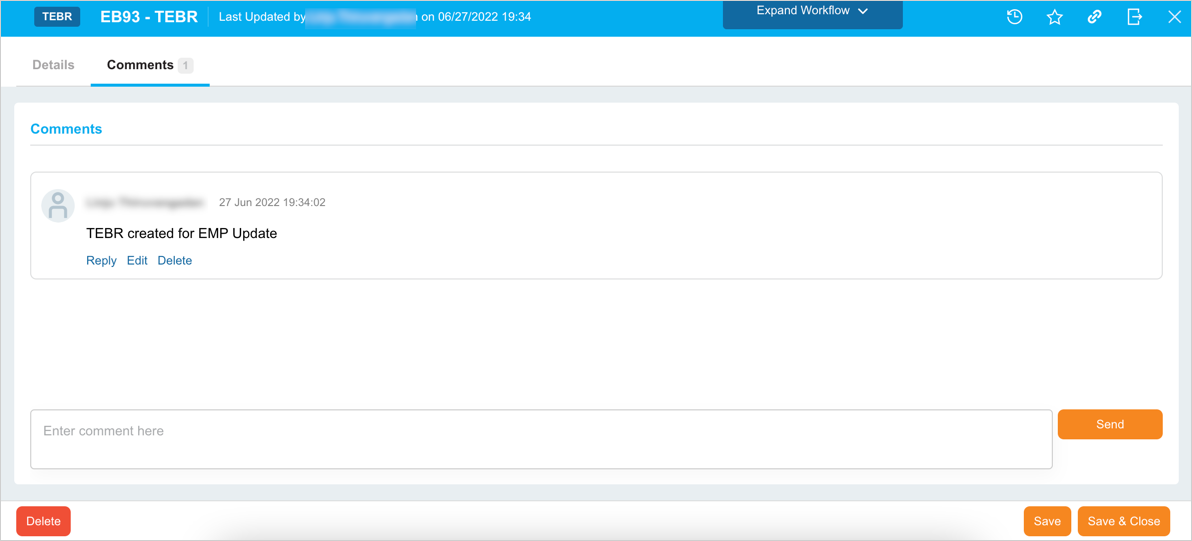
The Comments tab allows you to add a comment and answer other users’ comments.
- Add a comment: Type your comment into the Enter Comment Here field and click
 .
. - Edit a comment: Click Edit on the comment. Then edit the comment and click
 .
. - Delete a comment: Click Delete on the comment. Then click
 on the confirmation prompt.
 - Reply to a comment: Click Reply and enter your reply comment in the Enter comment here field and click
 .
.
Click ![]() once you have enter the required details.
once you have enter the required details.
A new TEBR is created and will be available on the grid.
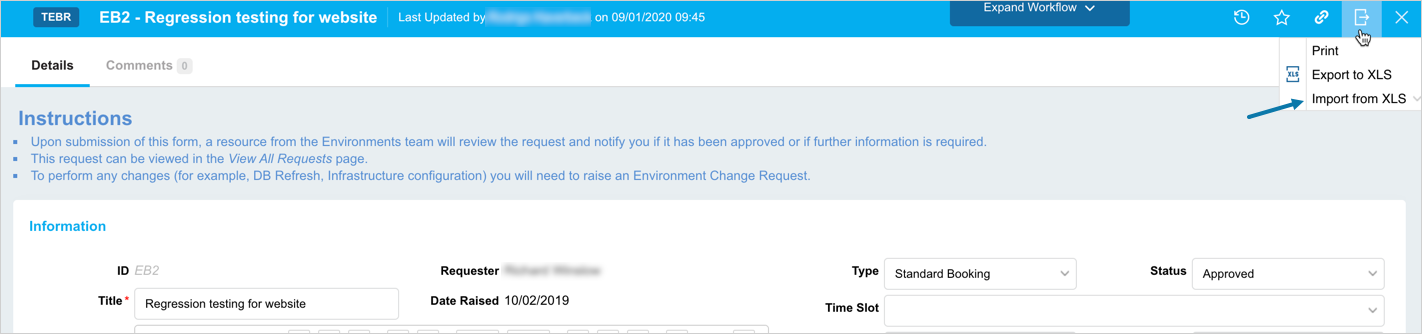
Print/Export TEBRs
To print or export a TEBR, open a TEBR. Click ![]() and select on of the following options:
and select on of the following options:
- Print to print the information.
- Export to XLS to download an XLS file containing the information. If the file doesn’t download, check your pop up blocker settings. If prompted, save the XLS file to your hard drive.

Import a TEBR from Excel
To import a TEBR from Excel, open a TEBR. Click ![]() and select Import from XLS. Click Download Template. The template file should start downloading immediately without any other interaction. If it doesn’t, check your pop up blocker settings.
and select Import from XLS. Click Download Template. The template file should start downloading immediately without any other interaction. If it doesn’t, check your pop up blocker settings.
Open the template file in Microsoft Excel. Fill in the fields using the suggestions in <<>> as a guide. To upload the filled-in Excel template to Plutora and create a new TEBR:
- Click
 .
. - Click Import from XLS.
- Click Upload File.
- Select the file to upload.
- Click Open.
The file should upload and the page will refresh and show the uploaded activities, which can be edited immediately.
- Users or watchers who are already in Plutora will not be imported to prevent doubled-up records.
- If mandatory fields are blank or contain incorrect data, only valid data will be imported, and you will see an error message. Fix the problems in your Excel file and try again.
- Environment Bookings and comments cannot be imported and must be added manually.
Manage Watchers
Watchers are external users, who made the booking in ServiceNow, or Plutora Users, or Plutora User Groups, who want to be informed of TEBR updates. If you are adding a new TEBR, click ![]() to make the Watcher options appear.
to make the Watcher options appear.
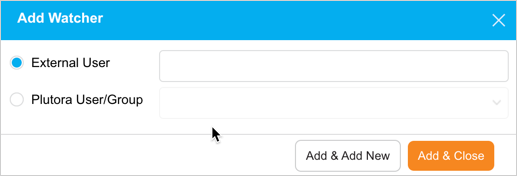
Add Watchers
- Click
 .
. - To add an external user select the External User, then type the external user’s email address. To add Plutora user select the Plutora User/Group, then select a User or User Group.
- Click
 to close or
  to add another Watcher.
Watchers will only be saved when the TEBR is saved.
Delete Watchers
Hover your mouse cursor over the Watcher and click ![]() to delete the Watcher.
to delete the Watcher.
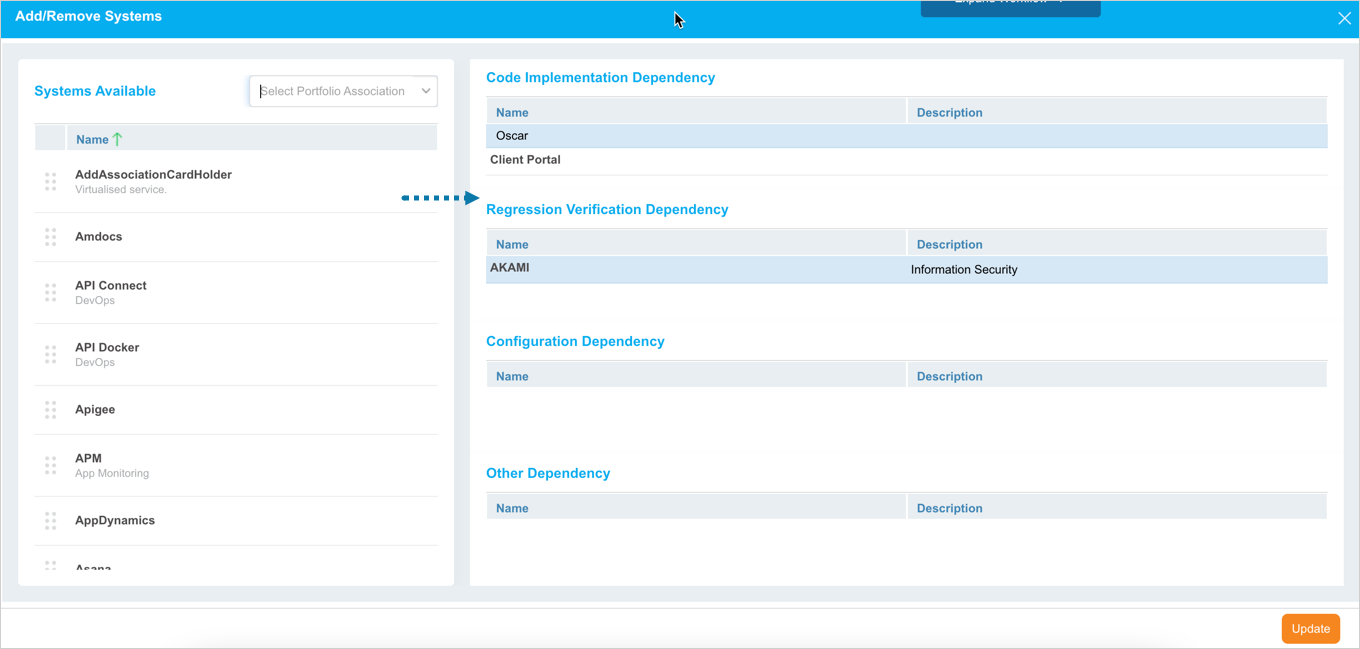
Manage System Details
The Systems on the TEBR pop-up are organized by the System Subtypes.
To manage System Details, click ![]() . The ‘Add/Remove Systems’ pop-up displays. The Left-Hand Side displays the available Systems that you can drag and drop to the System Subtypes. The Right-Hand Side displays the available System Subtypes. ‘Code Implementation Dependency’ and ‘Regression Verification Dependency’ are the default System Subtypes provided by Plutora.
. The ‘Add/Remove Systems’ pop-up displays. The Left-Hand Side displays the available Systems that you can drag and drop to the System Subtypes. The Right-Hand Side displays the available System Subtypes. ‘Code Implementation Dependency’ and ‘Regression Verification Dependency’ are the default System Subtypes provided by Plutora.
For more information, see System Subtype Customization.
Add a System
Drag and drop Systems into:
- Code Implementation Dependency: To show that the System is impacted by the Release.
- Regression Verification Dependency: To show that the Release poses a regression risk to the System.
- The up-to-two custom Systems Subtypes.
Click ![]() .
.
Remove a System
Click ![]() to display the ‘Add/Remove Systems’ pop-up. Drag the Systems you want to remove from the Systems Subtypes on the Right-Hand Side of the pop-up to ‘Systems Available’ on the Left-Hand Side of the pop-up.
to display the ‘Add/Remove Systems’ pop-up. Drag the Systems you want to remove from the Systems Subtypes on the Right-Hand Side of the pop-up to ‘Systems Available’ on the Left-Hand Side of the pop-up.
Click ![]() .
.
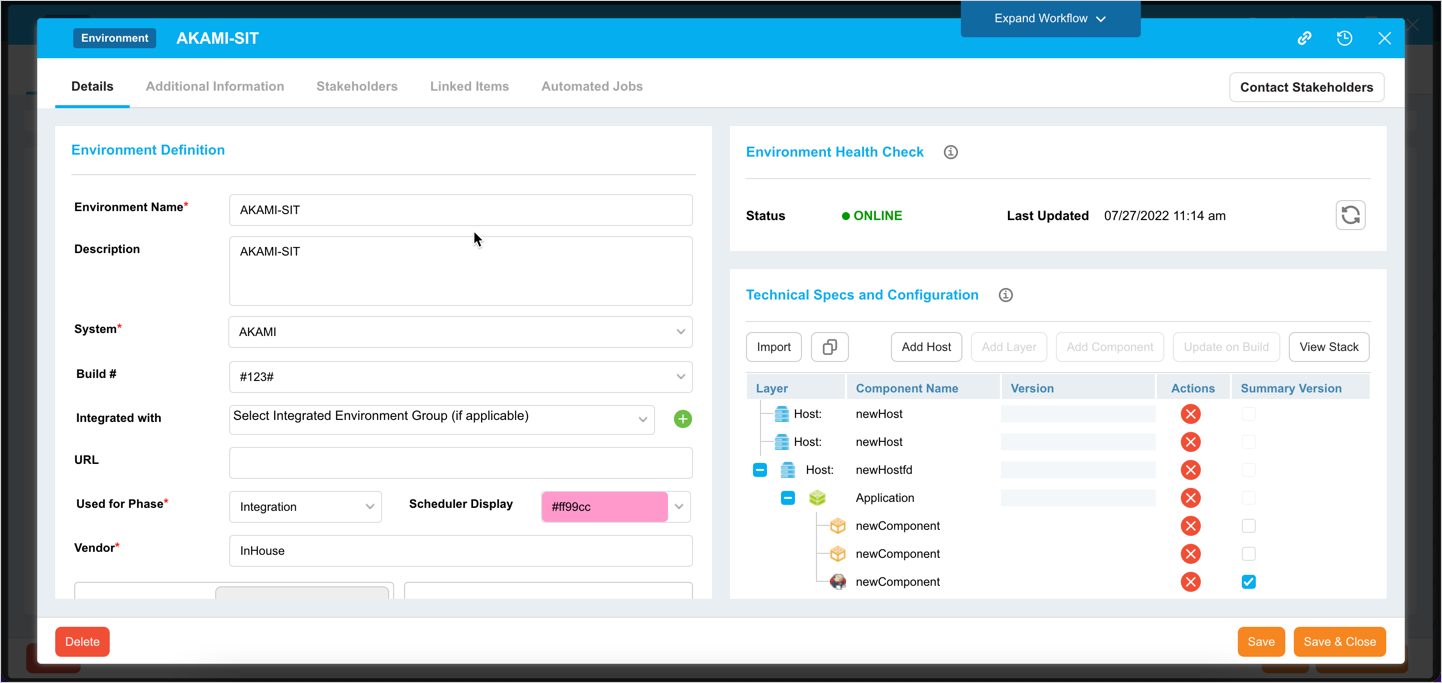
TEBR Workflow
Workflows allow administrators to control the way TEBRs are processed. Using the TEBR Status Customization, administrators can set:
- The sequence of TEBR Statuses for each TEBR Type.
- The User Groups or User Roles that have the permission to update each TEBR Status.
For instance, a TEBR Type might have a workflow based on the TEBR Statuses: Draft > Backlog > Under Review > Closed. All User Roles might have permission to change the TEBR Status from ‘Draft’ to ‘Backlog’ (using the Status drop-down menu) but only a Manager User Role might have permission to change the TEBR Status from ‘Under Review’ to ‘Closed’. This workflow would allow managers to check each TEBR before it is completed.
If the Enable TEBR Workflow checkbox is selected in TEBR Status Customization, users can click Expand Workflow![]() to view the TEBR’s workflow path. Clicking Collapse Workflow
to view the TEBR’s workflow path. Clicking Collapse Workflow ![]() hides the workflow.
hides the workflow.

View Audit History
View ‘Audit History’ of a TEBR to access the history of the events and updates associated with this TECR. To view the ‘Audit History’, click ![]() at the top-right corner of the pop-up. For more information, see Audit History.
at the top-right corner of the pop-up. For more information, see Audit History.
Copy URL
You can share the URL by clicking ![]() at the top right corner of the TEBR pop-up. Then paste the URL into another application or document to be shared. For further information, see Copy URL.
at the top right corner of the TEBR pop-up. Then paste the URL into another application or document to be shared. For further information, see Copy URL.
Add to Favourites
You can add a TEBR to your Favourites. For this, click on ![]() in the header of the pop-up. For more details, see Favourites.
in the header of the pop-up. For more details, see Favourites.