Access Bulk Import Feature
To access the ‘Bulk Import’ feature:
- Navigate to the ‘Deployment Plan Library’ page.
- Search for the plan. You can use the filter options available on this page.
- Open the plan by clicking on the Name.
- Click
 at the bottom of the pop-up.
The ‘Bulk Import Activities’ pop-up displays.
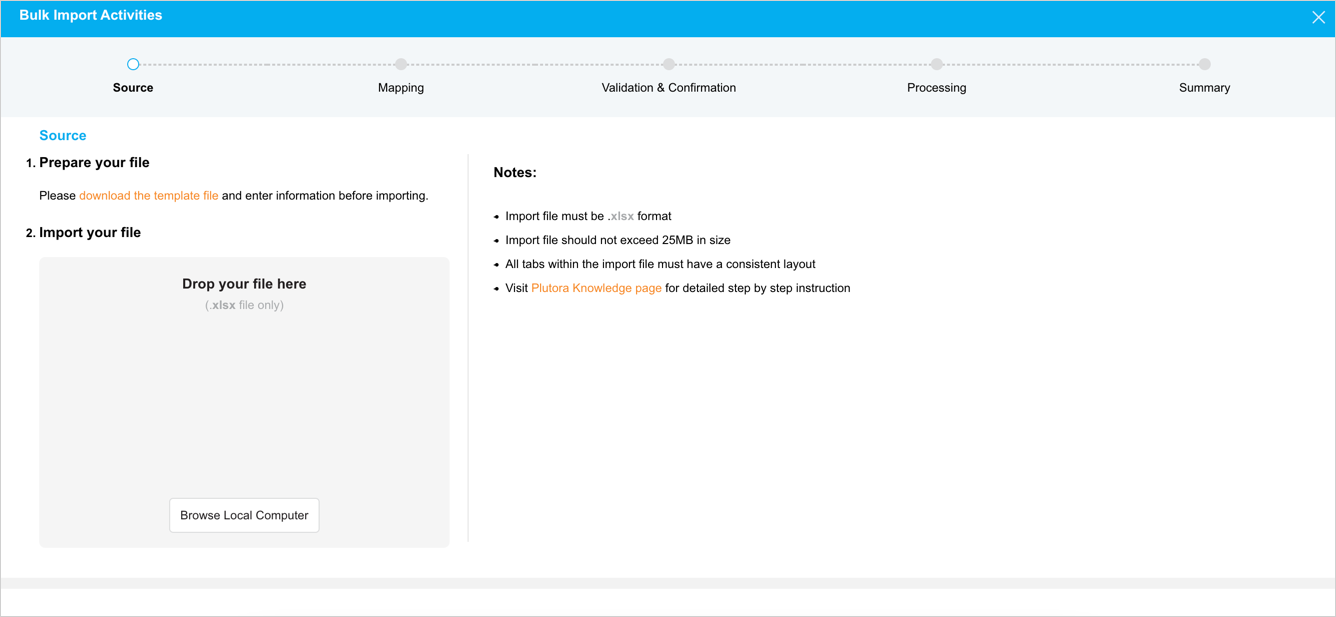
Upload the Excel file
To upload your Excel files to Plutora:
- Go to Deployment > Manager.
- Click to open the Deployment Plan.
- Click .
- Select the file to upload by dragging and dropping the file into Drop your file here or click Browse Local Computer, select the file, and click Open. The maximum Excel file size that can be uploaded is 25 MB.
- Click
 .
.

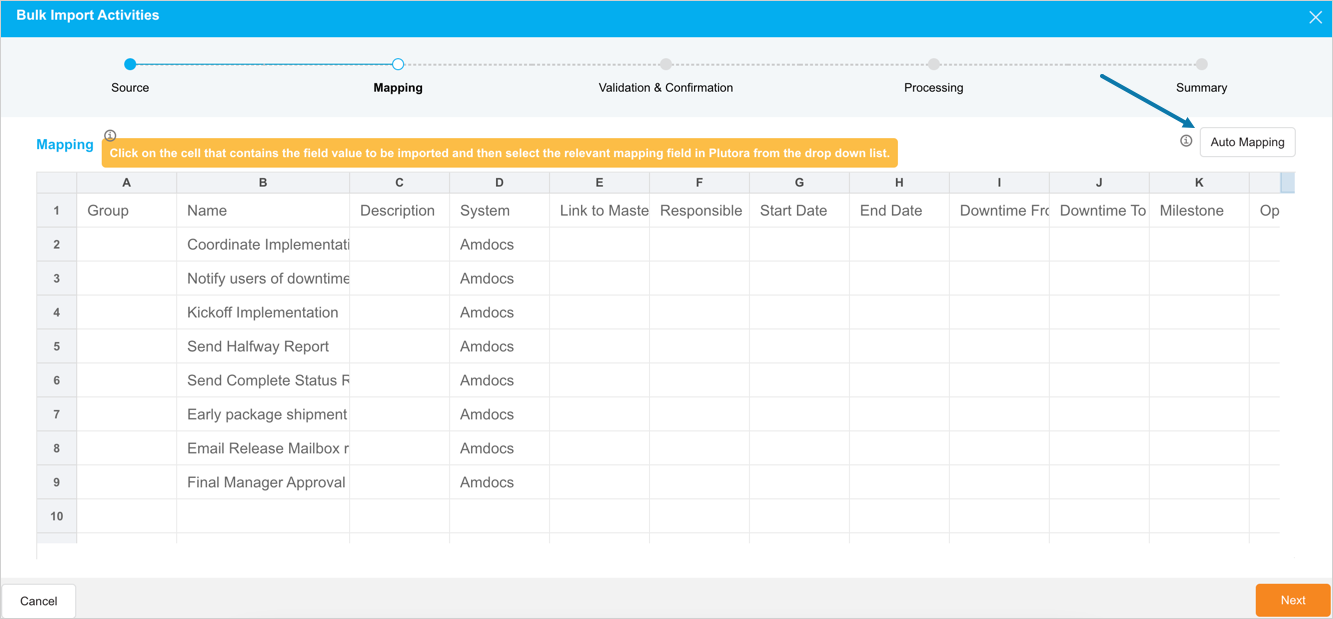
Mapping tab
Once your Excel file has been uploaded, you must map each column of your data to a field in Plutora.
Auto Mapping: Auto Mapping saves time by automatically matching column headings with Plutora’s field names. The Excel template file should map perfectly if the column headings are unedited and no Custom Fields have been added since the template was downloaded.
Manual Mapping: Manually map your data when
- You only want to import mandatory fields, not custom fields.
- Your Excel file column heading cells do not match Plutora’s fields.
Auto Mapping
To map your data automatically, click ![]() . All columns display the mapped data.
. All columns display the mapped data.
A warning pop-up will show if any required or non-required field has not been mapped ‘The import will not proceed if any required fields have not been mapped.’ In such a case, close the pop-up, then click Cancel, and upload an edited Excel file again.
Click ![]() .
.
To remove the mappings, click ![]() .
.
Manual Mapping
To map manually,
- Click a cell. A map value pop-up opens with the column value. For example, Column G.
- Click the map value pop-up.
- The ‘Copy values from’ pop-up opens. Select a field from where the column data should be copied on the Select a field drop-down.
- Field names are in alphabetical order, mandatory fields first.
- Fields with * are mandatory and must be mapped for the upload to proceed.
- Once a field is selected, the pop-up closes.
- Continue matching columns to fields until all mandatory fields and as many other values as necessary are mapped.
- Once the mapping is done, click .
To remove manual mappings, click ![]() .
.
Validation & Confirmation tab
After clicking ![]() , the Validation & Confirmation tab will open and the data will be validated.
, the Validation & Confirmation tab will open and the data will be validated.
Then the ‘Confirmation’ message will open.
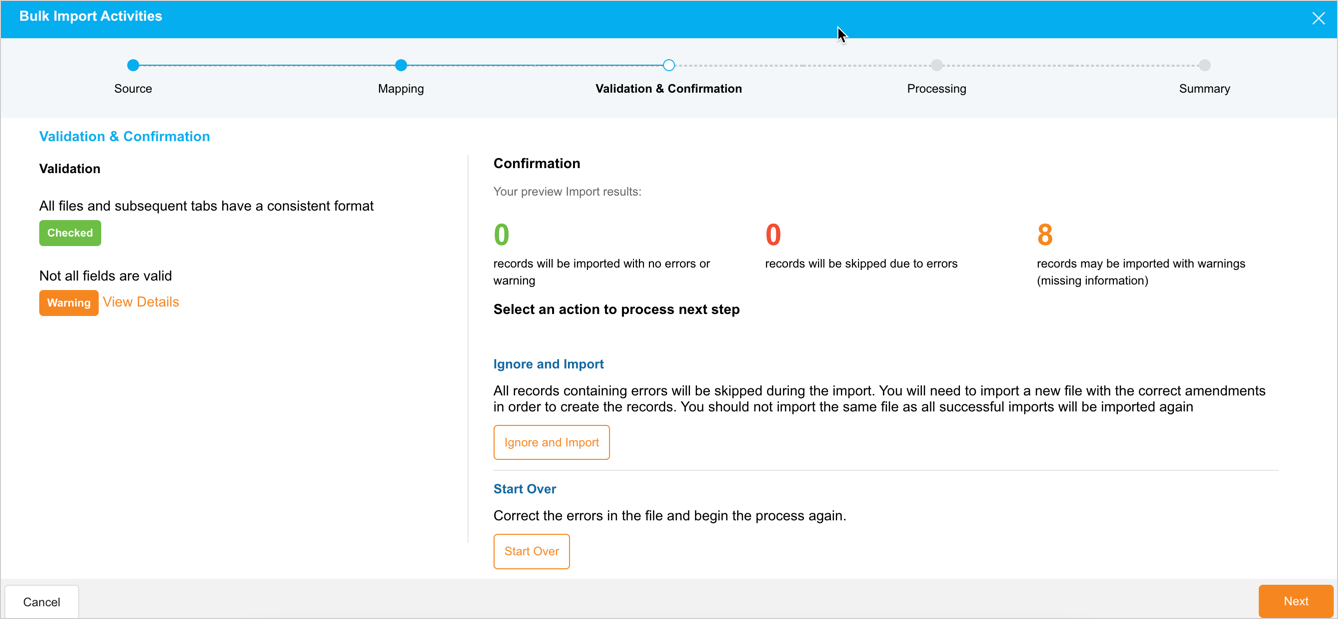
Click View Details under the Validation & Confirmation section to see more information about the import:
- Errors (such as incorrect formatting) in mandatory fields will result in the record being skipped.
- Errors in non-mandatory fields will result in the record being imported with warnings.
Under the Confirmation section, the numbers may not add up to the total number of records, as the same record can be skipped and have warnings at the same time.
Click ![]() to ignore the warning messages and proceed with the import or click
to ignore the warning messages and proceed with the import or click ![]() to start the import again.
to start the import again.
Processing tab
The file import processes, showing the percentage completed.
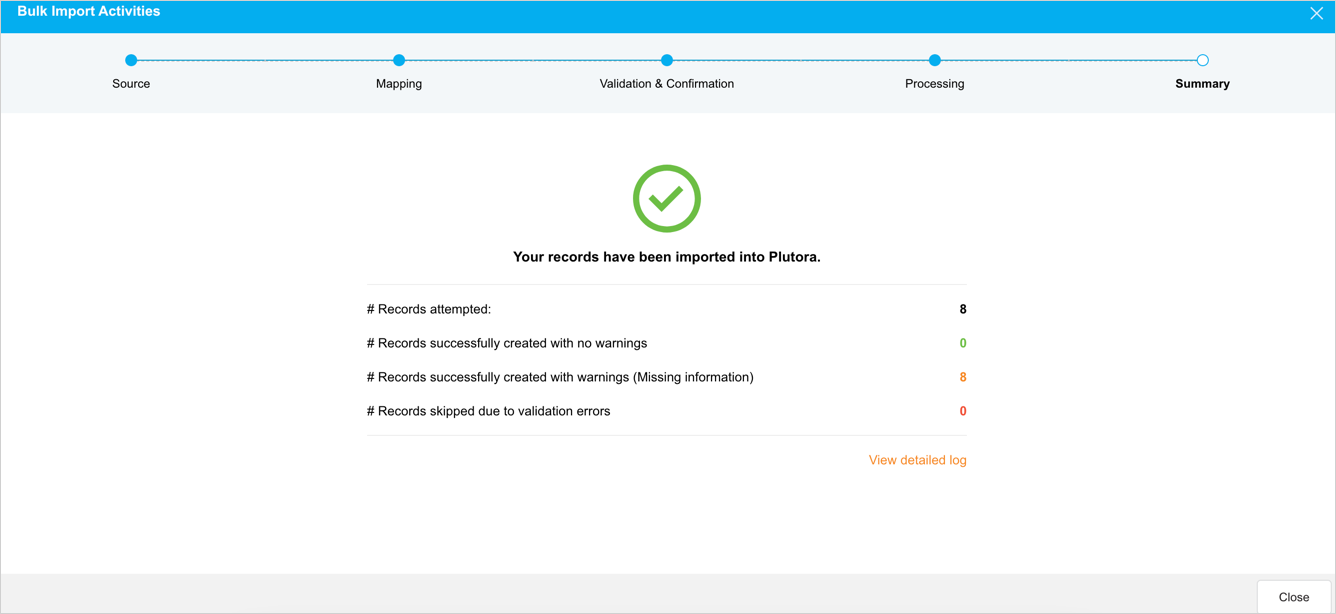
Summary tab
The Summary tab opens with an overview of the data imported and the error messages.
Click View detailed log to see the full list of records successfully created without warnings, the records created with a warning (for example, a missing value for a non-mandatory field), and records skipped and not created due to errors.