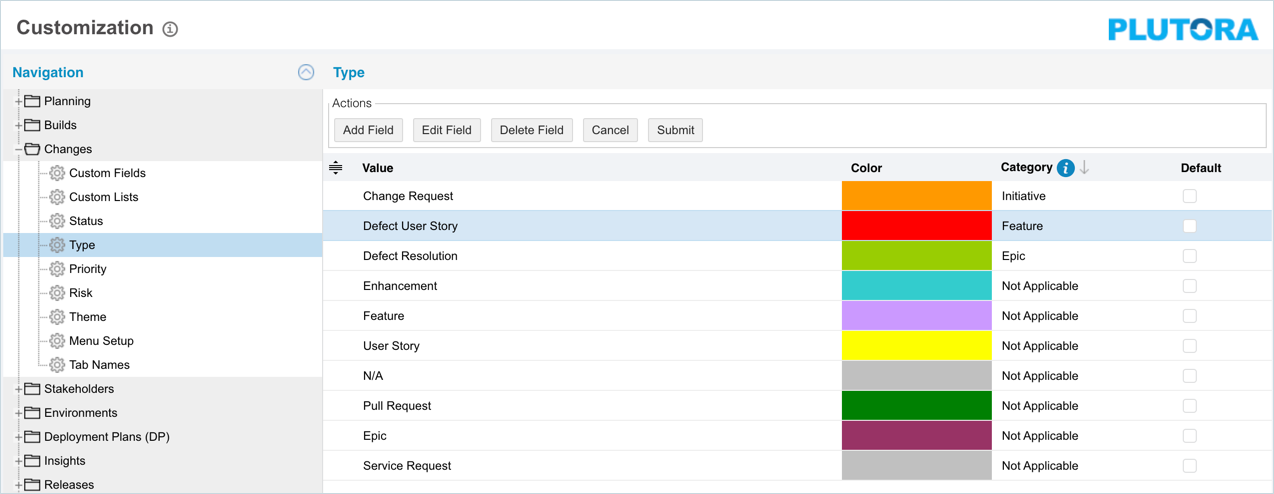
Navigation
Settings ![]() > Customization > Changes > Type
> Customization > Changes > Type
Add/Edit a Changes Type
To add a Changes Type:
- Navigate to the ‘Customization’ page.
- Click Changes.
- Click Type. The existing Change Types display.
- Click
 . The system adds a line on the grid for the new Type. To edit an existing Type, search and click on the Type from the grid and then click
  .
. - Enter/Edit the Type name in the ‘Value’ column.
- Select a color for the Change Type in the ‘Color’ column. The color appears on the Changes Type label in the Change dialog.
- Select a Category for the Change Type. For details on the available categories, see Change Type Category.
- Select the Default checkbox to make the item appear by default in the drop-down menu.
- Click
 .
.
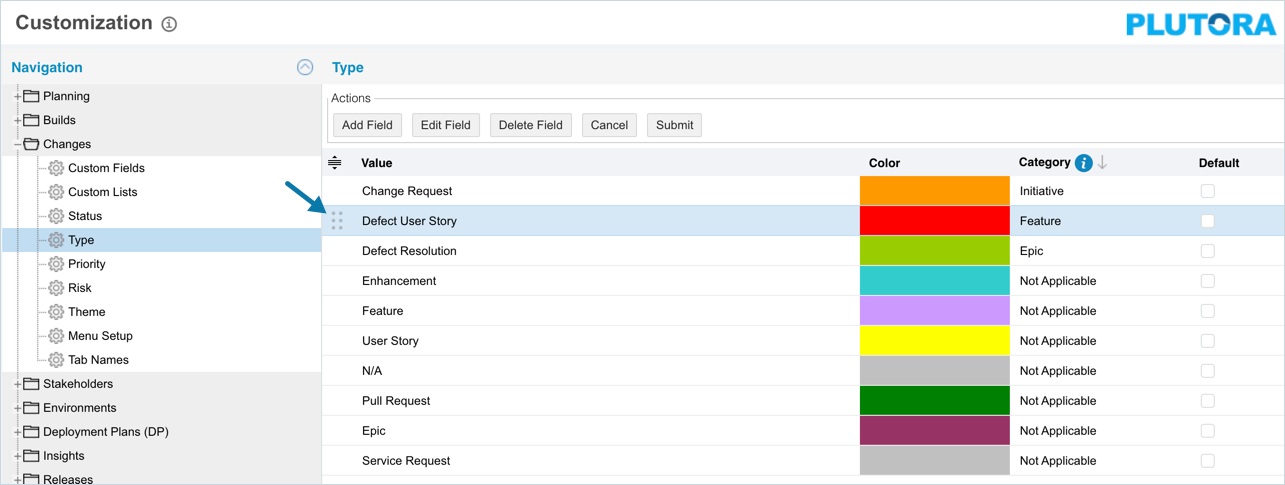
To sort Changes Types manually:
- Navigate to the ‘Customization’ page and double click Changes.
- Click Status.
- Hover your mouse cursor over the sort column of the Value that you want to sort.
 appears.
 - Drag and drop the Value as you require.
- Click .

Delete/Replace a Changes Type
Deleting a Changes Types will not delete it from Change records. But it will no longer be available when adding or editing a Change.
While deleting, you can either select another Type item that will replace the item to be deleted or simply delete the item from the list. Replacing a Changes Type will replace it in existing Change records.
To delete or replace a Changes Type:
- Navigate to the ‘Customization’ page and double click Changes.
- Click Type.
- Select the Type that you want to delete or replace.
- Click
 .
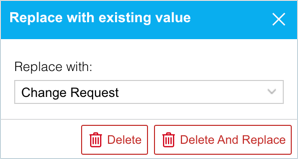
. - The ‘Replace with existing value’ dialog displays.
- To replace: select the item that will replace the item to be deleted from Replace with. Then click
 .
. - To simply delete the item, click
 .
.
- To replace: select the item that will replace the item to be deleted from Replace with. Then click
The item is now deleted and the page navigates back to the Type page.