
ServiceNow Integration allows users to synchronize data in ServiceNow with Plutora.
Plutora works with ServiceNow version Eureka and up.
Enable ServiceNow Integration with Basic Authentication
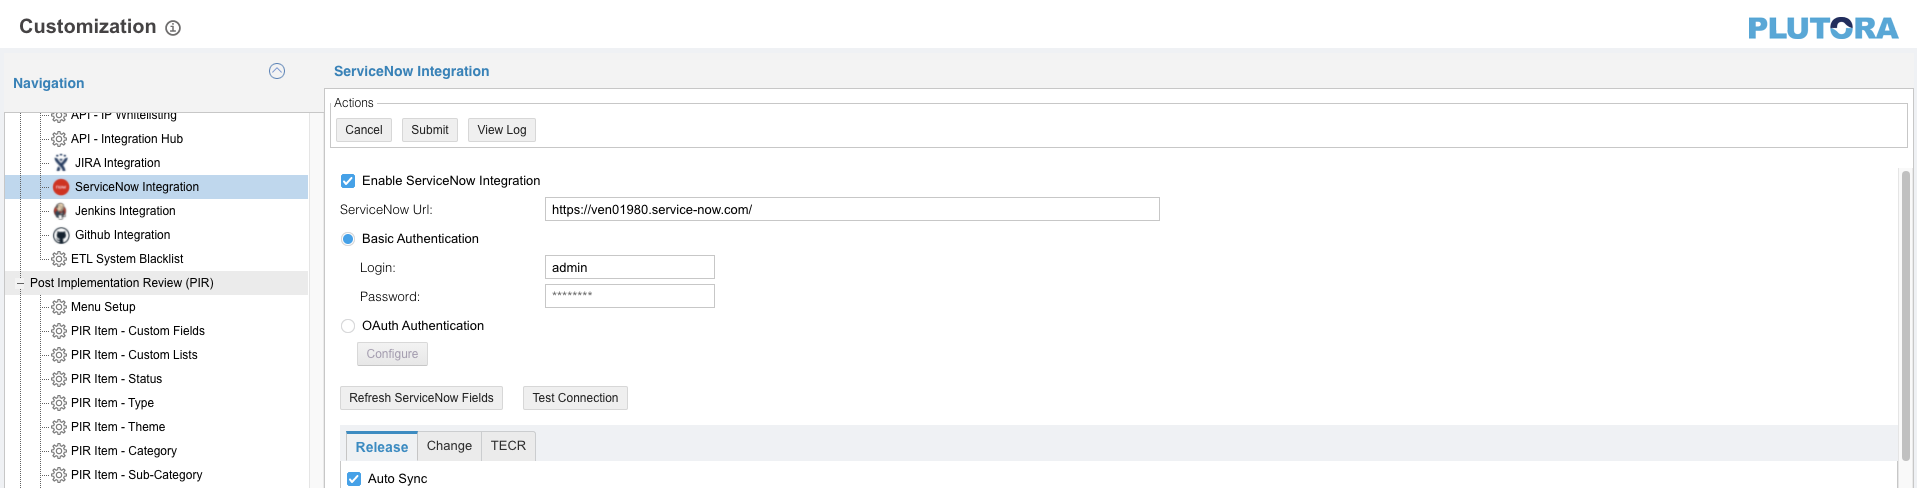
To enable ServiceNow Integration with basic authentication:
- Go to Settings
 > Customization > Integrations.
 - Click ServiceNow Integration.
- Click to select the Enable ServiceNow Integration checkbox to toggle on ServiceNow Integration. ServiceNow Integration can also be toggled off using this checkbox, without losing any of your settings.
- Type the ServiceNow URL.
- Click to select Basic Authentication radio button.
OAuth Authentication is not currently supported for ServiceNow in Plutora. - Type Login and Password.
- Click to select the Auto Sync checkbox under the Release, Change, and TEBR tabs.
- Click Submit.
The yellow Your changes have been saved pop up opens and closes.
If you click away from the Customization page without clicking Submit, your changes will not save. - Click Test Connection:
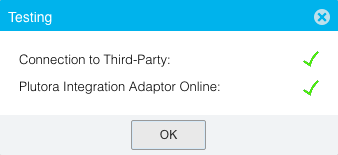
- Connection to Third Party. If a red cross is present:
- Check your proxy, username, password, or URL.
- Plutora Integration Adaptor Online: If a red cross is present:
- Contact customer support.
- Connection to Third Party. If a red cross is present:
- Click OK.
- Click Refresh ServiceNow Fields.

Sync from ServiceNow
Once you have authenticated with ServiceNow, you can sync systems with Plutora.
When syncing is set up, as items change in ServiceNow they will be synced with Plutora. This process will also happen in reverse if you click to select the Push to ServiceNow checkbox.
To sync from ServiceNow:
- Go to Settings> Customization > Integrations.
- Click ServiceNow Integration.
- Manage auto syncing:
- Click to select the Auto Sync checkbox. (If it hasn’t been selected already.)
- Set the sync rate by selecting a time (in seconds) from Period (seconds). (Mandatory field.)
- Type a Custom Filter as a ServiceNow query string. (Optional. See Advanced Searching for more information.)
- Click Test Filter. The filter is functional if issues are selected (see screenshot below).
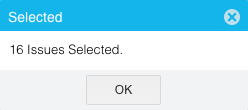
- Click Test Filter. The filter is functional if issues are selected (see screenshot below).
- Click Refresh.
- Select a table from Tables.
Only one table can be selected at a time. - Click the up and down
 arrows on Limit of Retrieved Records to select a number.
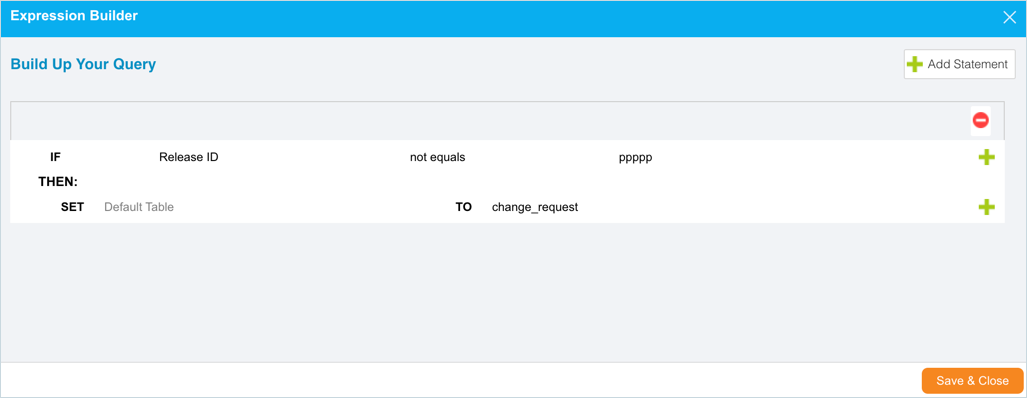
 - Click Expression Builder (Pull) (Optional):
- Click Add Statement.
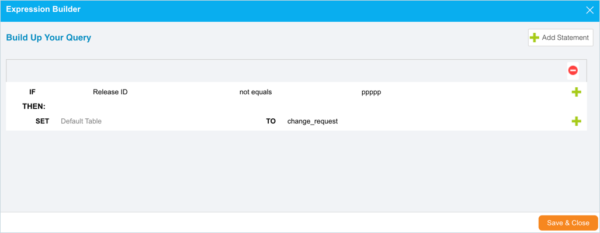
- Click to select each drop-down menu and choose a data field.
- Click the red delete button to remove a statement.
- Click Save & Close.
- Click Add Statement.
- To filter by last update date range:
- Click to select the Filter By Last Update Date Range checkbox.
- Click up and down arrows to select the number of months.
- Manage push to ServiceNow:
Push to ServiceNow exports data from Plutora to ServiceNow.- Click to select the Push to ServiceNow checkbox.
- Click Expression Builder (Push):
- Click Add Statement.

- Click to select each drop-down menu and choose a data field.
- Click the red delete button to remove a statement.
- Click Save & Close.
- Click Add Statement.
- Click to select the Default Table.
- Click Refresh ServiceNow Fields again.
Selected ServiceNow Projects appear as tabs. - Select ServiceNow Fields from the drop-down menus beside the Plutora fields where the data should go.
- Click Submit.
The yellow Your changes have been saved pop up opens and closes.
If you click away from the Customization page without clicking Submit, your changes will not save. - View log files by clicking View Log.


![]()