
See Quick Start Guide – Form Builder Customization for the context of this article. The previous article was 1d. Manage IM Form Builder Statuses and the next article is 1f. Manage IM Form Builder Scripts.
The Initiative Management module allows multiple workflows at once (unlike the rest of Plutora, which only allows one workflow at a time).
Form Builder Workflows allow users to:
- Select a sequence of IM statuses for each workflow, from an initial status to completion.
- Assign the privilege of setting each IM status to User Roles or User Groups.
- Set a Transition Prerequisite so that a certain state is required before the workflow can move to a new IM status.
Location of Workflows and Statuses on a Form
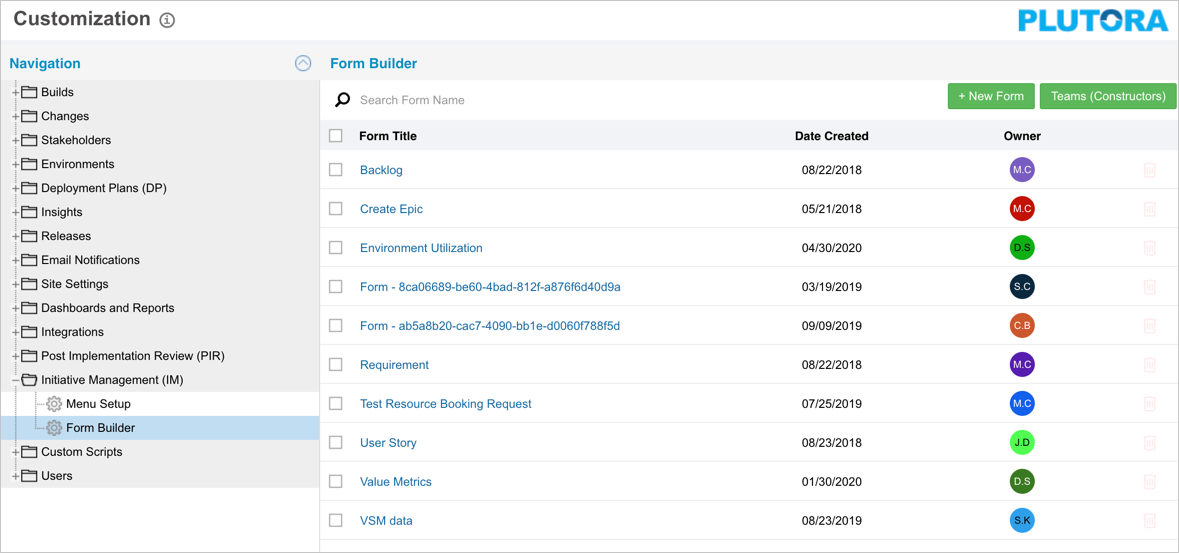
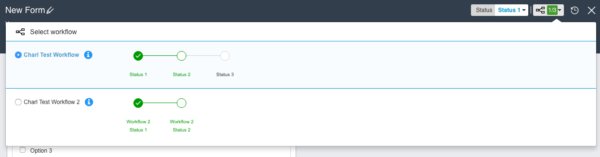
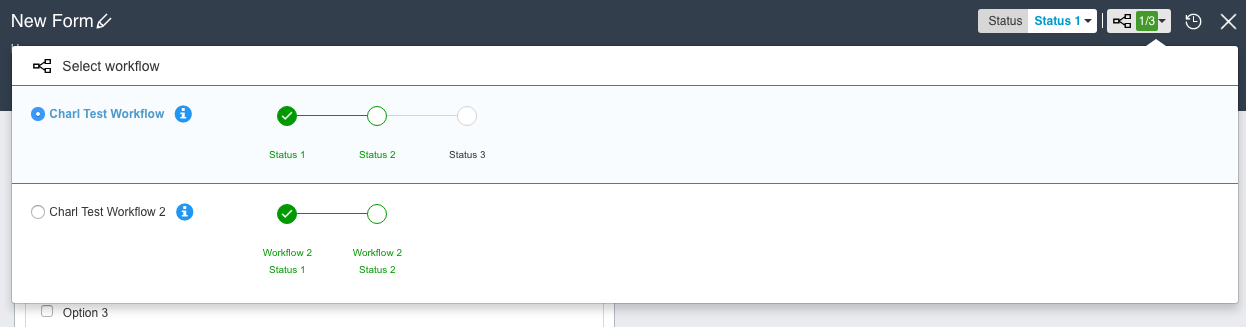
If a form has workflows and statuses enabled:
- The workflow and status drop-down menus will appear on the top-right corner of that IM form.

- The status menu will only contain statuses from the selected workflow.
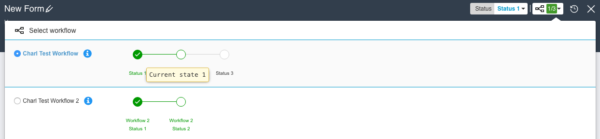
- Select a workflow by clicking the workflow drop-down menu and then the workflow radio button on the left-hand side.

If a form only has statuses enabled:
- All statuses will appear in the status drop-down menu.
- The workflow drop-down menu will be hidden.


If a form only has workflows enabled, or neither workflows or statuses enabled:
- Both the status and workflow drop-down menus will be hidden.


To create a workflow:
2. Enable IM Workflows
Workflows currently work separately, even when they share Statuses. Sub-workflows will be implemented in the future.
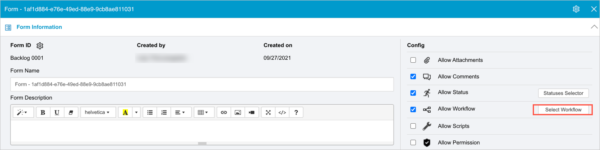
To enable workflows and statuses on an IM form:
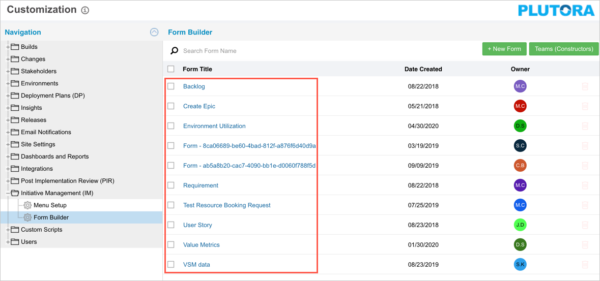
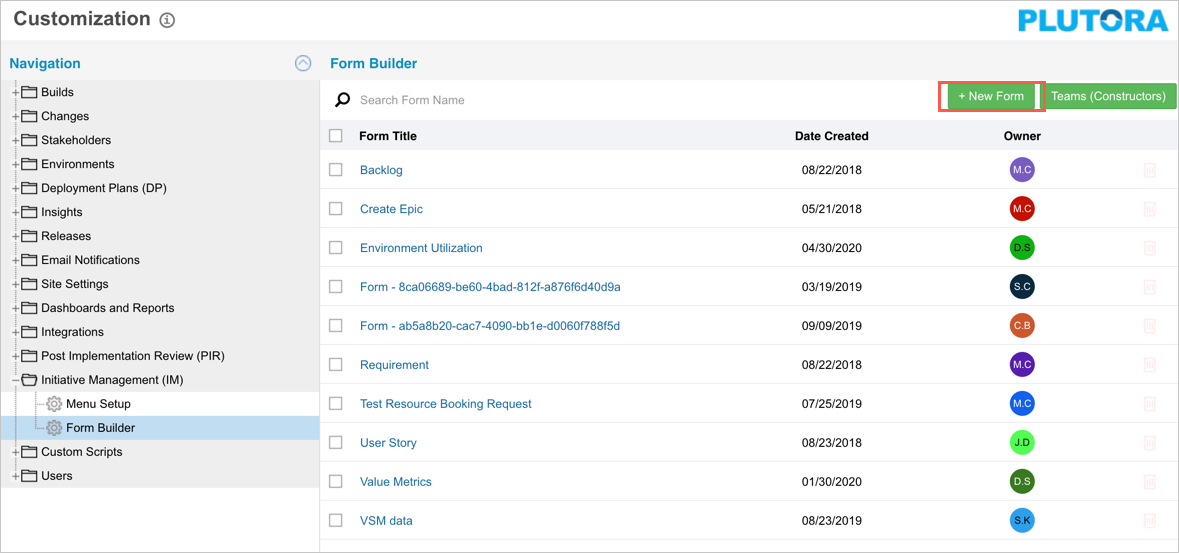
- Go to Settings
 > Customization > Initiative Management (IM).
 - Click Form Builder.
- Add or edit:
- To add a form:
- Click + New Form to open a new form in Form Designer.
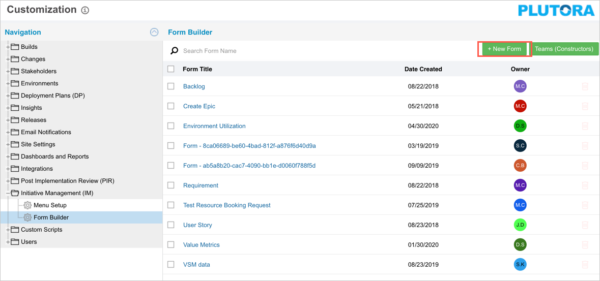
- Click + New Form to open a new form in Form Designer.
- To edit a form:
- Click a Form Title to edit a form in Form Designer.
- Click a Form Title to edit a form in Form Designer.
- To add a form:
- Click the Form Information menu button on the top-right corner of the form.
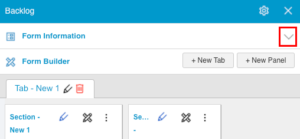
- Click to select the Allow Status checkbox.
- Click to select the Allow Workflow checkbox.

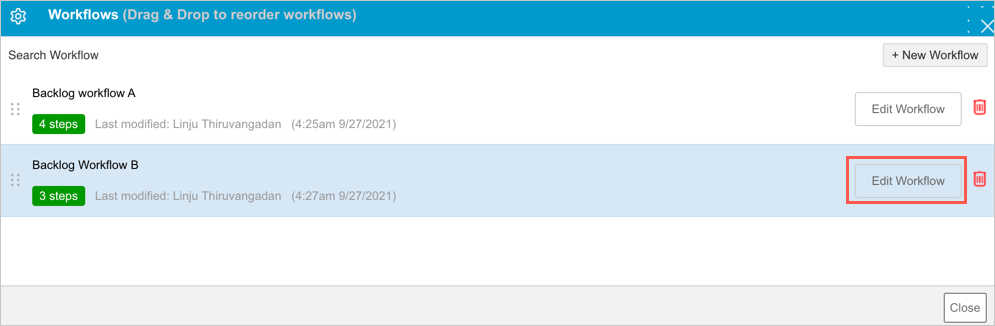
3. Manage Workflows
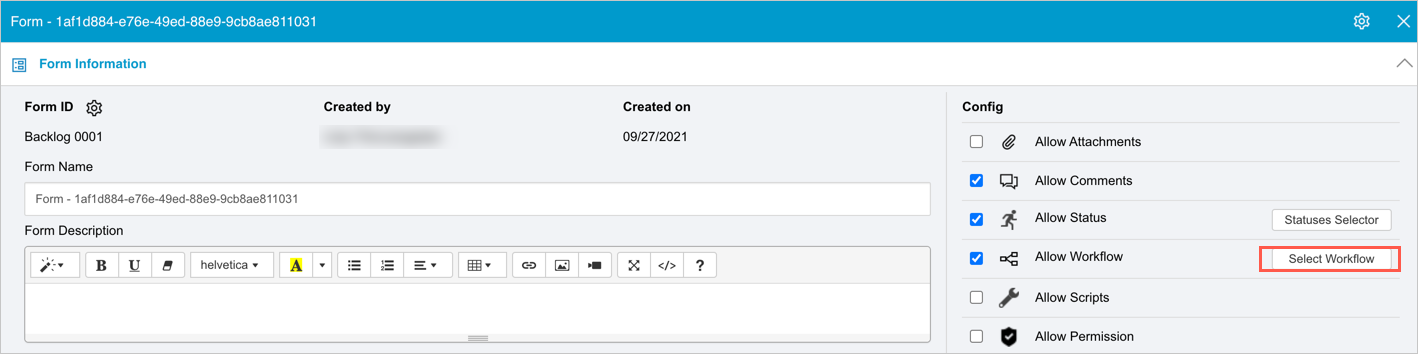
To manage workflows:
- Click Select Workflow.
- Add a workflow:
- Click + New Workflow.

- Type the workflow title.
- Click Update.
- Click + New Workflow.
- Edit a workflow title:
- Double-click the workflow title and edit the text.
- Click Update.
- Delete a workflow:
- Click the delete button.

- Click Yes to confirm.
- Click the delete button.

4. Edit a Workflow
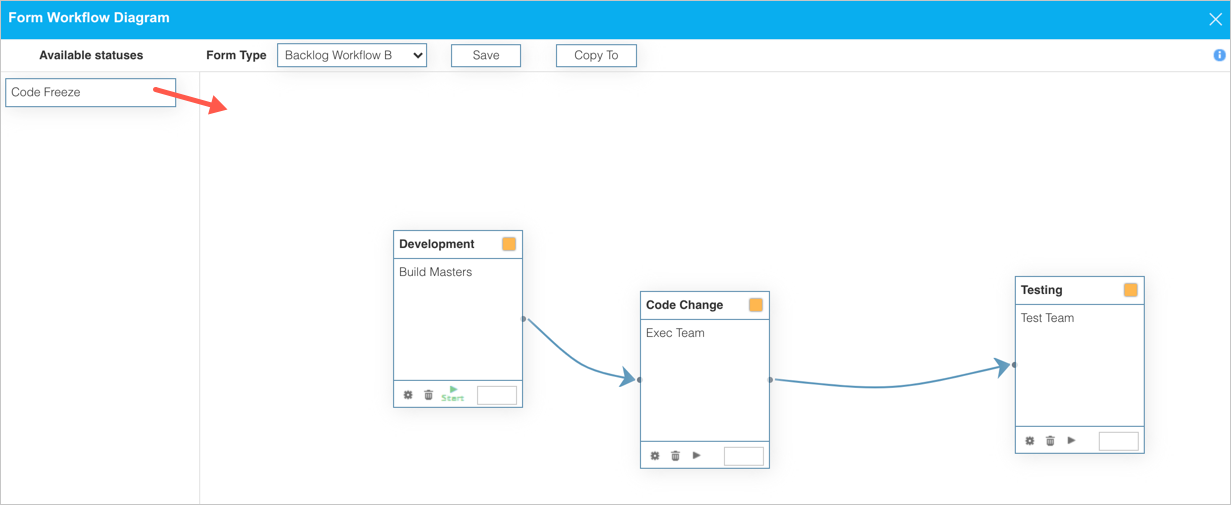
To edit the workflow diagram:
- Click Edit Workflow.
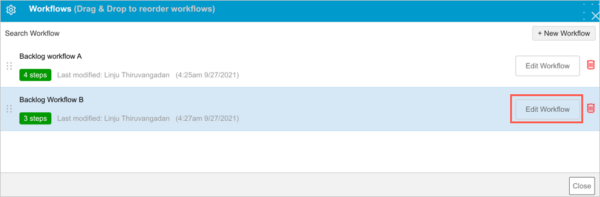 You cannot currently copy workflows. If you click Copy To, the pop up that opens is broken.
- Create the workflow path by dragging and dropping statuses from the Available Statuses column.
- Manage connections (the blue arrows):
- To make connections between status boxes:
- Click and drag the yellow button between status boxes to create an arrow.

- Release the mouse button when the connecting status turns red.
- Click and drag the yellow button between status boxes to create an arrow.
- To delete a connection:
- Double-click the connection.
- Click Yes to confirm.
- To make connections between status boxes:
- Set Initial Status on one status box by clicking to select the triangular play button.

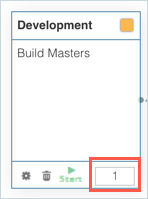
- Set the order priority of the status boxes by typing a number in the bottom right corner.
- Click Save.
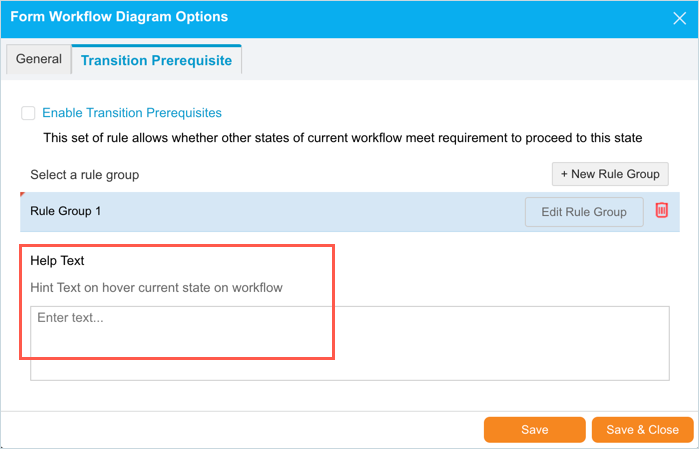
- Manage Settings and Transition Prerequisites:
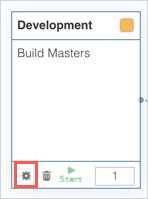
- Click the cogwheel-shaped Settings button.
Currently, the SLA Breach Times and colors do not appear anywhere. - Select the User Groups and User Roles that are allowed to move the workflow to this status from Permissions User Groups / Roles.
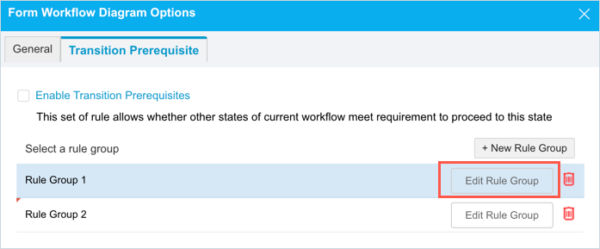
- Manage Transition Prerequisites:
Transition Prerequisites require a certain state of a workflow, a form, or a form field before the workflow can move to this status. For example, another form must be completed.- Click the Transition Prerequisite tab.
- Enable transition prerequisites by selecting the Enable Transition Prerequisite checkbox.
- Type text into the Help Text field.

This text can be seen when:- The Enable Transition Prerequisites checkbox is selected.
- The user hovers their mouse cursor over the status in the workflow.
- Manage Rule Groups:
- Add a Rule Group:
- Click + New Rule Group.
- Type the rule group name.
- Click Update.
- Delete a Rule Group:
- Click the red delete button.
- Click Yes to confirm.
- Click the red delete button.
- Add a Rule Group:
- Manage a Rule Group’s rules:
Click Edit Rule Group and choose from one of the three tabs:
- Workflow Relationship Check tab: These rules check the status of the workflow of the parent, child, or same form.
- Click + new rule.
- Form Direction: Select one of the following from the drop-down menu:
- This Form.
- Parent.
- Child.
- Form: Select the form to be validated from the drop-down menu.
- Workflow: Select a Workflow belonging to the form selected above.
- Condition: Select whether Equal or Not Equal.
- Value: Select the field item (if a drop-down menu) or Equal or Not Equal if the field contains a string.
- Click the pen icon
 beside Error Message, type the text of the error message, and click Save & Close.
 - Click Save & Close.
- Click Save & Close again.
- Field Validation Check tab: These rules check the condition of a field of the parent, child, or the same form.
- Click + new rule.
- Form Direction: Select one of the following from the drop-down menu:
- This Form.
- Parent.
- Child.
- Form: Select the form to be validated from the drop-down menu.
- Field Name: Select a field to be validated from the form selected above.
- Condition: Select whether Equal or Not Equal.
- Value: Select the field item (if a drop-down menu) or Equal or Not Equal if the field contains a string.
- Click the pen icon beside Error Message, type the text of the error message, and click Save & Close.
- Click Save & Close.
- Click Save & Close again.
- Related Form Check tab: Checks that a parent, child, or the same form has at least one entry.
- Click + new rule.
- Form Direction: Select one of the following from the drop-down menu:
- This Form.
- Parent.
- Child.
- Form: Select the form to be validated from the drop-down menu.
- Condition: Select whether Equal or Not Equal.
- Click the pen icon beside Error Message, type the text of the error message, and click Save & Close.
- Click Save & Close.
- Click Save & Close again.
- Workflow Relationship Check tab: These rules check the status of the workflow of the parent, child, or same form.
- Click the cogwheel-shaped Settings button.
- Click Save.
- Close the workflow diagram pop up by clicking the X in the top right corner.


![]()