
- Click
 .
.
Multiple Environments at a Time
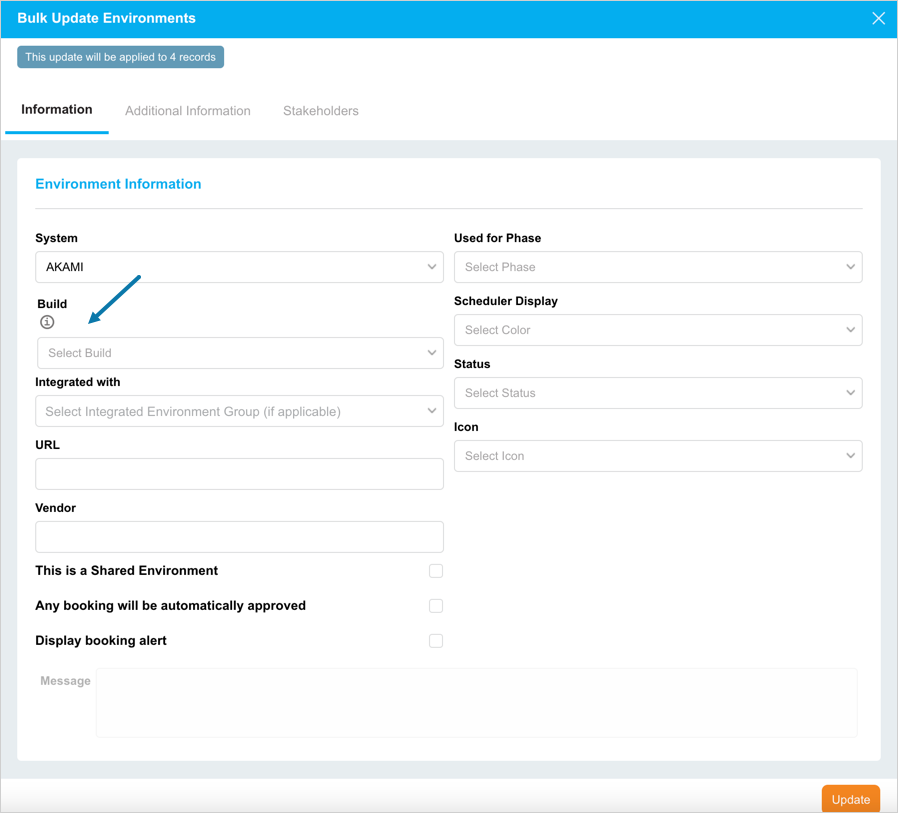
Builds can be manually bulk updated for selected Environments:
- Go to Environment > Manager.
- Click to select the checkboxes of two or more Environments (in the left column of Environment Manager).
- Select Bulk Update from the
 . See Bulk Update Environments for details.
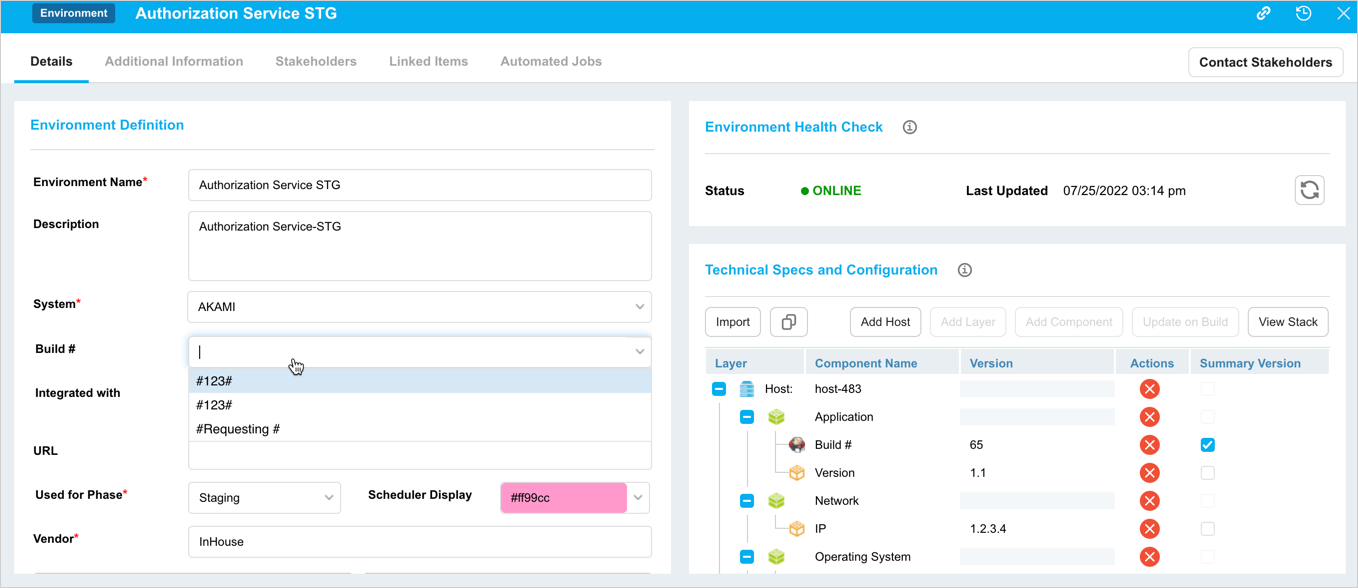
 - Select a System
- Select a Build. Changing a System once a Build has been selected will de-select the Build.
- Click
 .
.
Promote a Build using TECRs
To update an Environment:
- Go to Environment > Requests.
- Click the ‘TECR’ tab.
- Open a TECR.
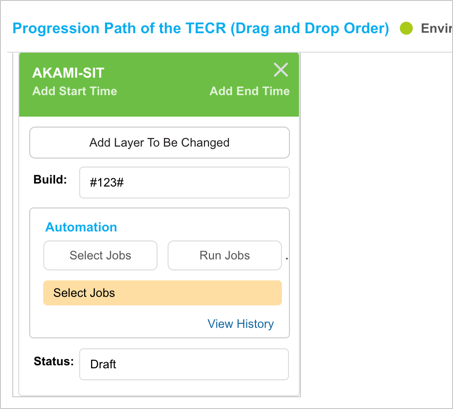
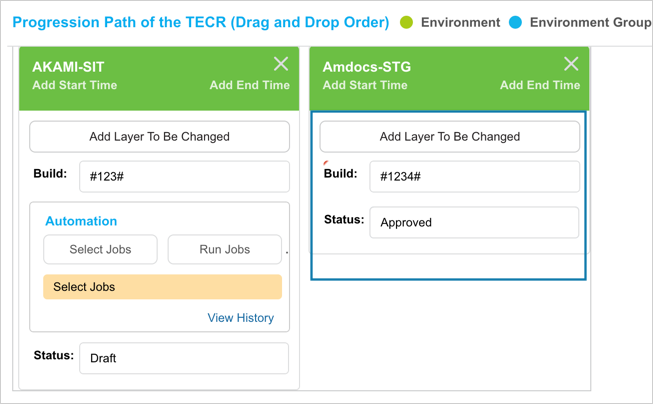
- Click
 in the Progression Path of the TECR section.
 - Continue with the following options based on what is enabled:
With Automated Jobs
If Jenkins or Integration Hub automated jobs are enabled:
- Select a Build. The Builds associated with the selected System and Release are listed.
- Click
 and select the Jenkins jobs to run.
 - Click
 and select or type the parameters for this Environment.
 - Click to go back to the TECR page.
- Click
 .
. - Click
 . The Jenkins jobs in the Build are triggered and will run in sequence. Upon successful completion of the automated jobs, the Build will be associated with the Environment.
 - Click View History for the job execution history, including the name of the job, execution date and time, the parameters used for the execution, and the application used.
- Click .
Without Automated Jobs
- Select a Build. The Builds associated with the selected System and Release are listed.
- Update the Status to an end state, such as ‘Completed’.
- Click .
Update on Build
If User has marked a Component within the Environment as Update on Build, then:
- the Component’s icon becomes a Jenkins icon,
- the Component’s Summary Version checkbox becomes selected,
- the Build Number of the first job executed via a TECR will be recorded in the Component Version field.

Promote Build using Deployment Plan Activities
Add Builds in Draft Mode
To add a Build to a Deployment Plan Activity:
- Go to Deployment > Manager.
- Click the Draft mode tab.
- Click to open a Deployment Plan in Draft mode.
- Click the Activities tab.
- Click + New to add a new Activity. The new Activity form opens in the right-hand panel.
Or:
Click a blue-linked Activity Name in the left-hand panel to make it open it in the right-hand panel. - Type or edit the Activity Name. (Mandatory field.)
- Type or edit the Activity Description.
- Click to select a System:
- You can only select from the Systems chosen in the Systems field under the Information tab.
- To run Builds in Deployment Activities, Systems must be selected that have those Builds associated.
- Select an Environment:
- The Environments belong to the Systems selected above.
- Select a Build:
- The System and its Environment must have been selected first.
- Listed Builds are also filtered depending on the selected Release under the Information tab.
- Click Select Jobs and select the Jenkins jobs to run.
- Select Parameters:
- Click + Parameters and select or type the parameters for this Environment.
- Click Save & Close.
- Click Save & Close to close the Parameter pop up.
- Click Close to close the Activity.
- Click Save & Close on the Deployment Plan.
Run Builds in Execution Mode
To promote a Build using a Deployment Plan Activity:
- Go to Deployment > Manager.
- Click to open a Deployment Plan in Execution mode.
- Click the Activities tab.
- Continue with either With Automated Jobs or Without Automated Jobs below, depending on what is enabled.
With Automated Jobs
- Click to open an automated Activity. (With
 ).
). - Click Run Automated Jobs.
- The Jenkins jobs in the Build will be triggered and will run in sequence.
- Upon successful completion of the automated jobs, the Build will be associated with the Environment.
- Click View History for the job execution history, including the name of the job, the execution date and time, the parameters used for the execution, and the application used.
Without Automated Jobs
- Open an Activity with a selected Build.
- Click
 .
.
The Build will be deployed to the selected Environment.