
Users select PIR Item – Preventative Measure Types when adding or editing a PIR Item on the PIR Manager page.
Location of PIR Item – Preventative Measure Types in PIR Manager
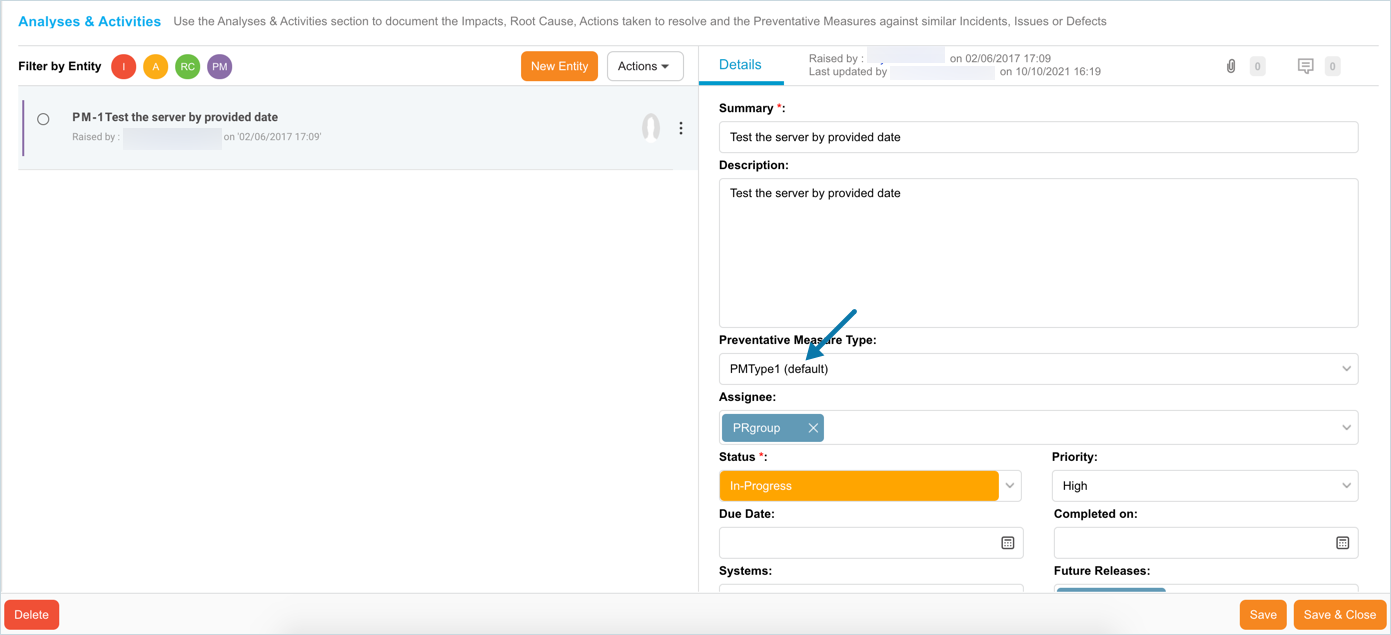
PIR Item – Preventative Measure Type Customization populates the Preventative Measure Type drop-down menu of Preventative Measures under the Root Cause Analysis and Actions tab when adding or editing a PIR Item.
To locate the drop-down Type menu where PIR Item – Preventative Measure Type Customization is used:
- Go to PIR > Manager.
- Click a blue-linked Summary to open a PIR Item.
- Scroll down to the Root Cause Analysis and Actions tab.
- View the Type drop-down menu:
- Open a Preventative Measure:
- Click a Preventative Measure.
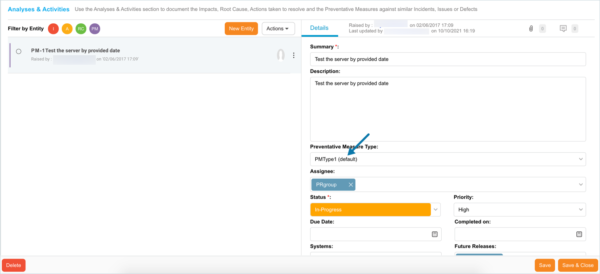
- Click a Preventative Measure.
- Or click Add New and then select New Preventative Measure.
- Open a Preventative Measure:
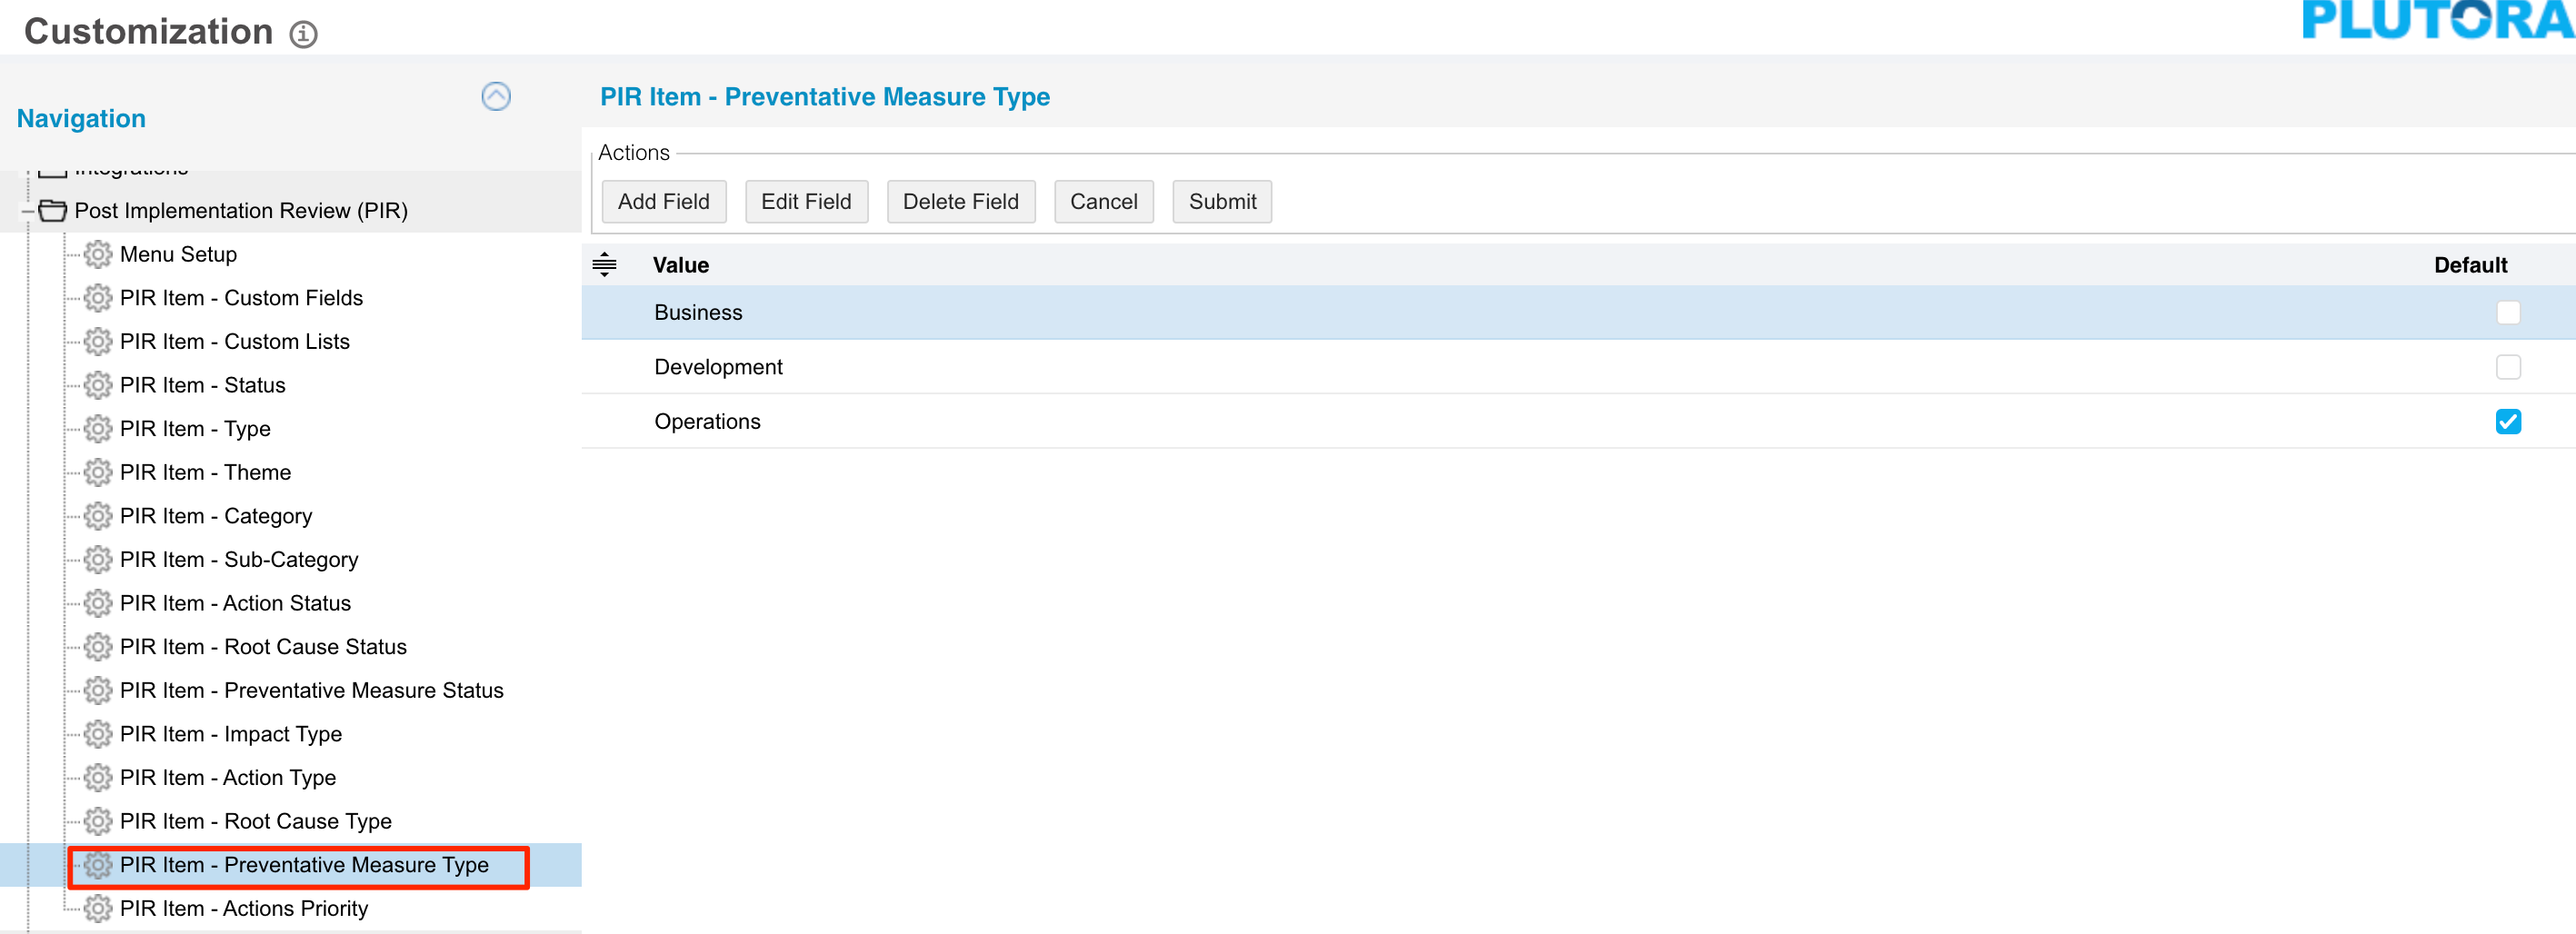
Add a PIR Item – Preventative Measure Type
To add a PIR Item – Preventative Measure Type:
- Go to Settings
 > Customization > Post Implementation Review (PIR).
 - Click PIR Item – Preventative Measure Type.
- Click Add Field.
- Type the new PIR Item – Preventative Measure Type.
- Click to select the Default checkbox if the item is the default.
- Click Submit.
The yellow Your changes have been saved pop up opens and closes.
If you click away from the Customization page without clicking Submit, your changes will not save.
Edit a PIR Item – Preventative Measure Type
To edit a PIR Item – Preventative Measure Type:
- Go to Settings> Customization > Post Implementation Review (PIR).
- Click PIR Item – Preventative Measure Type.
- Click to select the PIR Item – Preventative Measure Type.
- Click Edit Field.
- Edit the PIR Item – Preventative Measure Type.
- Click to select or deselect the Default checkbox.
- Click Submit.
The yellow Your changes have been saved pop up opens and closes.
If you click away from the Customization page without clicking Submit, your changes will not save.
Sort PIR Item – Preventative Measure Types
Sort Manually
Sorting PIR Item – Preventative Measure Types manually changes their order in drop-down menus.
To sort PIR Item – Preventative Measure Types manually:
- Go to Settings> Customization > Post Implementation Review (PIR).
- Click PIR Item – Preventative Measure Type.
- Hover your mouse cursor over the sort column.
The sort handle (six gray dots) appears.
- Left click and drag the sort handle to resort the PIR Item – Preventative Measure Type.
- Click Submit.
The yellow Your changes have been saved pop up opens and closes.
If you click away from the Customization page without clicking Submit, your changes will not save.

Sort by Column Header
Sorting PIR Item – Preventative Measure Types by column header only changes their order on the Customization page.
To sort alphabetically on the Customization page by column header:
- Go to Settings> Customization > Post Implementation Review (PIR).
- Click PIR Item – Preventative Measure Type.
- Click a column header.
The PIR Item – Preventative Measure Types will revert to their previous order when you click away from the Customization page.
Delete or Replace a PIR Item – Preventative Measure Type
Deleting a PIR Item – Preventative Measure Type will not delete it from PIR Item records. But it will no longer be available when adding or editing a PIR Item.
Replacing a PIR Item – Preventative Measure Type will replace it in existing PIR Item records.
To delete or replace a PIR Item – Preventative Measure Type:
- Go to Settings> Customization > Post Implementation Review (PIR).
- Click PIR Item – Preventative Measure Type.
- Click to select the PIR Item – Preventative Measure Type.
- Click Delete Field.
- Choose one of the following:
- Delete and Replace:
- Select the item that will replace the deleted PIR Item – Preventative Measure Type from Replace with.
- Click Delete and Replace.
Your updates will be automatically saved. There is no need to click Submit.
- Delete:
- Click Delete.
Your updates will be automatically saved. There is no need to click Submit.
- Click Delete.
- Delete and Replace:
![]()