Swagger provides users with interactive documentation so they can visualize and test the API of the various modules of Plutora.+
Swagger can be used with or without a token:
- Without a token: Users can view code samples.
- With a token: Users can view code samples and also use the API.
You can also download the Plutora REST API Primer v1.4.1 and Github sample scripts and see API User Stories.
To use Swagger with a token:
1a. Enable API in Plutora’s API Customization and generate a client_id and client_secret
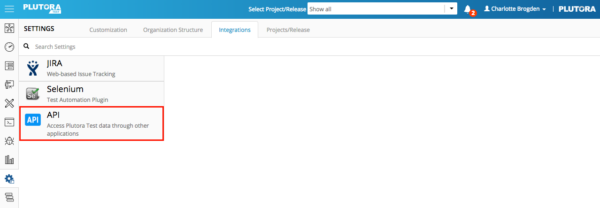
To enable API:
- Go to Settings
 > Customization > Integrations.
 - Click API – client_id & client_secret.

- Click to select the Enabled checkbox.
- Click Generate New Client Credentials.
- Copy and save the client_ID and client_secret.

1b. Enable API in Plutora Test’s API Customization and generate a client_id and client_secret
Administrators need the Enable/Disable APIs user permission to enable Plutora Test’s API and generate new API keys.
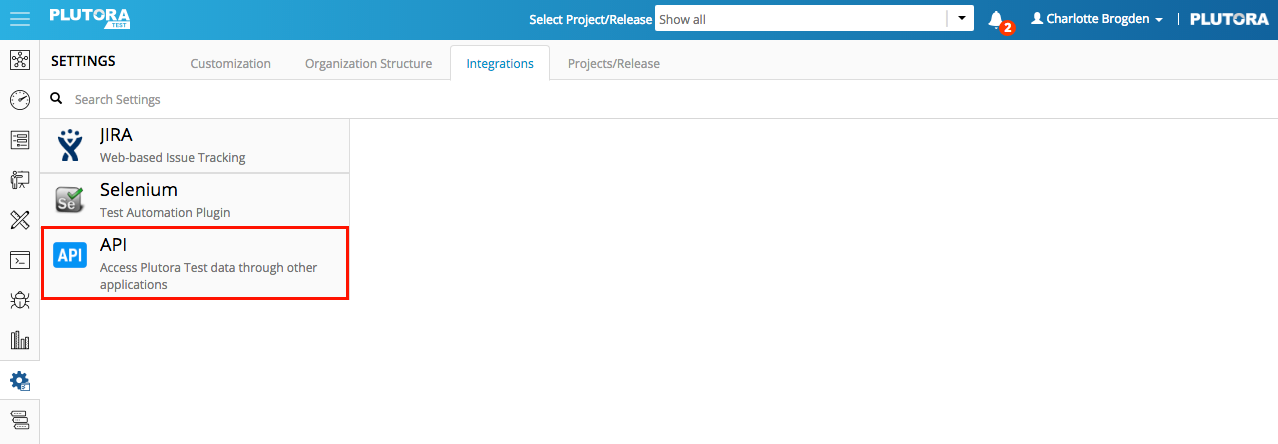
To enable the API of Plutora Test and generate API keys:
- Click Settings.

- Click the Integrations tab.
- Click API.
- Click to select the Toggle to enable/disable API access checkbox. The API Status will change to Enabled.
- Click Generate New API Keys.
- Copy and save the API Client ID and API Client Secret.
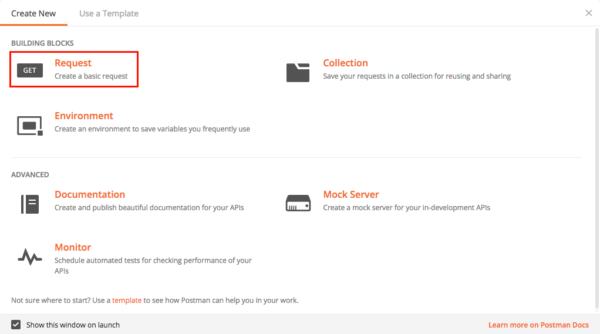
2. Download and install Postman app
To download and install the Postman app:
- Go to https://www.getpostman.com/apps.
- Click the Download button for your platform. (Mac, Windows, or Linux.)
- Install Postman app:
- For Windows:
- Click the downloaded file to run the installer.
- Follow the prompts.
- For Mac:
- Double click to open the downloaded zip file.
- Drag the Postman app into your Applications folder.
- For Linux:
- For Windows:
3. Retrieve a Token from the Authorization Server
To use Postman app to retrieve a token from the authorization server:
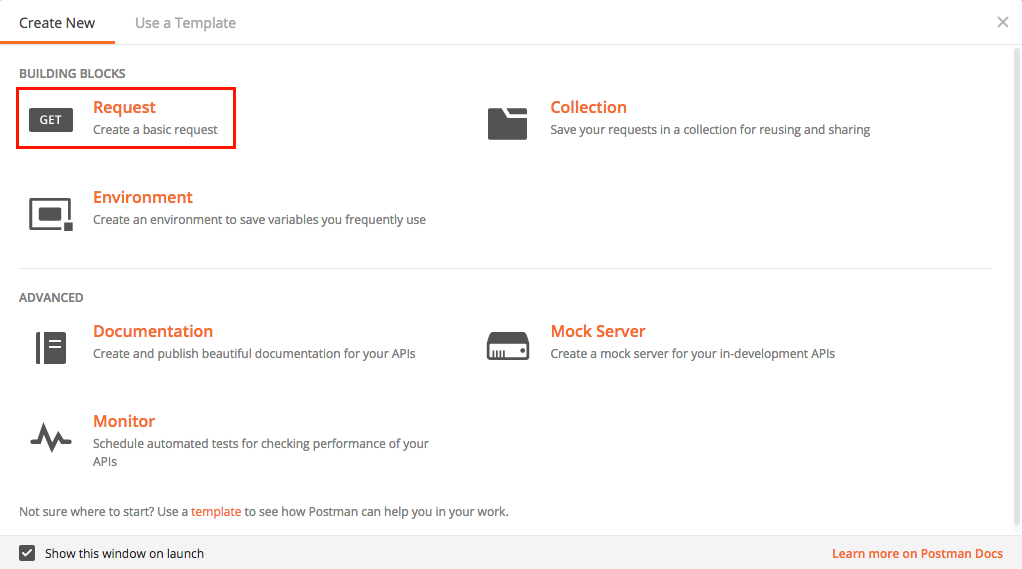
- Click to open Postman app.
- Click Create basic request.
- Save your request by:
- Typing a Request name and Request description.
- Selecting a Collection.
- Clicking Save.
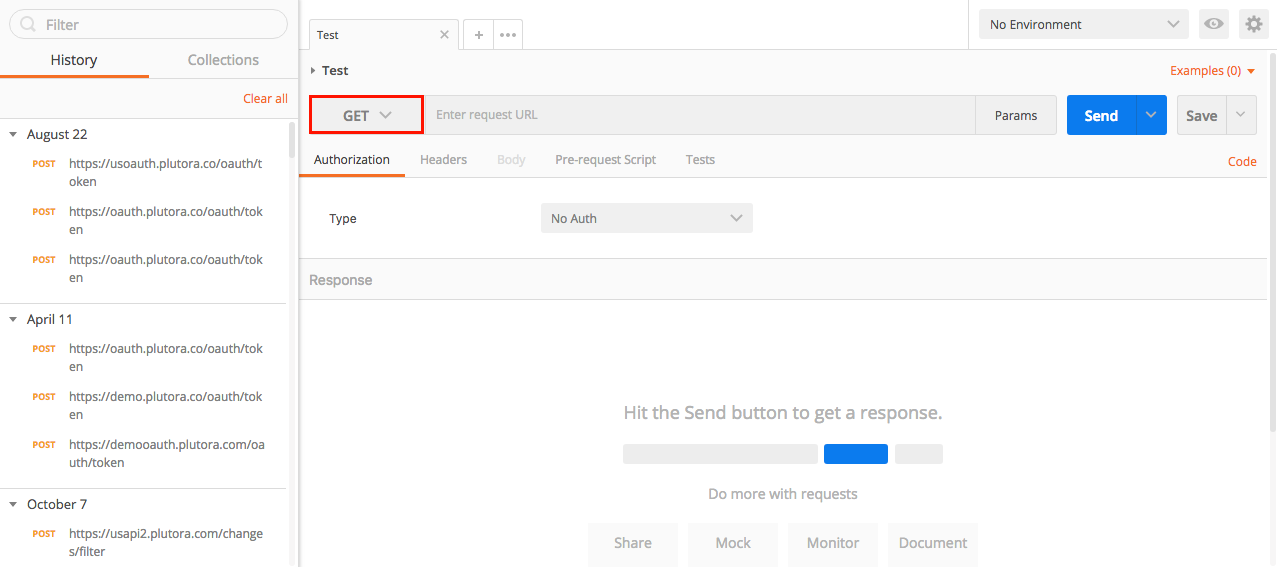
- Select Post from the Get drop-down menu.

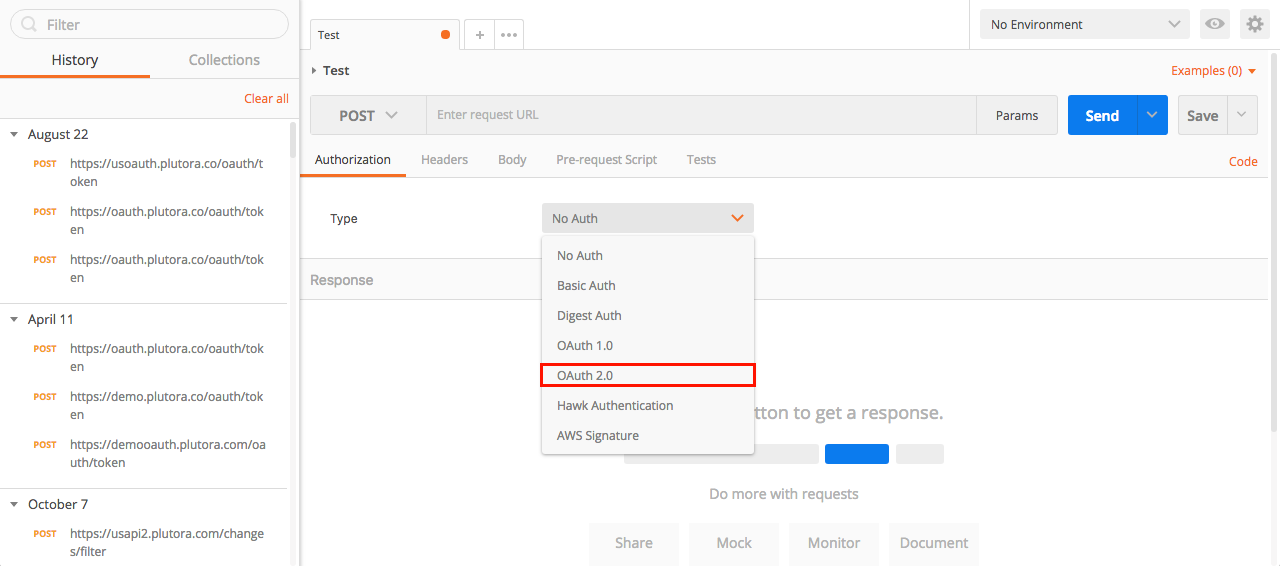
- Select OAuth 2.0 from the Type drop-down menu under the Authorization tab.
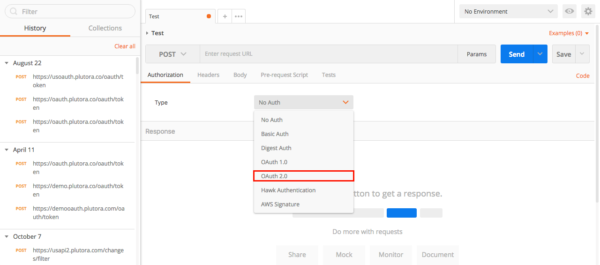 Plutora API does not allow No Auth.
 - Type the Request URL into the Enter request URL field.

The Request URL for all of Plutora’s modules (including Plutora Test) is:
https://[Country code: us, uk, au]oauth.plutora.com/oauth/token
For example, US customers would type: https://usoauth.plutora.com/oauth/token - Click the Body tab.

- Click to select the x-www-form-urlencoded radio button.

- Click the Key field and type or paste client_id.
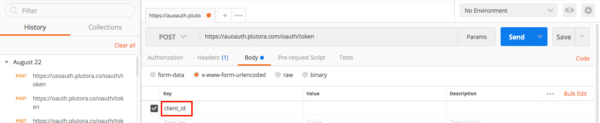
- Click the Value field and paste in the client_id generated in step 1.
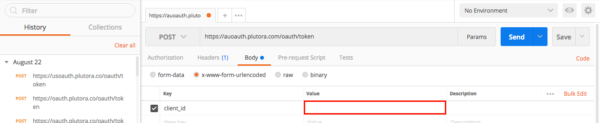
- Continue until you have added all the keys and values in the table below.


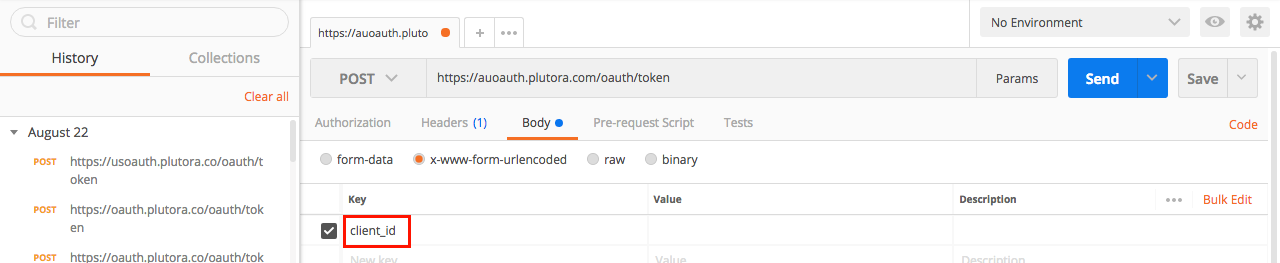

| Key | Value |
| client_id | Paste the client_id generated from Plutora or Plutora Test. |
| client_secret | Paste the client_secret generated from Plutora or Plutora Test. |
| grant_type | Type “password”. (The actual word “password”, not your Plutora password.) |
| username | Type the email address you use to log into Plutora or Plutora Test. |
| password | Type the password you use to log into Plutora or Plutora Test. |
Your screen should look like this:
- Click Send.
After a few seconds of loading, the access token should appear.If using credentials from Plutora Test you may need to click Send a second time. - Copy and save the access token without the double quotes from the response body.
4. Add the token to Swagger
To add the token to Swagger:
- Open your country’s API in your browser:
- Click on the ‘Authorize’ button and enter your API credentials (the token you just obtained from Postman, minus the [[]]).
5a. Test Swagger for Plutora
Test Swagger by bringing up a Change from its ID:
- Get the Change ID:
- Click GET /changes.
- Select application/json from the Response Content Type drop-down menu (if it hasn’t been select already).
- Click Try it out!
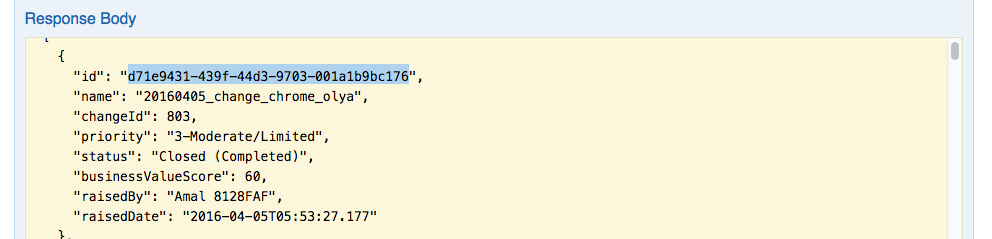
- Select and copy a Change ID.

- Bring up the Change by its ID:
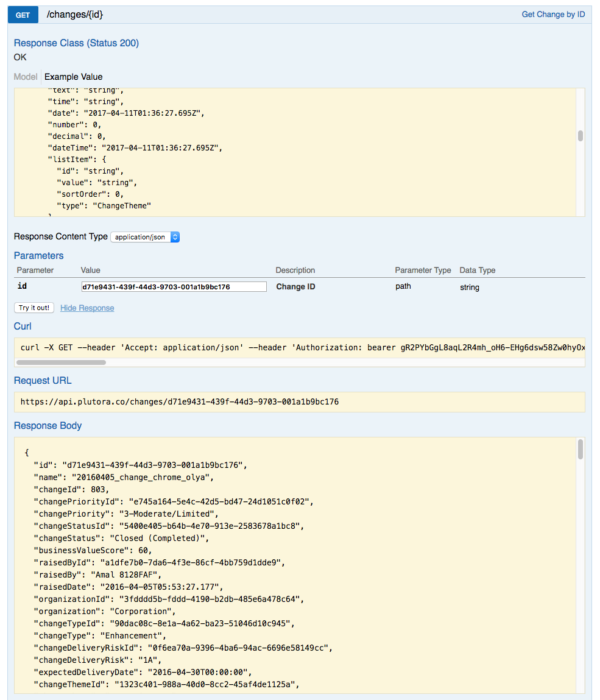
- Click GET /changes/{id}.
- Select application/json from the Response Content Type drop-down menu (if it hasn’t been selected already).
- Paste the Change ID into Value.
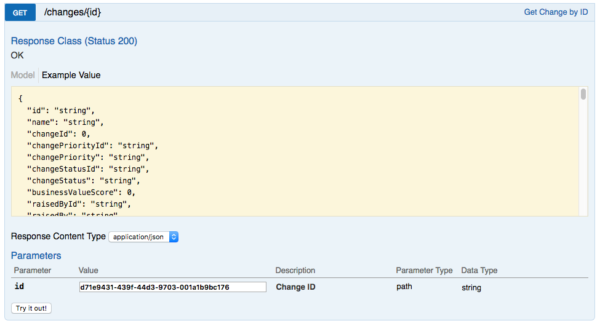
- Click Try it out!
- Get the Change ID:


- Click Try it out!
- Copy a Defect ID.
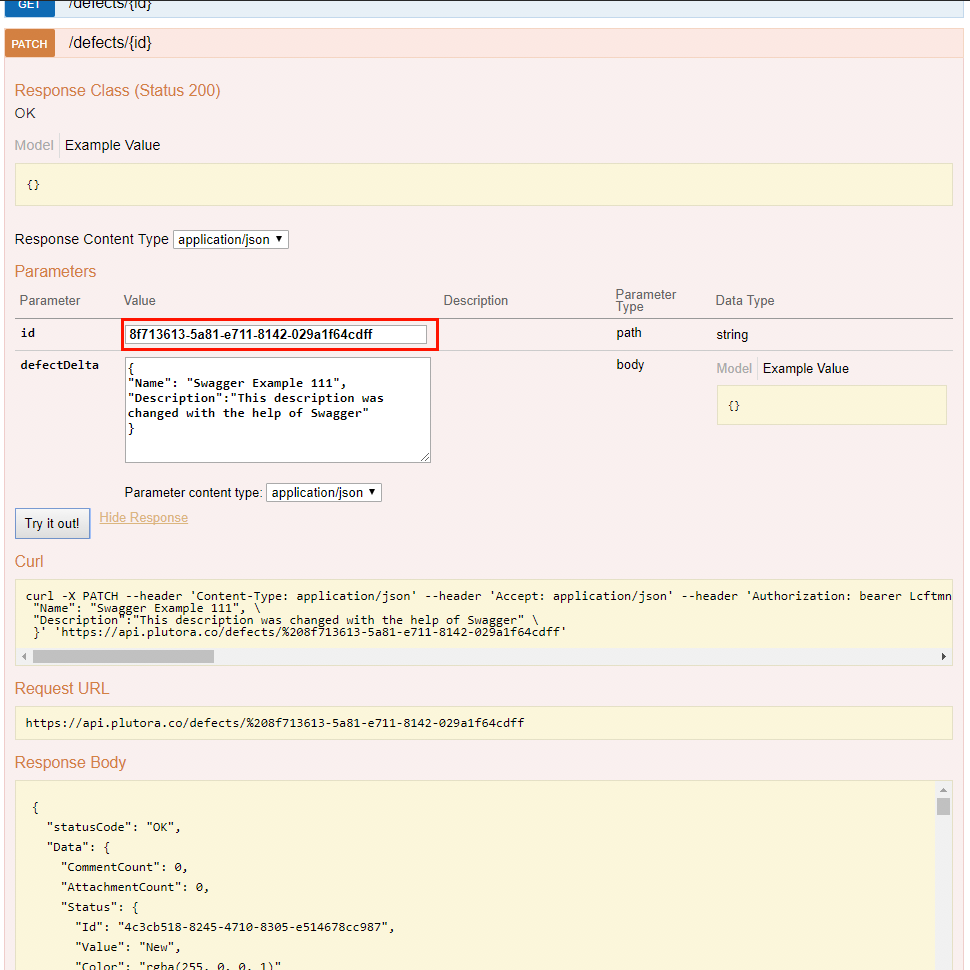
Change the name and description of the Defect:
- Click PATCH /defects/{id}.
- Paste the Defect ID into the id field.
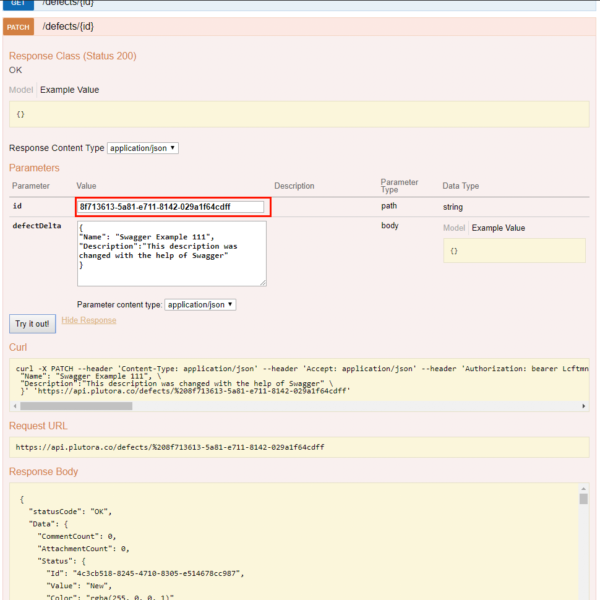
- Paste the following code into the defectDelta field.This code will change the Defect’s Title to Swagger Example 111 and its Description to “This description was changed with the help of Swagger.”
{ "Name": "Swagger Example 111", "Description":"This description was changed with the help of Swagger." } - Click Try it out!