
Jenkins is a cross-platform, open-source build automation tool for delivery pipelines. Whether your goal is continuous integration or continuous delivery Jenkins can help automate it.

1. Set up Jenkins to trigger builds remotely
To build an environment with a single click, using Plutora and Jenkins:
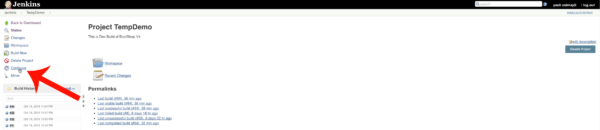
- Open Jenkins.
- Click a blue-linked job Name.

- Click Configure.
- Click to select the Trigger builds remotely (e.g., from scripts) checkbox.
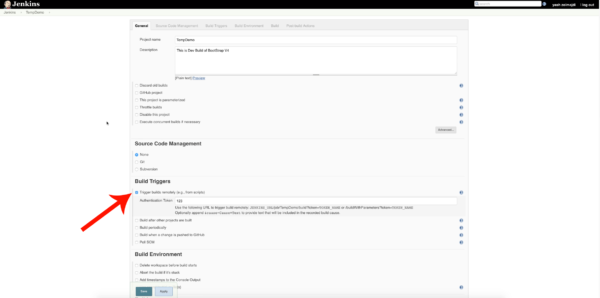
- Type an Authentication Token.
- Click Save.
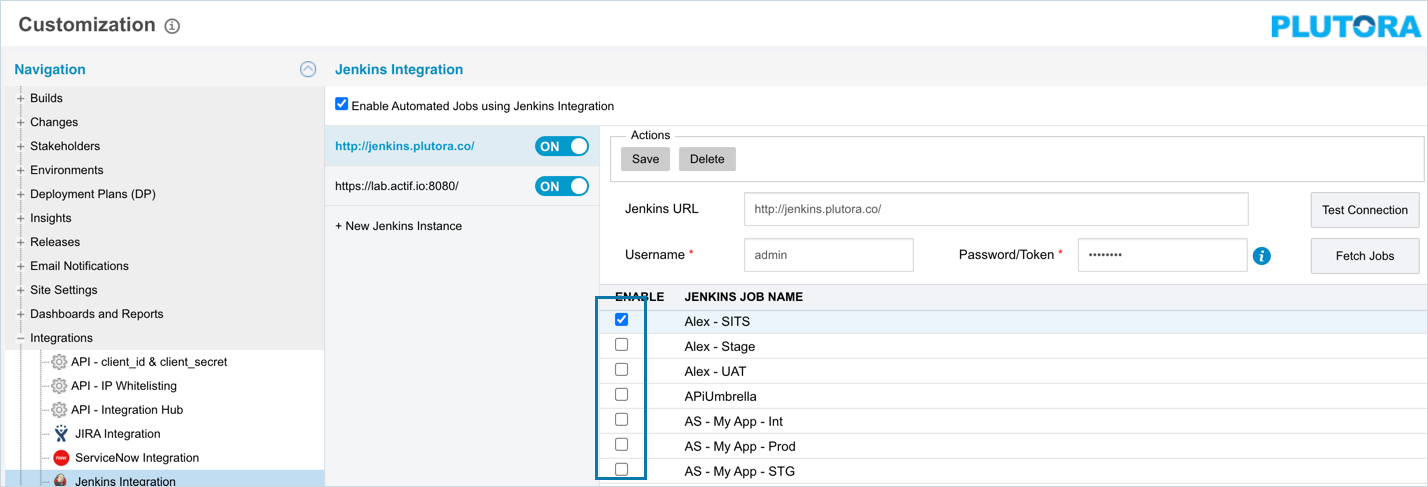
2. Enable Jenkins Integration
To enable Jenkins Integration:
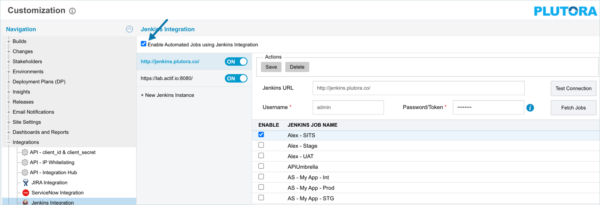
- Go to Settings
 > Customization > Integrations.
 - Click Jenkins.
- Click to select the Enable Jenkins Integration checkbox to toggle on Jenkins Integration.

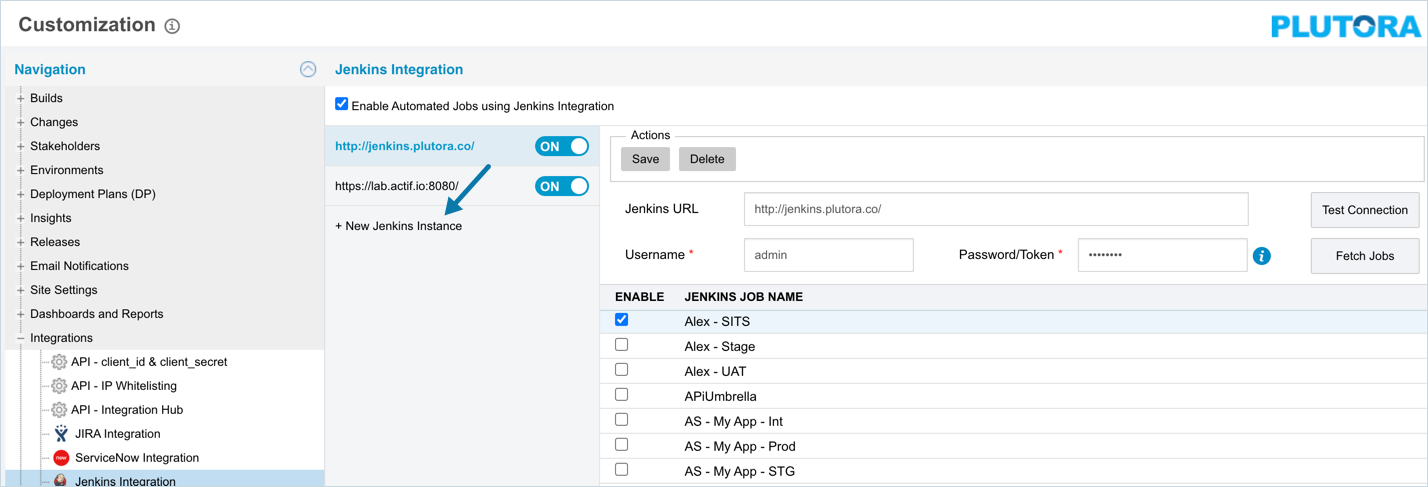
3. Add and Enable a Jenkins Instance
To add and enable a new Jenkins instance:
- Click + New Jenkins Instance at the bottom of the left-hand panel.
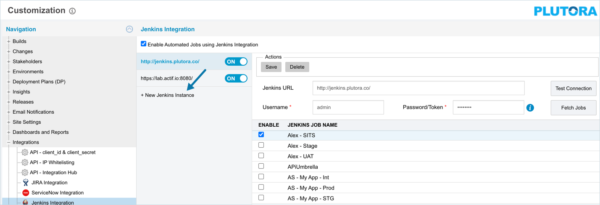
- Type the Jenkins URL.
- Type the Username. (Mandatory field.)
- Type the Password/Token. (Mandatory field.)Now, you can use either a Username and Password or a Username and API Token to authenticate.
- Click Test Connection.If the connection fails, check the Jenkins URL, username, and password or token.
- If the connection is successful, click Create.
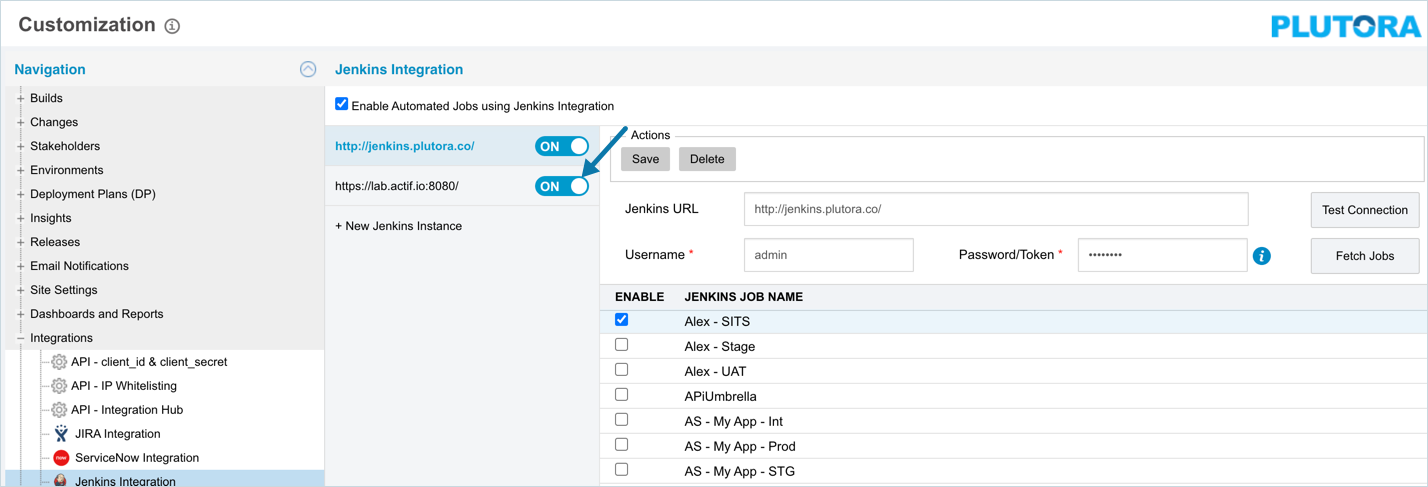
- Enable the new instance by clicking the OFF toggle switch in the left-hand panel until it is blue and ON.
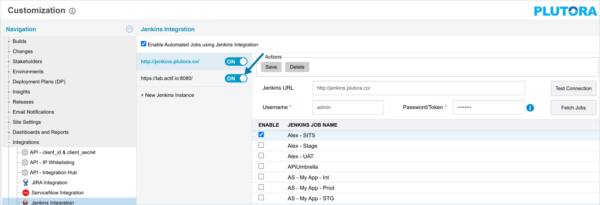
4. Fetch and Enable Jobs
Jenkins Integration now retrieves only the top-level (root) folder of Jenkins jobs and the contents of folders are only retrieved when clicked. This minimizes the level of data coming back in response requests and prevents timeouts.
To enable Jenkins jobs in the new Jenkins instance:
- Click Fetch Jobs. The Job Names column should populate with jobs and jobs folders.

- Click to select the job checkboxes to enable the jobs.
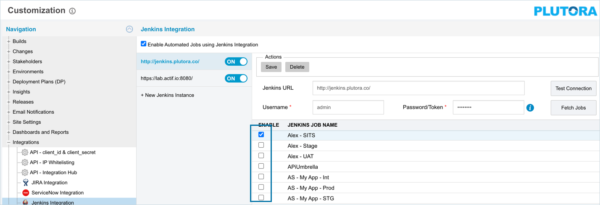 Only enabled jobs can be added to a System’s automated jobs list.
 - Click Save.

5. Select and Sequence Jenkins Jobs
See Orchestration Using Automated Jobs.
6. Select a Component to Update the Version Number
Now set which of the Environment’s components will be updated:
- Click the Environment’s Details tab.
- Click to select the Summary Version checkbox of the Component which is updated by the job:
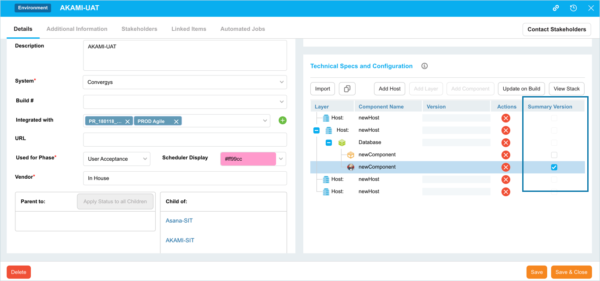
- If Builds are enabled:
- See Manage Builds.
- Continuous Delivery Pipeline will display Build #, Build Tag and Build Status instead of the Environment Component’s Summary Version Number.
- Users can manually enter Version Number, click Summary Version checkbox, and see it displayed on Continuous Delivery Pipeline.
- If Builds are enabled:
- Click Update on Build.
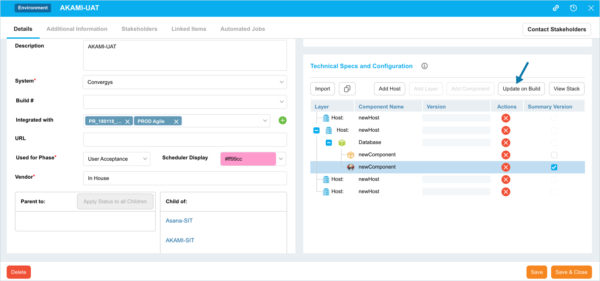
The component’s icon becomes a Jenkins icon.
- The component’s Version will contain a build version number when a build is initiated.
- Only one Component can be active with Jenkins at a time.
- Click Save & Close.


7. Run Jenkins Jobs in a TECR and View the Execution History
See Orchestration Using Automated Jobs.
![]()