
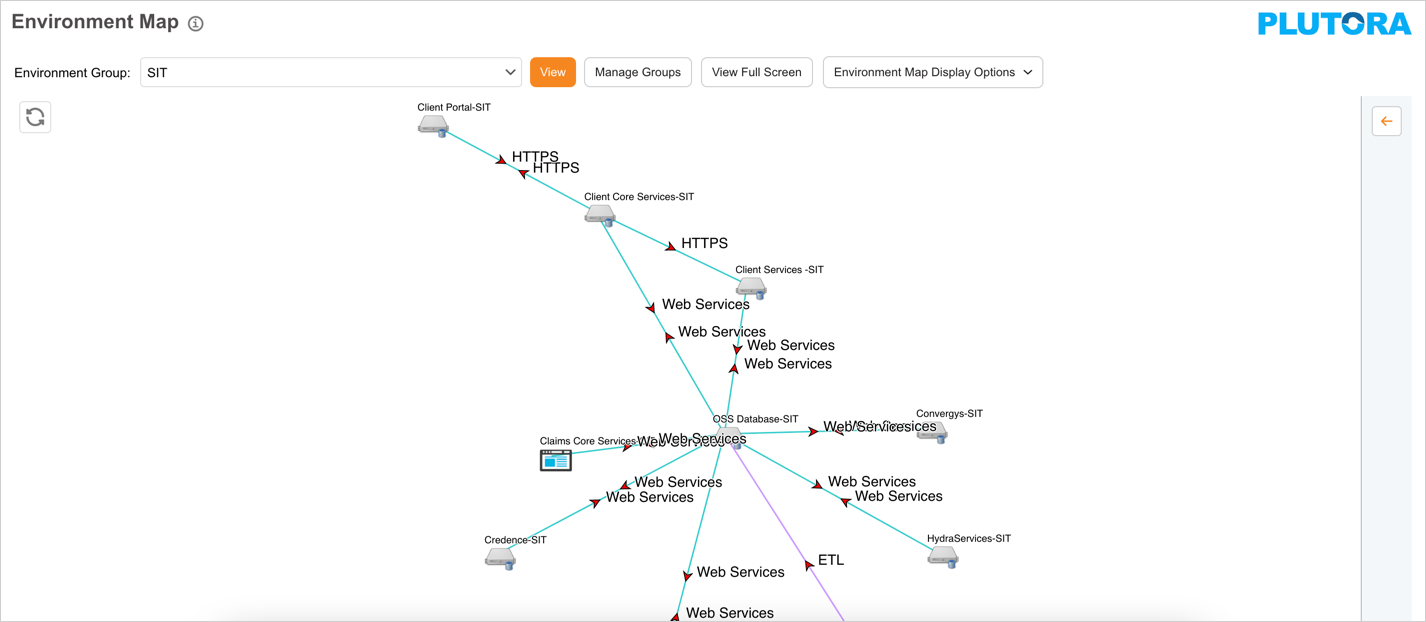
Access Environment Map
Navigate to Environment > Map and select an Environment Group from the drop-down. Then click ![]() .
.
Administrators can prevent users from viewing and booking Environments and Environment Groups outside their Portfolio Association by selecting the My Portfolio Association checkbox for the ‘Restrict Site-Wide View’ of Environments user permission.

View Options
Edit Environment Group
Edit the selected Environment Group by clicking ![]() . See Manage Environment Groups.
. See Manage Environment Groups.
View Environment Details
Click an Environment icon to see more information about that Environment.

The side panel opens when an Environment is clicked to show:
- Name.
- System.
- Build: This field will be visible if Builds are enabled. See Manage Builds for more details.
- Icon: Select an icon to represent the Environment.
- Technical Specs and Configurations.
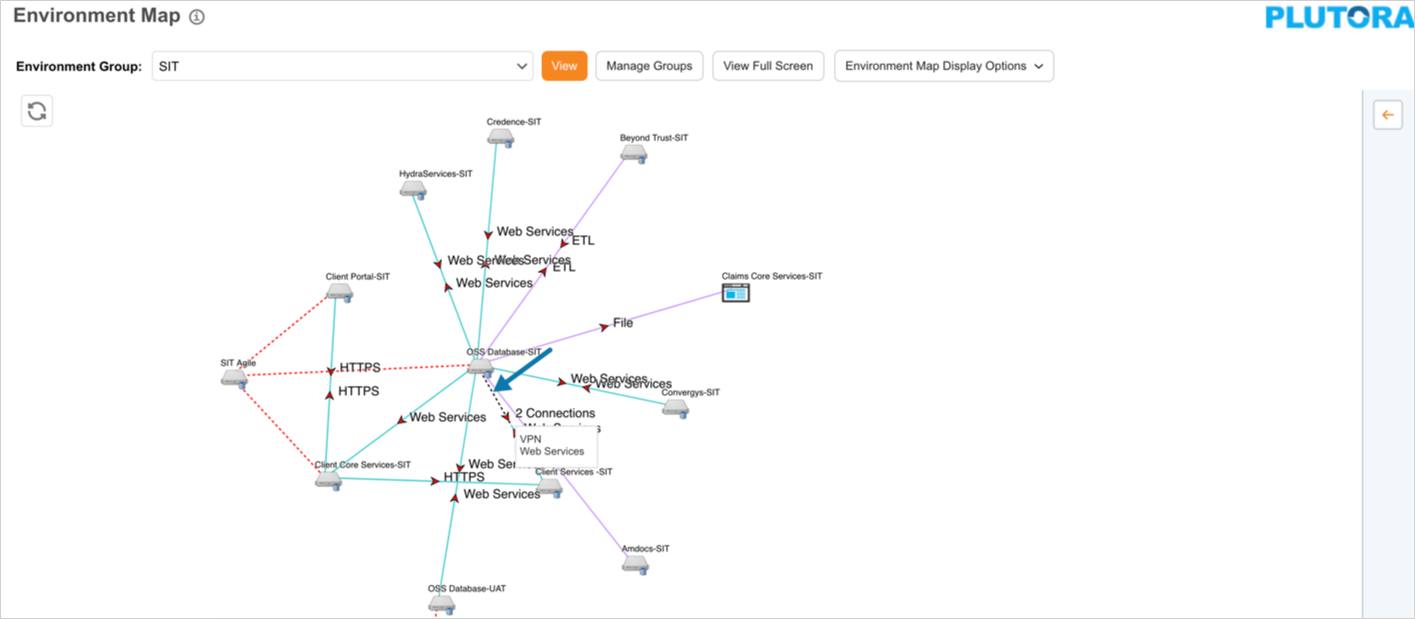
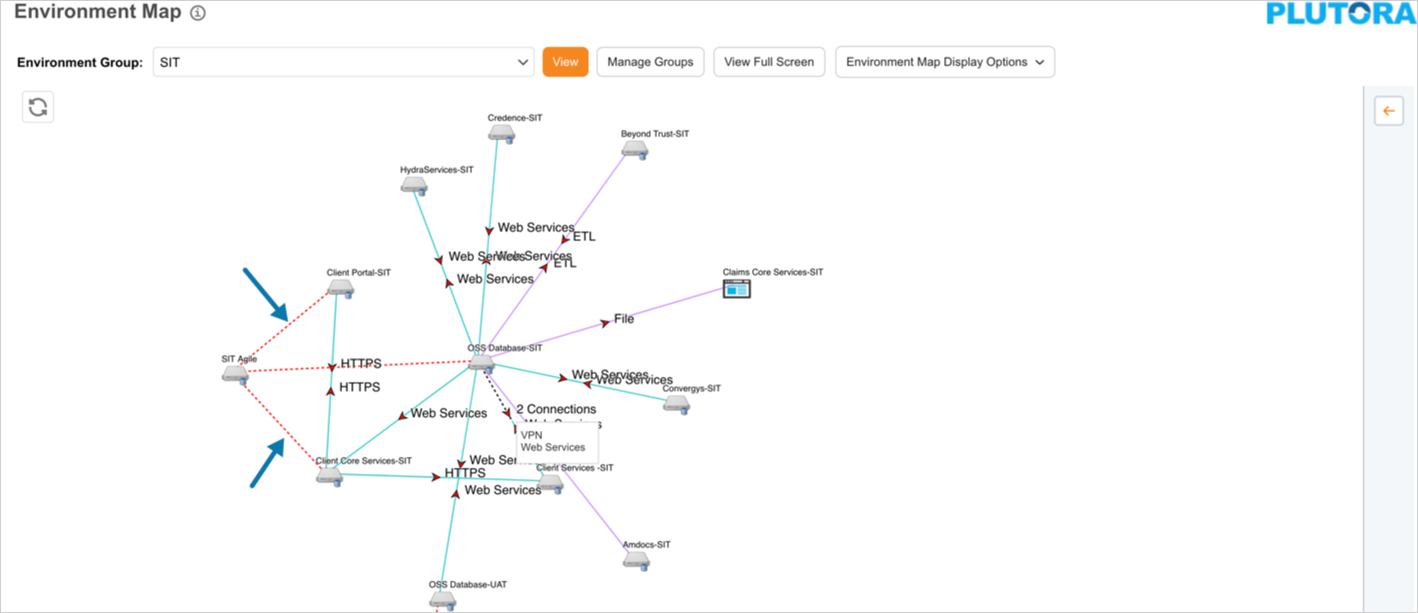
Integrated Environment Groups on the red, dotted lines are not clickable.
You can change the Environment Icon by clicking the Icon drop-down. Icons can be chosen from the Environment Map or while adding or editing an Environment.
To close the panel, click ![]() .
.
Reset Environment Map
Click ![]() to reset the Environment Map and its original position.
to reset the Environment Map and its original position.
Manage Environment Map Display
Click ![]() for the following options:
for the following options:
- Show Environment Names: Click to toggle the visibility of the Environment Names.
- Show Environment Group/s: Click to toggle the visibility of the integrated Environment Groups.
- Show Connectivity Type Info: Click to toggle the visibility of single connection types and multiple connection numbering.
- Show Details of Multiple Connections: Click to toggle the visibility of multiple connection types.

Full Screen
Click ![]() to expand the Environment Map to the full screen.
to expand the Environment Map to the full screen.

Press the Escape key on your keyboard to close full-screen view.
Copy Configurations
You can select one or more Technical Specs fields on the Environment Map and copy them using right-click copy, Control + C, or Apple Key + C.
To copy the components, click ![]() . Paste the copied Technical Specs component data can now be pasted into another application or document. When pasted, the component data looks like this:
. Paste the copied Technical Specs component data can now be pasted into another application or document. When pasted, the component data looks like this:
