Introduction
The Release Manifest tab is available only in Enterprise Release. This tab allows you to add child Releases (Project and Independent Releases) to an Enterprise Release.
Pre-requisite
- To be able to view this tab, you must have ‘View Release Manifest Tab’ user permission.
- To be able to use Public Query on this tab, you must have ‘Create/Delete Release Manifest Public Query Builder’ user permission.
Navigation
Release > Manager
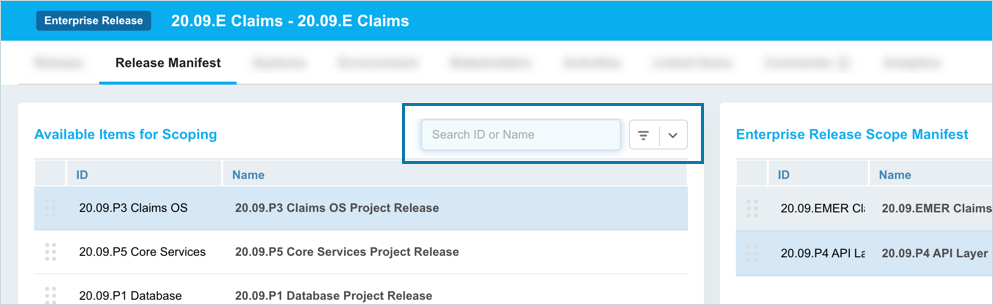
Access ‘Release Manifest’ tab
To access the Release Manifest tab:
- Navigate to the ‘Release Manager’ page.
- Ensure that the Release toggle button is selected.
- Search for the Enterprise Release that you want to manage. You can use the filter options available on this page.
- Open the Release by clicking on the Release ID or Release Name.
- Click on the Release Manifest tab.
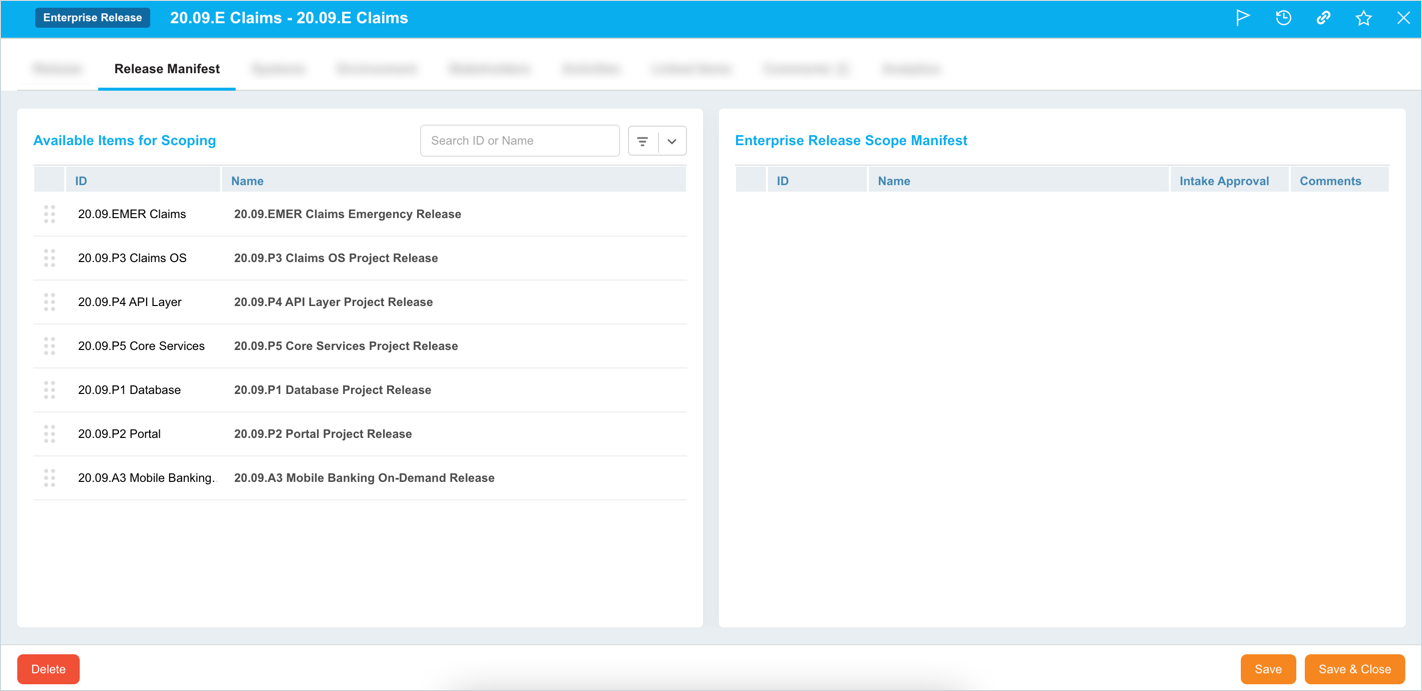
The Project and Independent Releases appear under the Available Items for Scoping section.
- the Release Implementation date in the future.
- it has no Dependency set.
- the Status of the Release is not an end state.
Add Child Release to Enterprise Release
On the Release Manifest tab, drag and drop the child (Project/Independent) Releases from Available Items for Scoping to the Enterprise Release Scope Manifest column.

When dragging and dropping Releases, the ‘Phase/Gates Migration’ pop-up display. This pop-up enables you to decide how to handle Phases/Gates, Activities/Criteria from the parent and child Release, and the associated Environment Bookings.
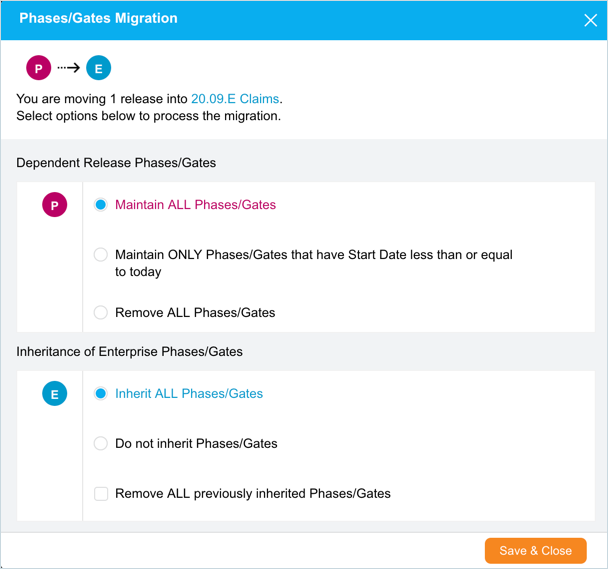
There are three scenarios:
Maintain ALL Phases/Gates
Select this option to maintain all the Phases/Gates, Activities/Criteria, and Environment Bookings from the Child Release.
The following options are available in the ‘Inheritance of Enterprise Phase/Gate’ section:
- Inherit ALL Phases/Gates: Select this option to inherit all the Phase/Gate and Activities/Criteria. If the same Phase, that exists in the Child Release, is inherited from the new Parent release, and it has Bookings in the Child Release, then the ‘Environment Booking Smart Alerts’ wizard will appear asking if you want to adjust Bookings dates.
- Do not inherit Phases/Gates: Select this option if you do not want to inherit any Phases/Gates and Activity/Criteria from the Parent Release. This option will keep all the Child Phases/Gates, Activities/Criteria, and associated Bookings and not inherit anything from the Parent Release.
- Remove ALL previously inherited Phases/Gates checkbox: If the Project Release is currently associated with a different Enterprise Release, selecting this option will delete all the Phases/Gates, Activities/Criteria, and the associated Bookings that were inherited from the previous Parent Release.
Maintain ONLY Phases/Gates that have Start Date less than or equal to today
This option will retain Phases/Gates with the Start Date less than or equal to today (and their associated Bookings, and Activities/Criteria), and will remove everything else. It will also delete the Bookings associated with Phases that are to be deleted.
The option Inherit FUTURE Phases/Gates in the ‘Inheritance of Enterprise Phase/Gate’ section will be selected by default. It will inherit all the Phases/Gates in the future with their Activities/Criteria from the new Parent Release.
Remove ALL Phases/Gates
This option will delete all Phases/Gates, Activities/Criteria, and Bookings from the Child Release. It will also delete the Bookings associated with Phases that are to be deleted.
The option Inherit ALL Phases/Gates in the ‘Inheritance of Enterprise Phase/Gate’ section will be selected by default. It will inherit the Phase/Gates and Activities/Criteria from the new Parent Release.
After adding the required child Releases, click ![]() .
.
Inherit Systems
System Setup Customization allows Plutora to inherit the Systems from the child Releases to their parent (Enterprise) Release.
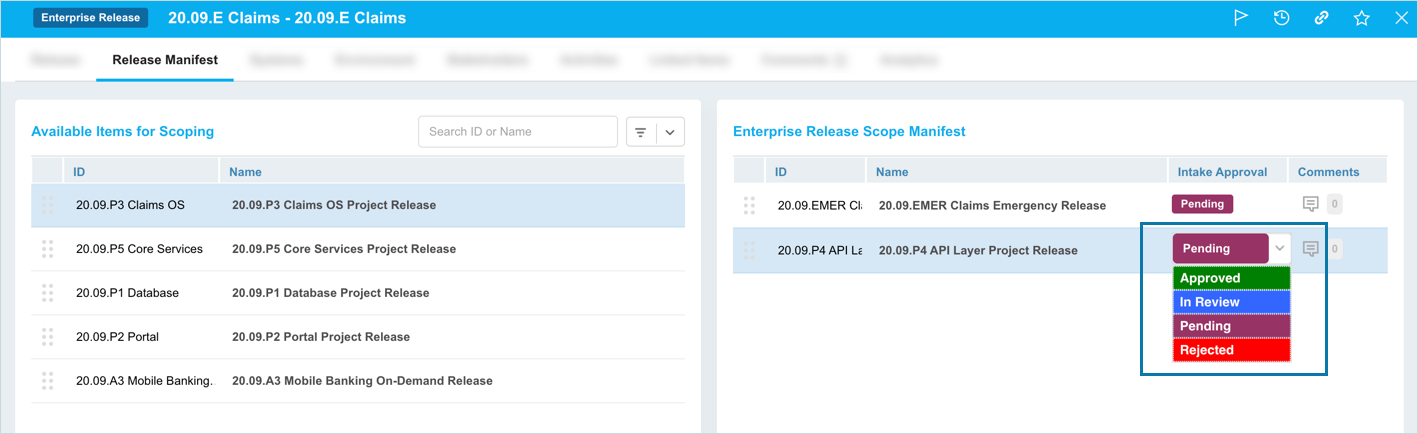
Approve Child Release
If Release Intake Status is enabled, child Releases must be approved after they are added using the Intake Approval drop-down menu. Administrators can control who can approve the intake of child Release using the ‘Update Release Intake Status’ user permission.
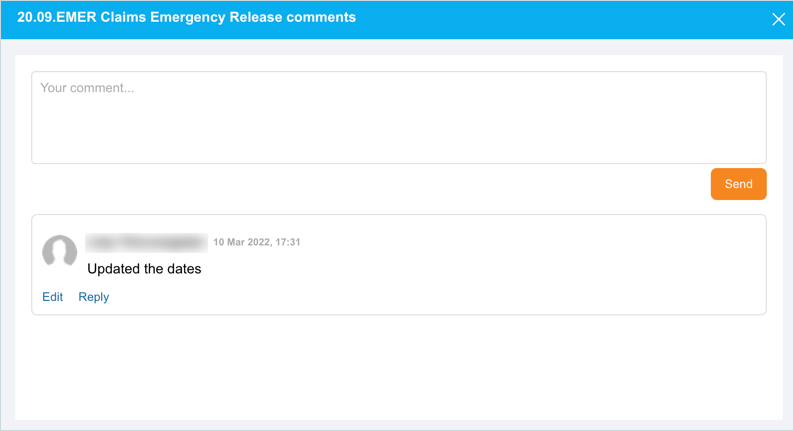
Manage Comments
To manage Release Manifest comments:
- View comments: Click the number that appears next to
 . The existing comments display with user, date, and timestamp details.
 - Add a comment: Click and enter your comment in Your comment field. Then click
 .
. - Reply to a comment: Click Reply below a comment. Enter your reply and click .
- Edit a comment: You can only edit your own comments. Click Edit below a comment. Edit your comment and click .
More Information
Link to the Child Release
You can view/open a child Release from the ‘Release Manifest’ tab by clicking the Name of the Release.
Filter Release
You can filter the Project and Independent Releases that display under Available Items for Scoping:
- by entering the Release ID or Name
- using Query Builder.