
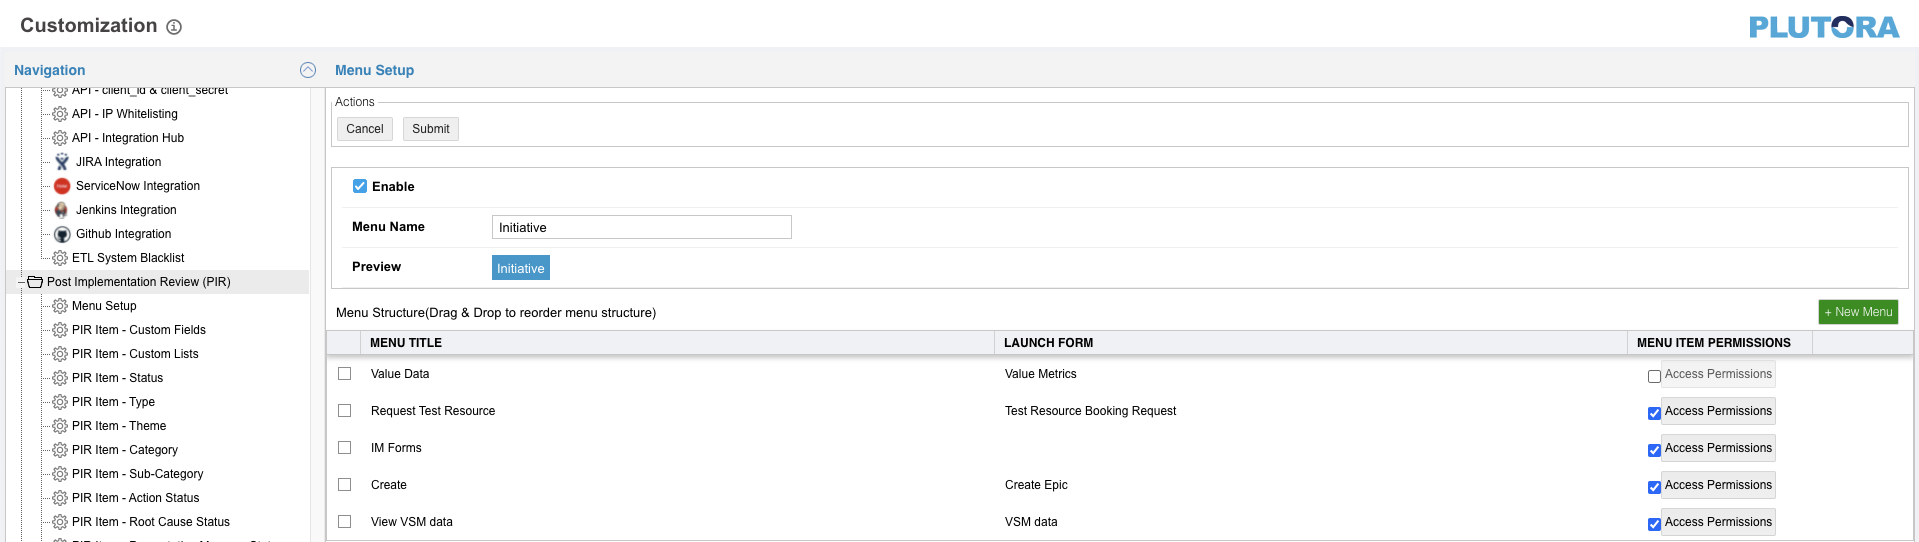
Menu Setup (Initiative) allows administrators to:
- Show and hide the Initiative Management menu in the blue navigation menu.
- Change the menu label.
- Manage the menu structure.
Manage the Initiative menu
To manage the Menu Setup (Initiative) menu:

- Go to Settings
 > Customization > Initiative Management (IM).
 - Click Menu Setup.
- Enable the Initiative module:
- Click to select the Enabled checkbox.
- Click Submit.
The yellow Your changes have been saved pop up opens and closes.
If you click away from the Customization page without clicking Submit, your changes will not save.
- Format the Initiative menu:
- Type the Menu Name or keep the default menu name, Initiative.
- Click Submit.
The yellow Your changes have been saved pop up opens and closes.
If you click away from the Customization page without clicking Submit, your changes will not save.
Refresh your browser to see the changes.
- Manage Menu Structure:
- Add a menu level:
- Click + New Menu.
- Type a Menu Title.
- Select the form that will open when the menu level is clicked from Launch Form
Or:
Leave the Launch Form field blank to launch the IM grid containing all IM forms.
Create IM forms in Form Builder Customization. - Click Save & Close.
- Click Submit.
The yellow Your changes have been saved pop up opens and closes.
If you click away from the Customization page without clicking Submit, your changes will not save.
- Sort menu levels:
- Drag and drop the menu levels to change their sort order and whether they are a top or sub-menu.
- Create child menus by dragging the menu to the right under a parent menu until a green cross appears.

- Turn a child menu into a parent menu by dragging it to the right until a green cross appears.
Only parent and child menu levels are currently supported.
- Click Submit.
The yellow Your changes have been saved pop up opens and closes.
If you click away from the Customization page without clicking Submit, your changes will not save.
- Manage Access Permissions for a menu level: Field Permissions set the view, edit, and hide permissions for each menu level.
- Click the checkbox beside Access Permissions to activate permissions.
- Click Access Permissions.
- Select from the By: drop-down menu:
- Individual: Click to select the checkboxes of one or more users.
- Organization: Click to select the checkboxes of one or more organizations or Portfolio Associations.
- Role: Click to select the checkboxes of one or more roles.
- User Group: Click to select the checkboxes of one or more User Groups.
- Click Save & Close.
- Edit a menu level:
- Click to select the menu level.
- Click the pen icon
 or double click the Menu Title field.
 - Edit the Menu Title.
- Double click the Launch Form drop-down menu and make a new selection.
- Click Submit.
The yellow Your changes have been saved pop up opens and closes.
If you click away from the Customization page without clicking Submit, your changes will not save.
- Delete a menu level:
- Click to select the menu level.
- Click the red delete button.

- Click Submit.
The yellow Your changes have been saved pop up opens and closes.
If you click away from the Customization page without clicking Submit, your changes will not save.
- Add a menu level:
![]()