
Add/Edit a PIR Item
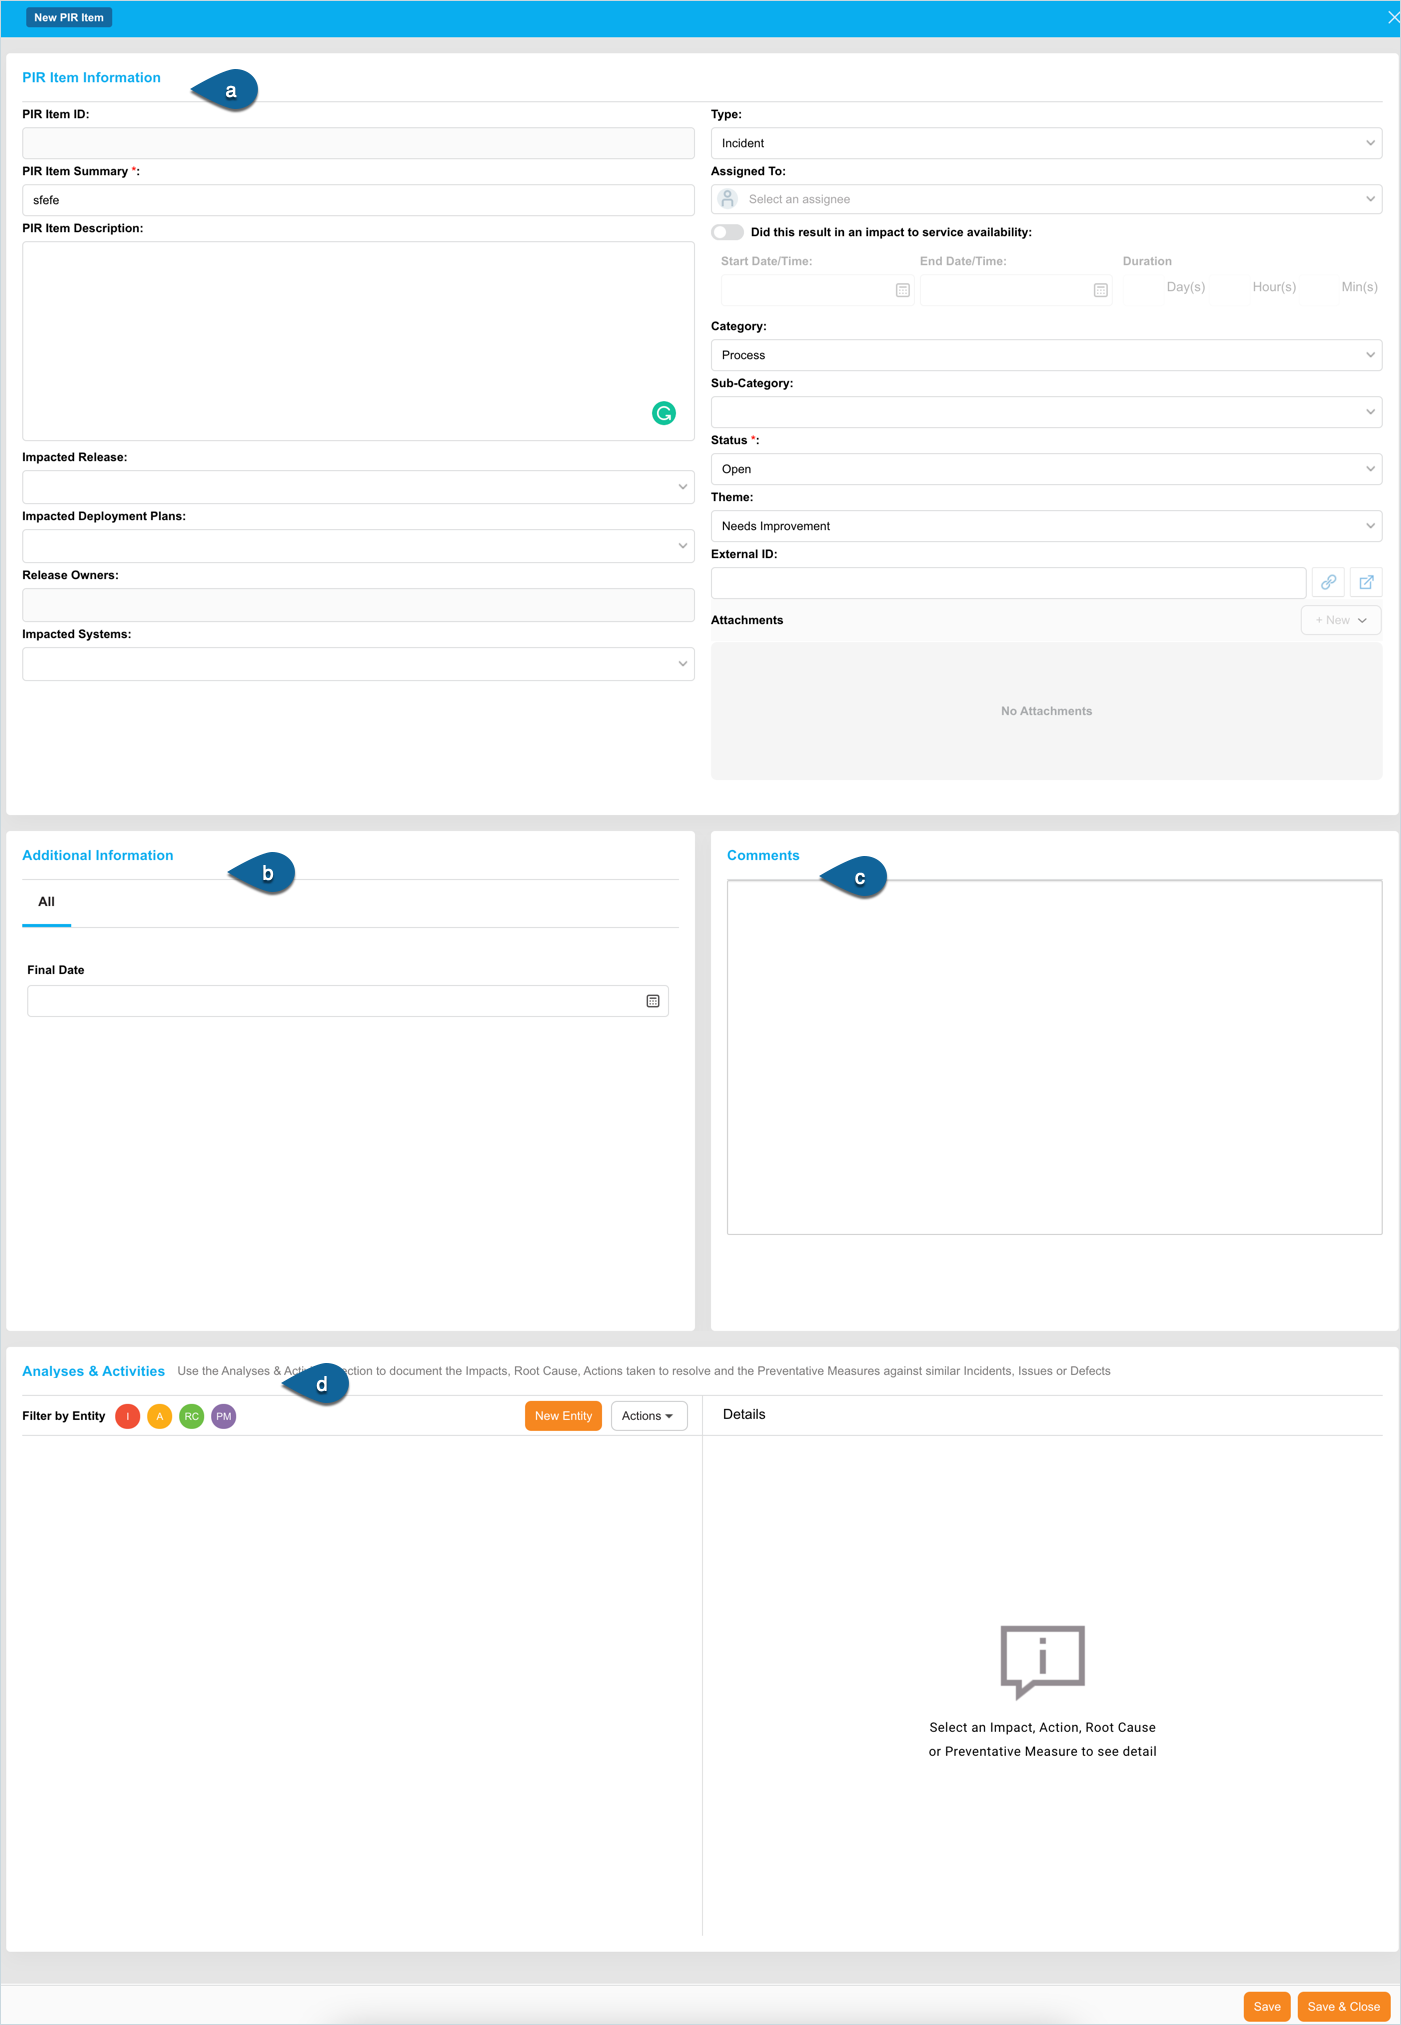
To add a PIR Item, navigate to the PIR Manager page and click ![]() . New PIR Item dialog displays. This dialog has the following sections:
. New PIR Item dialog displays. This dialog has the following sections:
- PIR Item Information
- Additional Information
- Comments
- Analyses & Activities
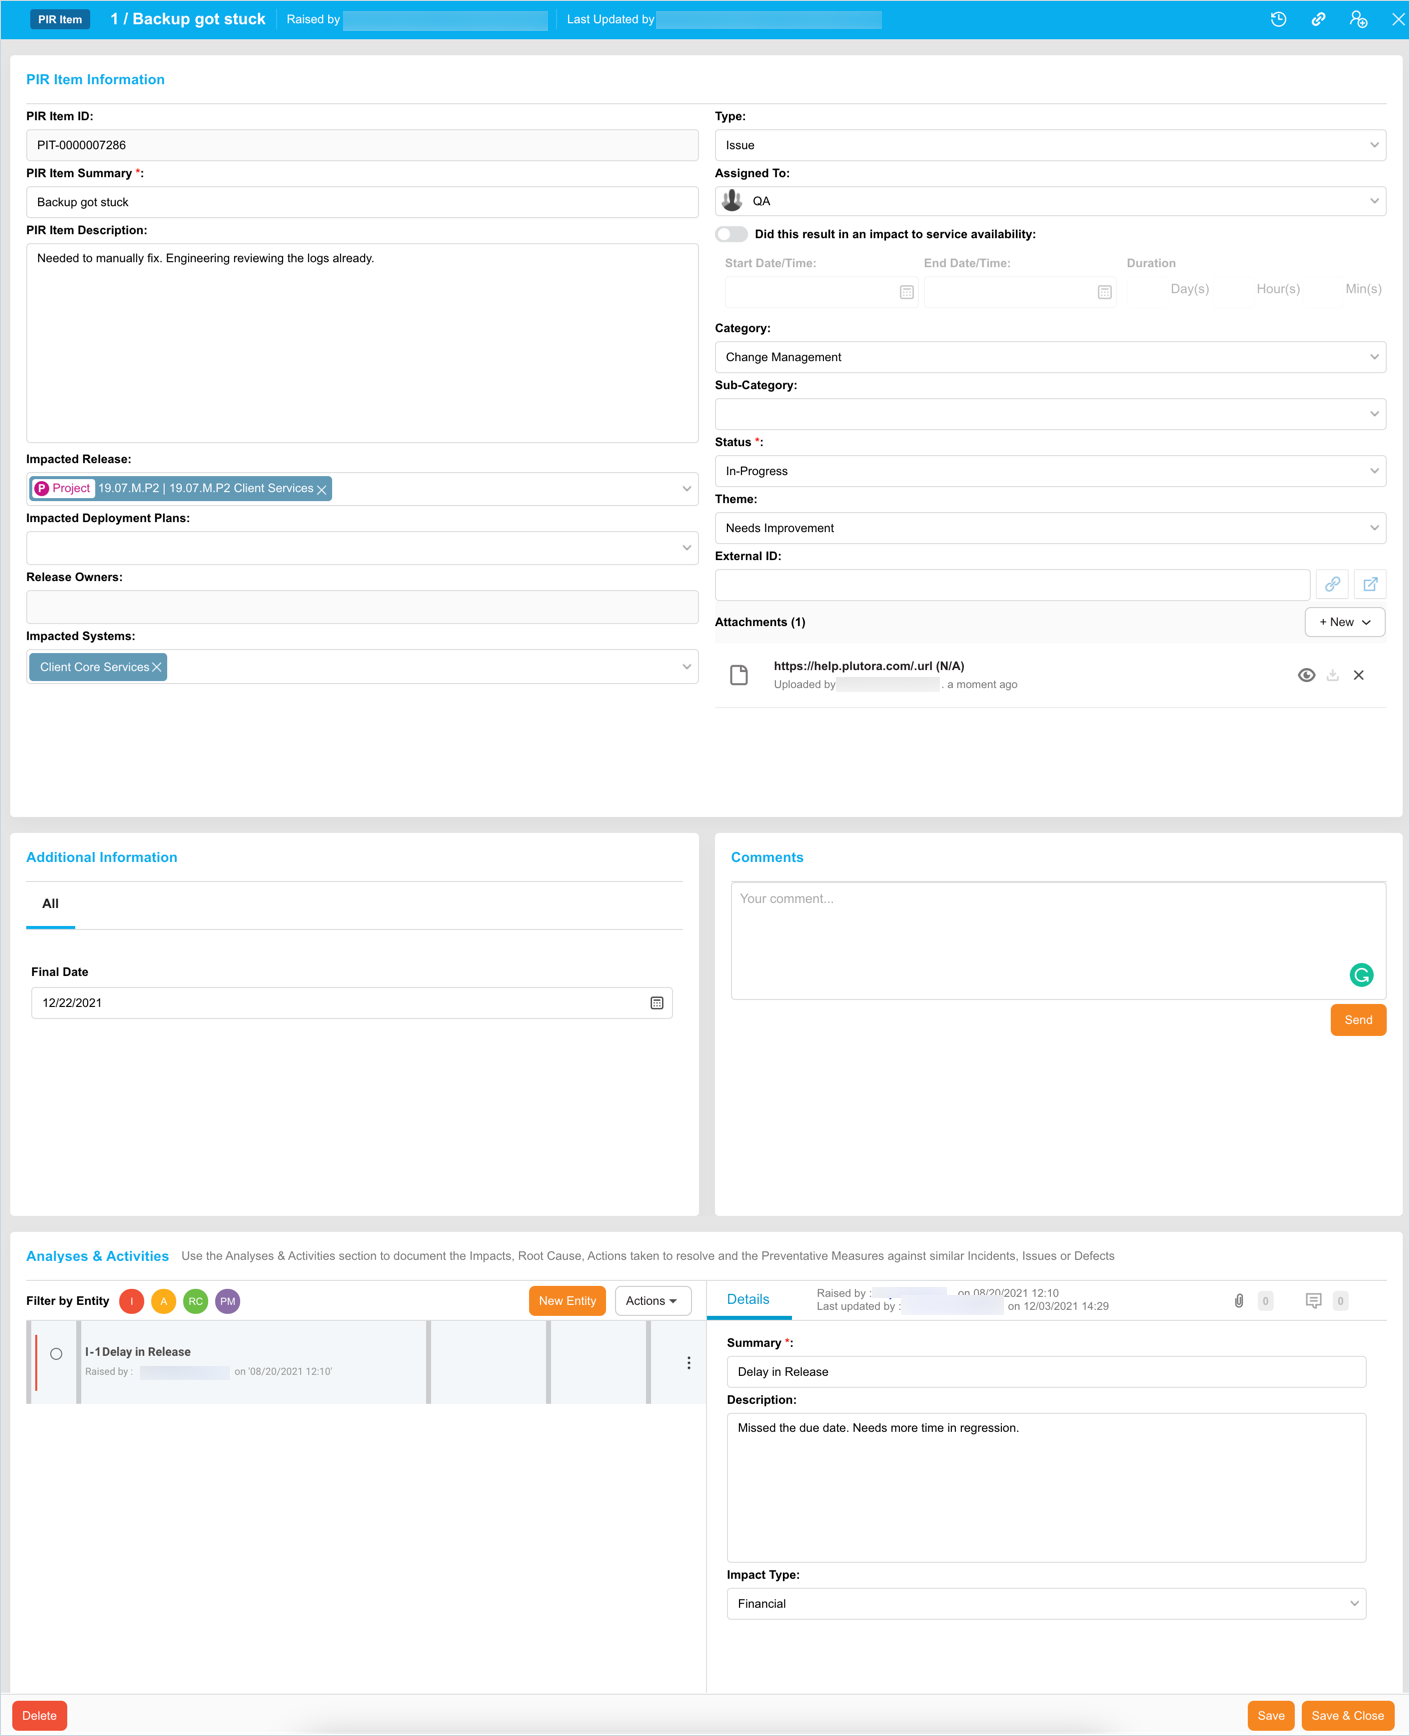
| Fields | Description |
|---|---|
| PIR Item ID | System-generated field and cannot be edited |
| PIR Item Summary | Mandatory; Enter the PIR item summary. |
| PIR Item Description | Enter the item description. |
| Impacted Release | Click the drop-down and select the impacted release(s) |
| Impacted Deployment Plans | Click the drop-down and select the impacted deployment plan(s). |
| Release Owners | Cannot be edited; It is the Release Owner selected in the Release. |
| Impacted Systems | Select the impacted system(s) |
| Type | Select the PIR item type from the drop down. You can customize this field using the PIR Item - Type Customization. |
| Assigned To | Select the user or user group that the PIR Item is assigned to. |
| Did this result in an impact to service availability | Select if the PIR Item records an impact on service availability. Enter the Start Date/Time and End Date/Time. The duration will be automatically added from the start and end dates. |
| Category, Sub-Category | Select Category, Sub-Category of the PIR item from the drop-down. To customize this field, go to PIR Item - Category Customization and PIR Item - Sub-Category Customization. |
| Status | Mandatory; Select the status of the PIR item from the drop-down. To customize this field, go to PIR Item - Status Customization. |
| Theme | Select a theme from the drop-down. To customize this field, go to PIR Item - Theme. |
| External ID | Enter the external ID. |
| Attachments | Add a new URL or File as an attachment by clicking |
Comments
- To add a comment, enter your comment in the Your comment… field. Then click
 .
. - To edit a comment, click Edit. Then click Save.
- To reply to a comment, click Reply. Enter your reply and click .
You cannot delete comments.
Analyses & Activities
In this area of the PIR Item you document the following aspects of each PIR Item:
- Impact: What effects it will have.
- Actions: Assigned tasks related to solving the problem. For example, one Action could be finding out the Root Cause of a problem and suggesting some Preventative Measures.
- Root Causes: What caused the problem.
- Preventative Measures: Measures to be put in place to prevent the problem from happening again.
To add a new Action, Impact, Root Cause, or Preventative Measure, click ![]() . Refer to Add or Edit PIR Activity for more information on PIR Activities.
. Refer to Add or Edit PIR Activity for more information on PIR Activities.
After making the required edits and additions to the PIR item, click ![]() .
.
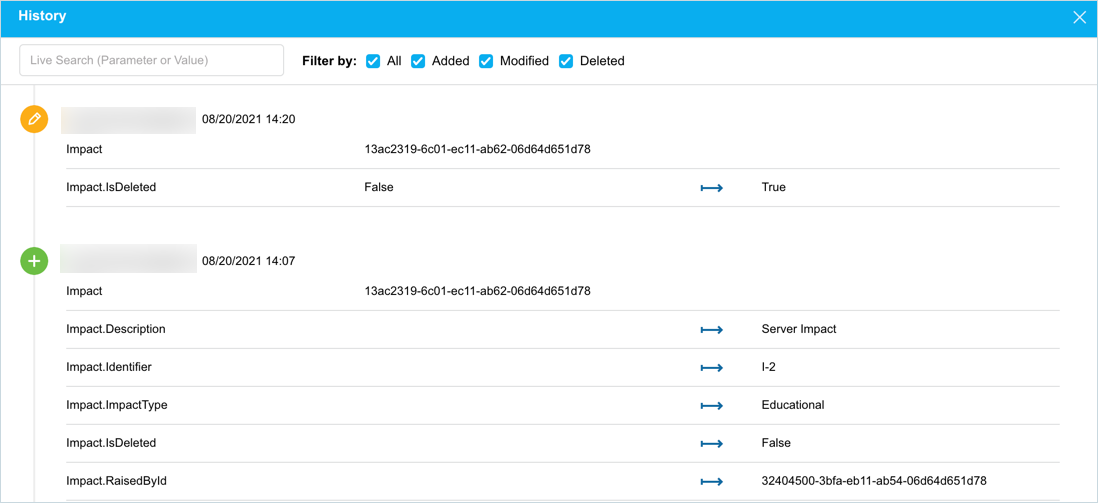
View the Audit History of a PIR Item
To view the audit history of a PIR item, click ![]() in the top-right corner. Refer to Audit History for more information.
in the top-right corner. Refer to Audit History for more information.
Copy a PIR Item’s URL
To copy a PIR Item’s URL to the clipboard, click ![]() in the top-right corner. For more information, see Copy to Clipboard.
in the top-right corner. For more information, see Copy to Clipboard.

PIR Item External ID
Once you add an External ID to the PIR Item, ![]() becomes clickable.
becomes clickable.
Clicking this button displays the ‘Set Entity URL’ dialog, paste a link to the relevant ServiceNow or defect management application record, and click ![]() .
.

Once saved, you can open the record link in a new browser tab by clicking ![]() .
.