
Release Setup allows administrators to customize the way Releases are handled in Plutora.
Customize Release Setup
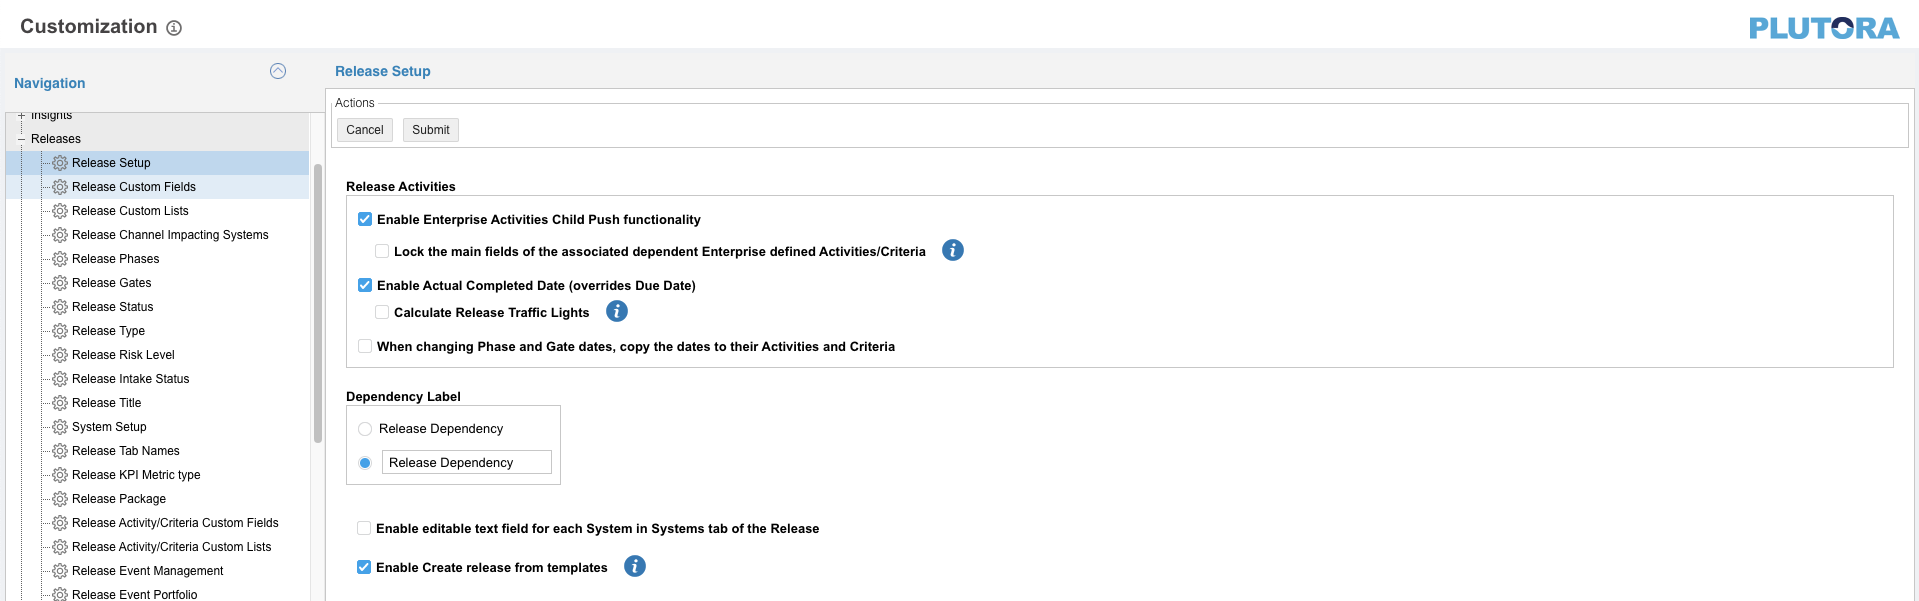
To customize Release Setup:
- Go to Settings
 > Customization > Releases.
 - Click Release Setup.
- Click to select one or more of the following checkboxes:
- Enable Enterprise Activities Child Push Functionality: Puts child Push buttons onto Enterprise Releases, allowing the Enterprise Release’s Activities and Criteria to be pushed to the child Releases.
- Release Dependency Association: Locks the Activities and Criteria that have been pushed to child Releases so that ID, Title, Description, Type and Assigned to Phase/Gate can only be edited from the Enterprise Release.
The Enable Child Releases to inherit Parent Release Data checkbox has been removed and replaced by the new Phases/Gate Migration pop up in Project and Independent Releases.
- Release Dependency Association: Locks the Activities and Criteria that have been pushed to child Releases so that ID, Title, Description, Type and Assigned to Phase/Gate can only be edited from the Enterprise Release.
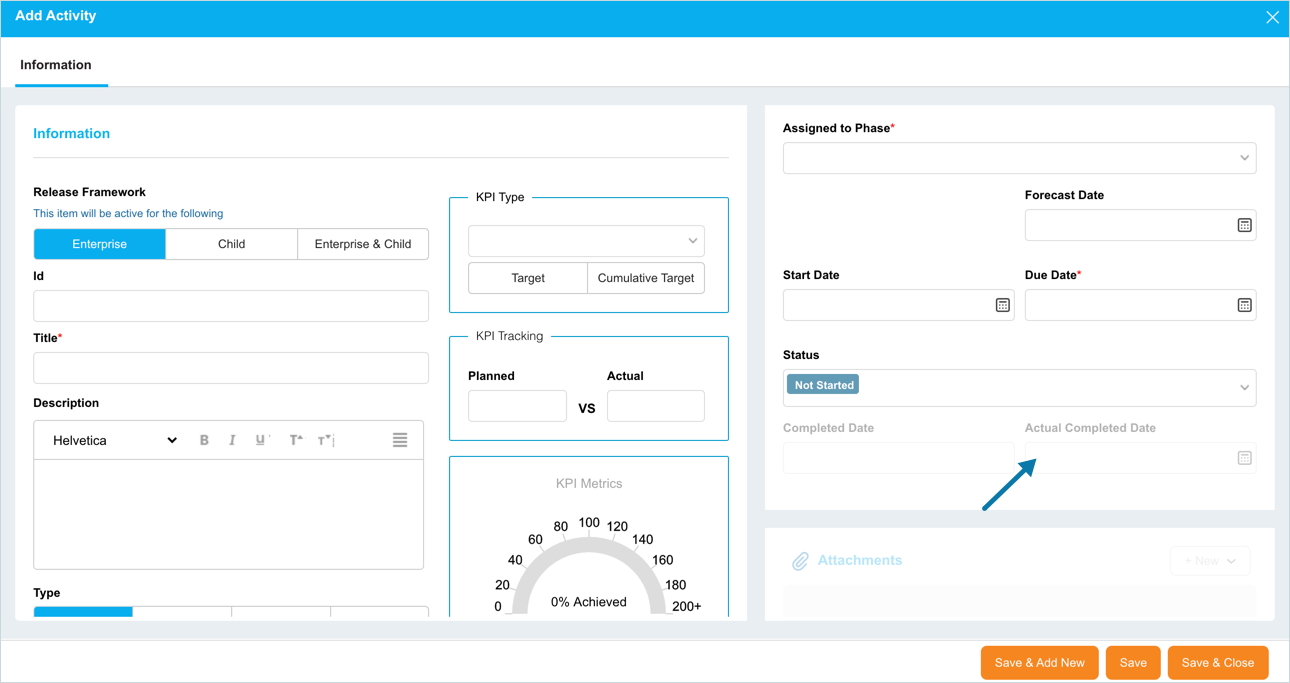
- Enable Actual Completed Data (Overrides Due Date):
- Makes the Actual Time Completed field editable when adding or editing a Release Activity for Enterprise, Project, or Independent Releases if:

- A Completed Status is selected.
- See Release Status Customization for more information about Release Status end states.
- Allows Actual Time Completed column in Release Activities to override the date and time in the End column.
- Calculate Release Traffic Lights:
- Allows Actual Time Completed column in Release Activities to override the End Date and time for Traffic Lights.
- When selected, Phases or Gates that have Activities that have an Actual Time Completed that is on time will have a green traffic light.
- Calculate Release Traffic Lights:
- Makes the Actual Time Completed field editable when adding or editing a Release Activity for Enterprise, Project, or Independent Releases if:
- When changing Phase and Gate dates, copy the dates to their Activities and Criteria: When Phases or Gate dates are updated, the corresponding dates of their Activities and Criteria will be copied to the new Phase and Gate dates.
- Enable Enterprise Activities Child Push Functionality: Puts child Push buttons onto Enterprise Releases, allowing the Enterprise Release’s Activities and Criteria to be pushed to the child Releases.
- Dependency Label: Administrators can change the label of the Dependency field in Project, and Independent Releases:
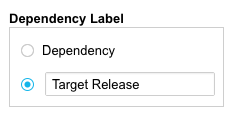
- Click the Dependency radio button to keep Dependency as the field name.
Or: - Click the second radio button and type a new field name.
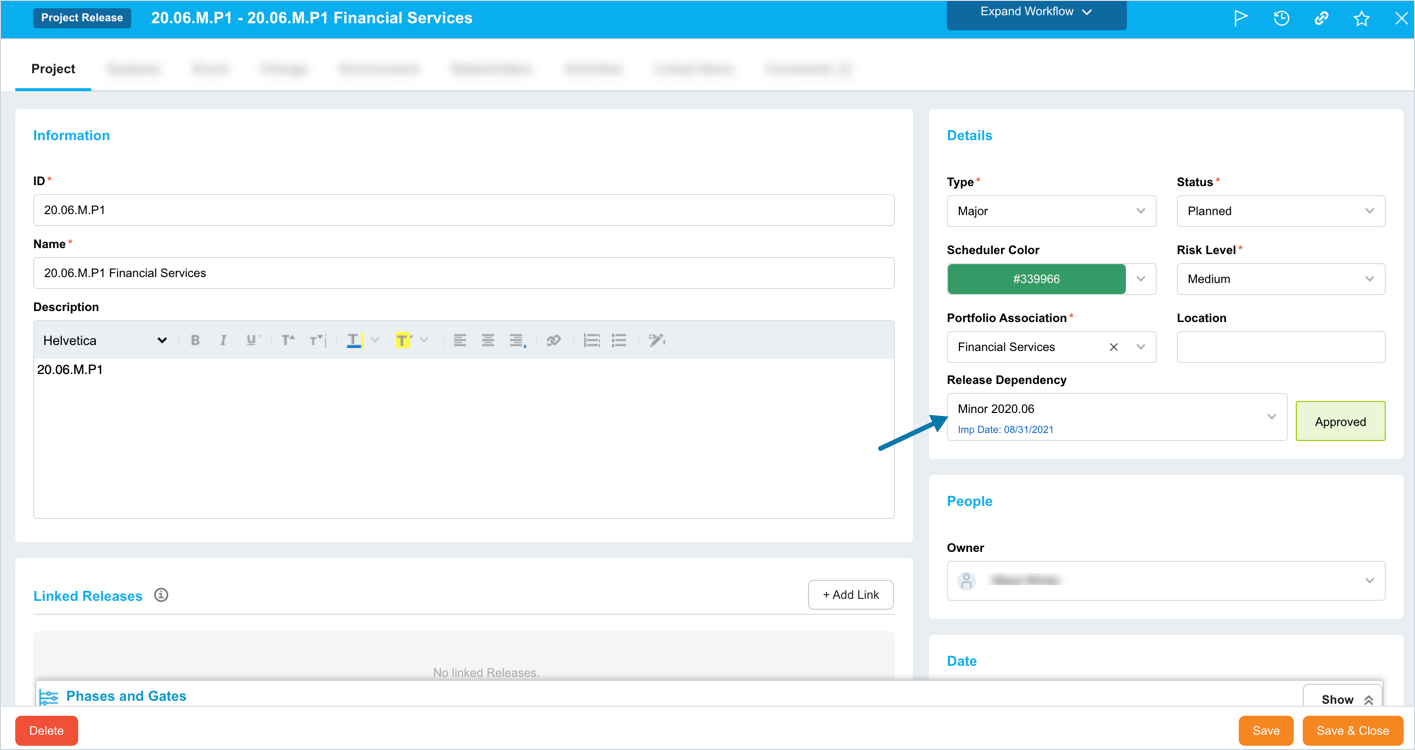
Maximum field length is 18 characters. - This field affects the title of the Release Dependency field in the first tab of Project and Independent Release pop-ups.
- Click the Dependency radio button to keep Dependency as the field name.
- Toggle the visibility of the editable text field for each System under the Systems Tab in the Enterprise, Project, and Independent Release pop ups:
- Click to select the Enable editable text field for each system in systems tab of the release checkbox.
- Type a Field Name for the free text column.
To locate the editable text field go to Release > Manager > Click the Releases toggle button (if present) > Click to open a Release > Click Systems Tab and the text field column will appear in the right-hand panel for each selected System.*NEW* Release Templates added.
- Click to select Enable Create release from templates checkbox to display the Releases Templates toggle button in Release Manager and let users with the correct permissions use Release Templates to create Releases.
- Click Submit.
The yellow Your changes have been saved pop up opens and closes.
If you click away from the Customization page without clicking Submit, your changes will not save.

![]()