Introduction
Pre-requisite
Navigation
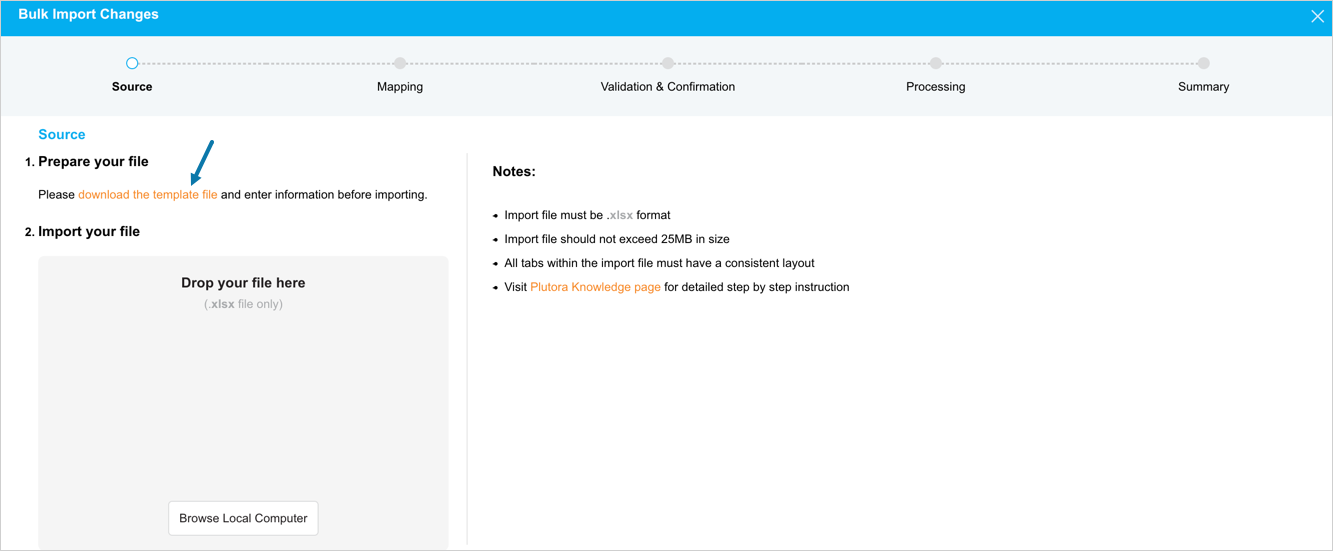
Bulk Import Changes pop-up displays. Follow the below steps to Bulk Import Changes.
Source Tab
Download the Excel import template file
Download the import template so you can start adding the data to be imported. To download the import template, click the download the template file link. The template will contain a column for every field, including Change Custom Fields.
Fill the Excel file
Add your Change data to the downloaded template file.
Format requirements:
- Supported date formats are:
- DD/MM/YYYY (22/03/2019)
- DD/M/YYYY (22/3/2019)
- D/M/YYYY (9/03/2019)
- MM/DD/YYYY (03/22/2019)
- M/DD/YYYY (3/22/2019)
- M/D/YYYY (03/9/2019)
- YYYY/MM/DD (2019/03/09)
- Supported date and time formats are:
- DD/MM/YYYY HH:MM AM or PM (22/03/2019 09:00 PM)
- DD/MM/YYYY HH:MM (22/03/2019 21:00)
- MM/DD/YYYY HH:MM AM or PM (03/22/2019 09:00 PM)
- MM/DD/YYYY HH:MM (03/22/2019 21:00)
If seconds are present, they will be truncated.
- Supported time formats are:
- HH:MM AM or PM (09:00 PM)
- HH:MM (21:00)
If seconds are present, they will be truncated.
Check for duplicates: Change records with the same Name and Portfolio Association will be skipped at import with the error: Change Name already exists for this Portfolio.
Fill in all mandatory core and custom fields.
Change records with bad formatting, missing data, or other errors will be handled by:
- Mandatory core and custom fields: Being skipped at import and an error being logged.
- Non-mandatory custom fields: Being imported without that data and a warning being logged.
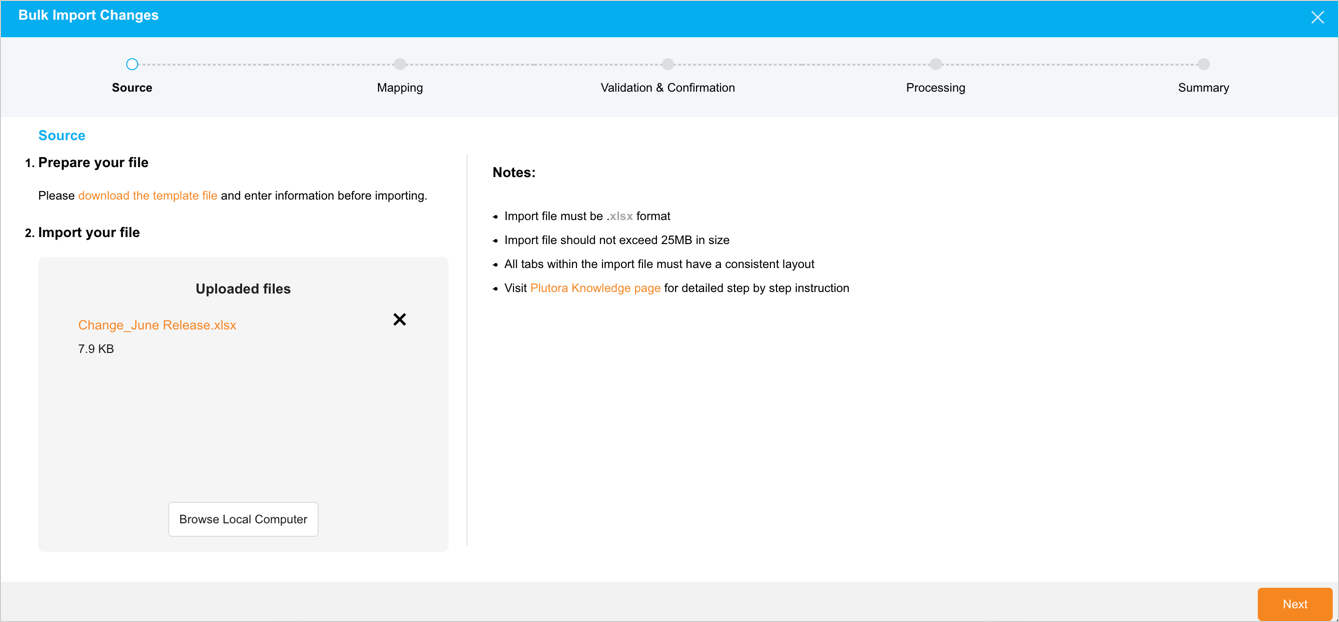
Upload the Excel file
To upload your Excel file to Plutora:
Mapping tab
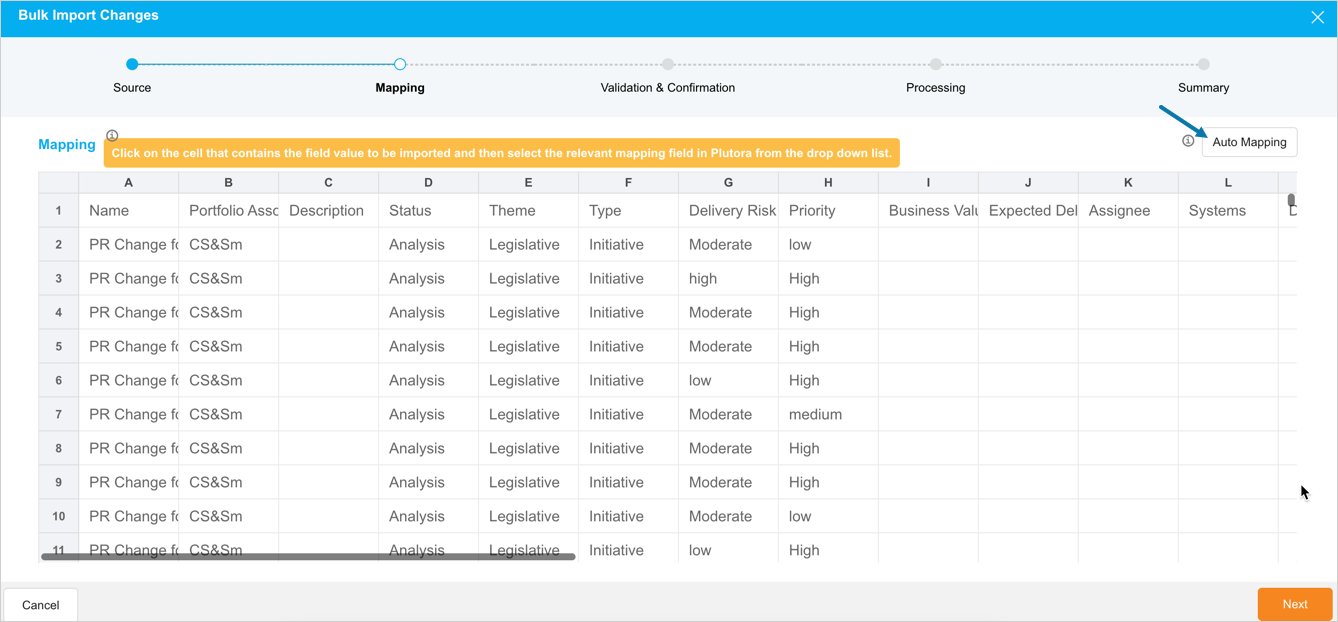
Once your Excel file has been uploaded, you must map each column of your data to a field in Plutora.
Auto Mapping: Auto Mapping saves time by automatically matching column headings with Plutora’s field names. The Excel template file should map perfectly if the column headings are unedited and no Change Custom Fields have been added since the template was downloaded.
Manual Mapping: Manually map your data when
- You only want to import mandatory fields, not custom fields.
- Your Excel file column heading cells do not match Plutora’s fields.
Auto Mapping
To map your data automatically, click ![]() . All columns display the mapped data.
. All columns display the mapped data.
A warning pop-up will show if any required or non-required field has not been mapped ‘The import will not proceed if any required fields have not been mapped.’ In such a case, close the pop-up, then click Cancel, and upload an edited Excel file again.
To remove manual mappings, click ![]() .
.
Manual Mapping
To map manually,
- Click a cell. A map value pop-up opens with the column value. For example, Column G.
- Click the map value pop-up.
- The ‘Copy values from’ pop-up opens. Select a field from where the column data should be copied on the Select a field drop-down.
- Field names are in alphabetical order, mandatory fields first.
- Fields with * are mandatory and must be mapped for the upload to proceed.
- Once a field is selected, the pop-up closes.
- Continue matching columns to fields until all mandatory fields and as many other values as necessary are mapped.
- Once the mapping is done, click
 .
.
To remove manual mappings, click ![]() .
.
Validation & Confirmation tab
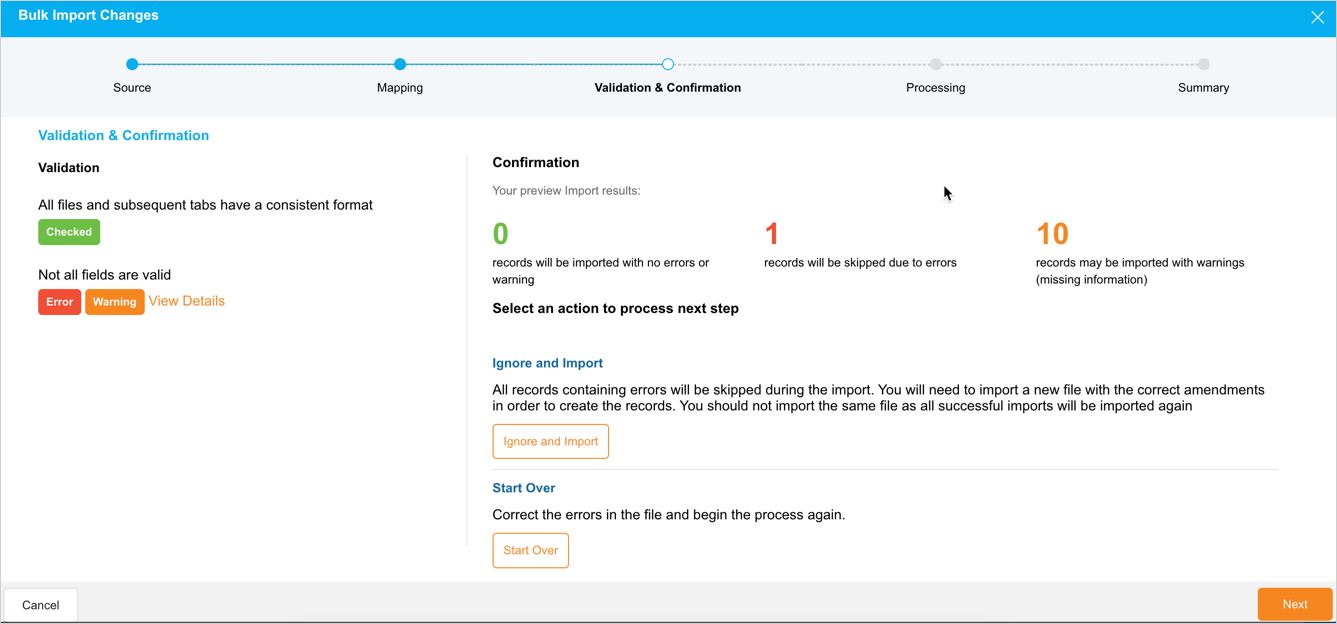
After clicking ![]() , the Validation & Confirmation tab will open and the data will be validated.
, the Validation & Confirmation tab will open and the data will be validated.
Then the ‘Confirmation’ message will open.
Click View Details under the Validation & Confirmation section to see more information about the import:
- Errors (such as incorrect formatting) in mandatory fields will result in the record being skipped.
- Errors in non-mandatory fields will result in the record being imported with warnings.
Under the Confirmation section, the numbers may not add up to the total number of records, as the same record can be skipped and have warnings at the same time.
Click ![]() to ignore the warning messages and proceed with the import or click
to ignore the warning messages and proceed with the import or click ![]() to start the import again.
to start the import again.
Processing tab
The file import processes, showing the percentage completed.
Summary tab
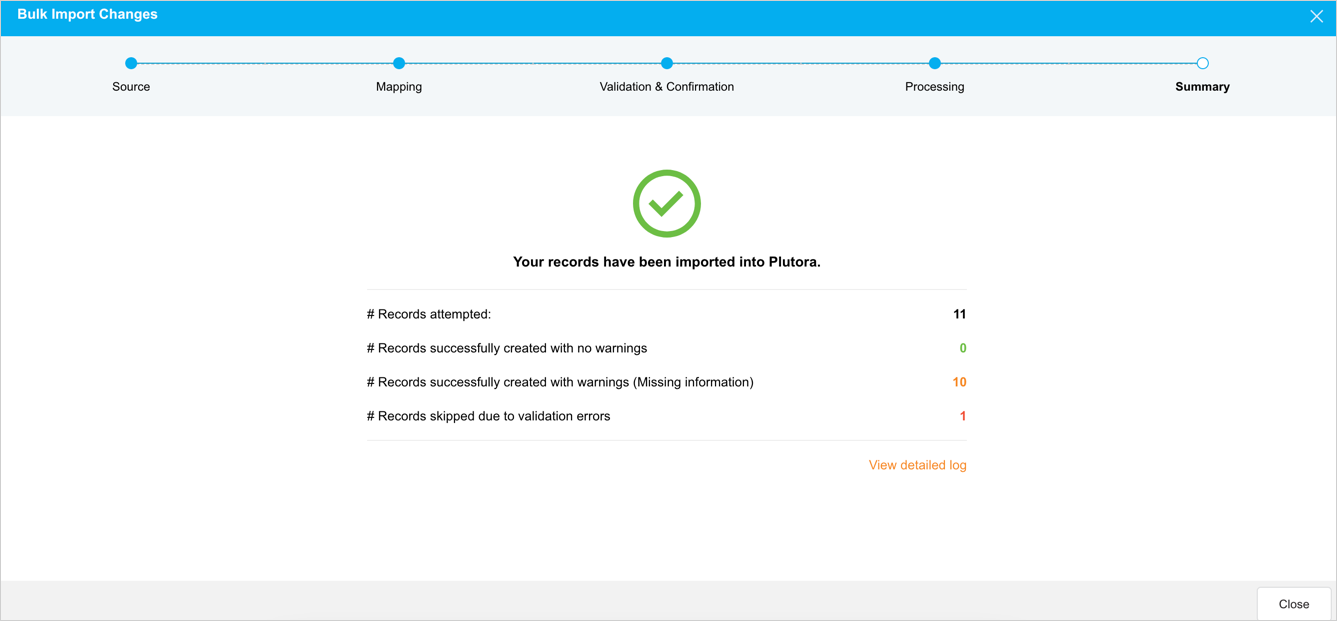
The Summary tab opens with an overview of the data imported and the error messages.
Click View detailed log to see the full list of records successfully created without warnings, the records created with a warning (for example, a missing value for a non-mandatory field), and records skipped and not created due to errors.
You have now bulk imported the data in your Excel file to Plutora. Click Close.


