Navigation
Settings ![]() > Customization > Environments > Environment Setup
> Customization > Environments > Environment Setup
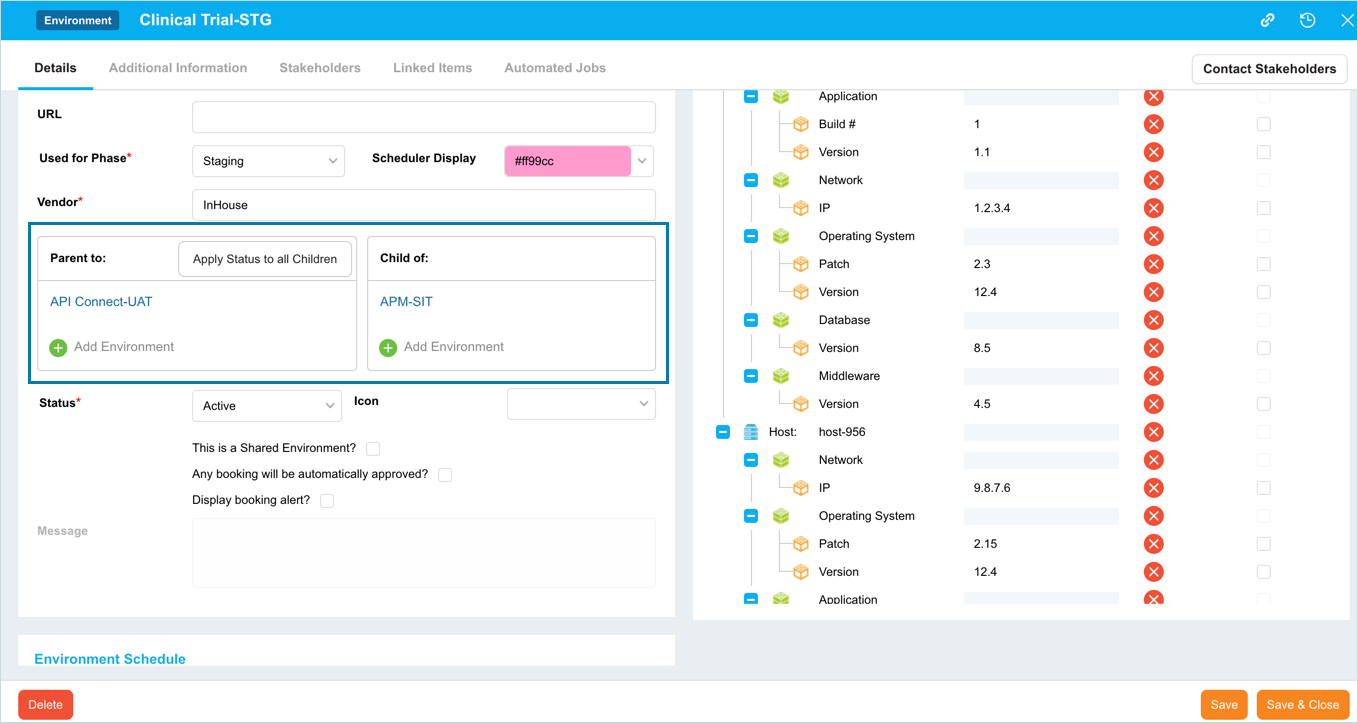
Toggle Linked Environments
To toggle Linked Environments feature on and off:
- Navigate to the ‘Customization’ page and double-click Environments.
- Click Environment Setup. ‘Environment Setup’ page displays.
- To turn linked Environments on, select the Enable Sub-Environments checkbox.
- Click
 .
.
Your changes will be saved and a confirmation message will display.
To turn linked Environments off deselect the Enable Sub-Environments checkbox and Click ![]() .
.

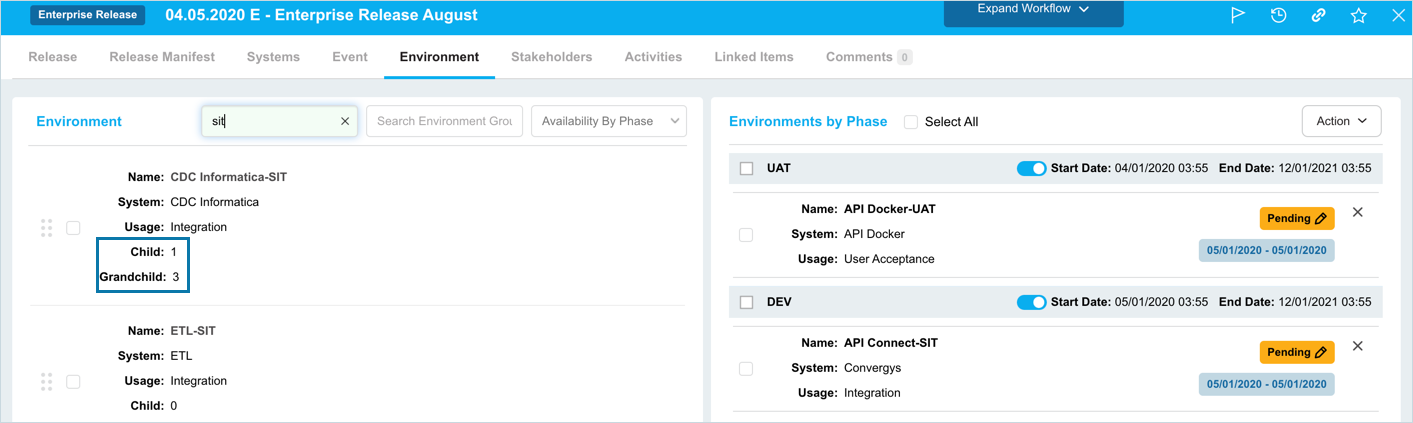
Environment Schedule
To set the default values in Environment Schedule Environment Group View navigate to the ‘Environment Setup’ page.
If you click Release in ‘Show Release/TEBR Information’:
- Clicking Release in ‘Show Release/Env. Group Color Scheme’: TEBRs and Environment Bookings appear in the Environment Schedule Environment Group view as rectangles showing the selected Release Color Scheme color.
- Clicking Env. Group in ‘Show Release/Env. Group Color Scheme’:
- Environment Bookings made through TEBRs that are associated with Releases are flagged with a triangle on their bottom-left corner in Environment Schedule Environment Group view.

- Environment Group bookings appear as rectangles in Environment Schedule Environment Group view showing their Environment Group color.
- Environment Bookings made through TEBRs that are associated with Releases are flagged with a triangle on their bottom-left corner in Environment Schedule Environment Group view.
If you click TEBR in ‘Show Release/TEBR Information’:
- Clicking Release in ‘Show Release/Env. Group Color Scheme’:
- TEBRs appear as rectangles in Environment Schedule Environment Group view that are the color of their TEBR Type, with a color bar at the bottom showing their TEBR Status color.

- Environment bookings appear as rectangles in Environment Schedule Environment Group view showing their Release Color Scheme color below.
- TEBRs appear as rectangles in Environment Schedule Environment Group view that are the color of their TEBR Type, with a color bar at the bottom showing their TEBR Status color.
- Clicking Env. Group in ‘Show Release/Env. Group Color Scheme’:
- TEBRs appear as rectangles in Environment Schedule Environment Group view the color of their TEBR Type, with a color bar at the bottom showing the color of their TEBR Status.
- Environment Group bookings appear as rectangles in Environment Schedule Environment Group view showing their Environment Group color.
Select a color from the Release Color Scheme drop-down menu or enter a Hex value. Click ![]() .
.
Your changes will be saved and a confirmation message will display.
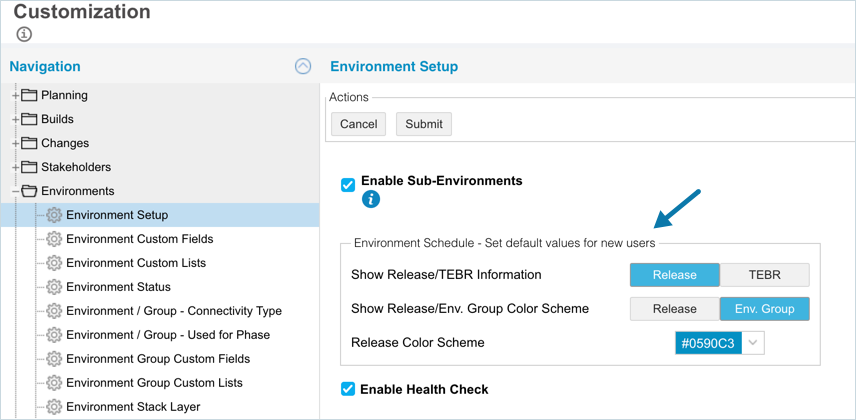
Enable Health Check Dashboard
Health Check Dashboard will provide a view of Environment health.
To enable Health Check Dashboard:
- Select Enable Health Check checkbox.
Click
.
Your changes will be saved and a confirmation message will display.