
Navigation
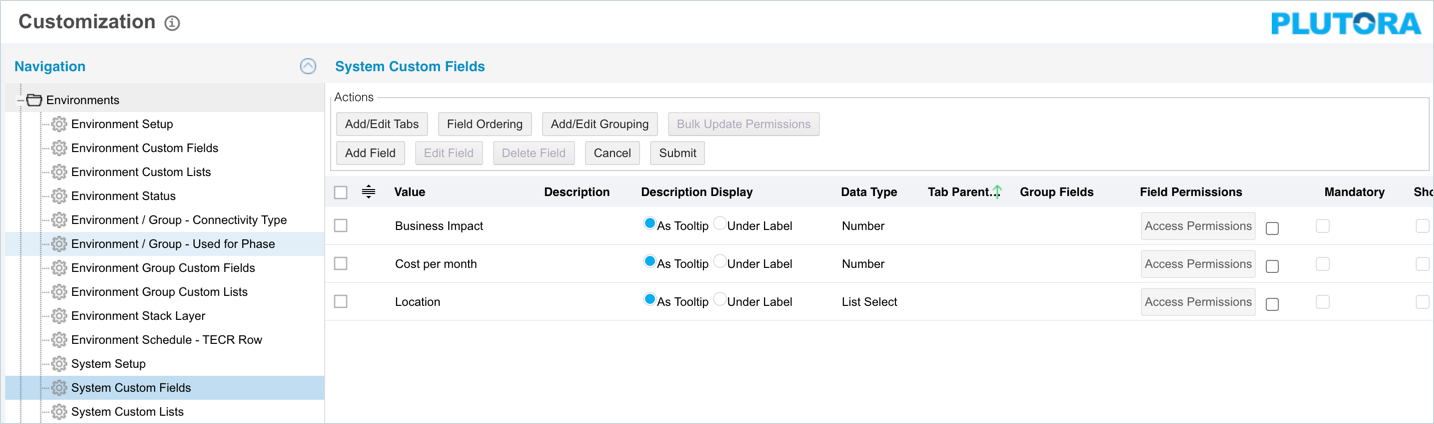
Settings ![]() > Customization > System > Custom Fields
> Customization > System > Custom Fields
Add or Edit a System Custom Field
- Navigate to the ‘Customization’ page and click System.
- Click Custom Fields.
- To add a new field, click
 . The system adds a line on the grid for the new field. To edit an existing custom field, search and click on the custom field from the grid and then click
  .
. - Enter/update the following details:
- Click
 .
.
Add, Edit or Delete Tabs
To manage custom field tabs on the ‘Additional Information’ tab on the System dialog:
On the ‘Customization’ page, navigate to System > Custom Fields. Click ![]() . ‘Add/Edit Custom Field Tabs’ display.
. ‘Add/Edit Custom Field Tabs’ display.
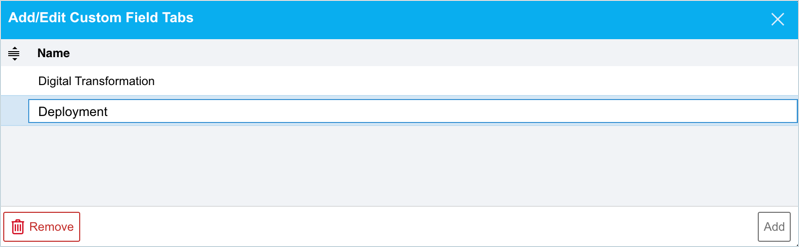
- To add a tab: Click
 and enter the new tab name.
 - To edit a tab: Double click the tab that you want to edit and make changes.
- To delete a tab: Select the tab that you want to delete and then click
 .
.
Close the pop-up by clicking the X at the top-right corner. You can view the changes by clicking the Tab Parent column.
Add, Edit, or Delete Groupings
To manage custom field groups on the Additional Information panel on the System dialog:
On the ‘Customization’ page, navigate to System > Custom Fields. Click ![]() . ‘Add/Edit Custom Field Grouping’ display.
. ‘Add/Edit Custom Field Grouping’ display.
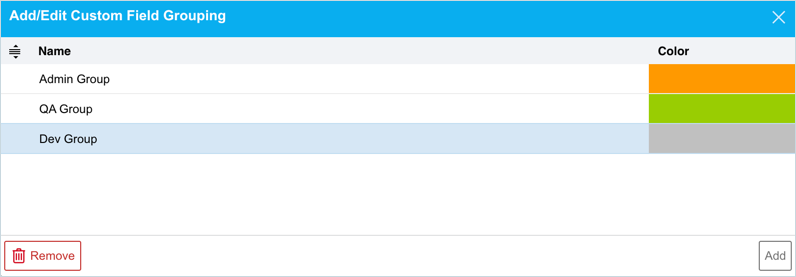
- To add a grouping: Click and enter the new grouping name. Double click the Color column and select a color from the drop-down menu or enter a Hex value.
- To edit a grouping: Double click, then edit the grouping. Double click the Color column and select a color from the drop-down menu or enter a Hex value.
- To delete a grouping: Click to select the grouping. Click .
Close the pop-up by clicking the X at the top-right corner. You can view the changes by clicking the Group Fields column.
Bulk Update Permissions
To update the permissions of two or more System Custom Fields at once:
- On the ‘Customization’ page, navigate to System > Custom Fields.
- Select two or more custom fields (check the checkboxes)
- Click
 . The button will be greyed out until you select two or more checkboxes.
 - On the ‘Bulk Update Fields Permissions’ dialog, from the Select the permission type you would like to change drop-down menu select an option. For detail on these options, see Manage Field Permissions.
- Select an option from the By drop-down menu. For detail on these options, see Manage Field Permissions.
- Click
 .
.
The system updates the permissions and the ‘Customization’ page is back to display.
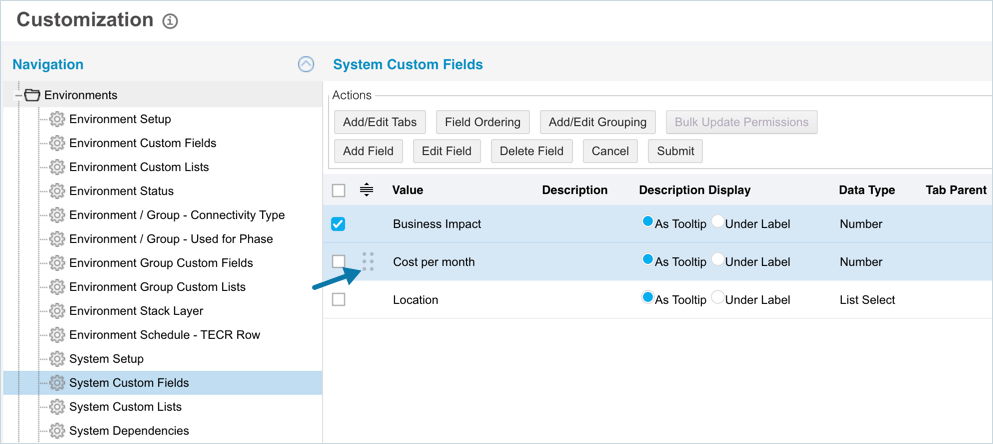
Sort System Custom Fields
Sort Manually
Sorting ‘System Custom Fields’ manually changes their order in the drop down menus
To sort manually:
- On the ‘Customization’ page, navigate to System > Custom Fields.
- Hover your mouse cursor over the sort column of the Value that you want to sort.
 appears.
 - Drag and drop the Value as you require.
- Click .

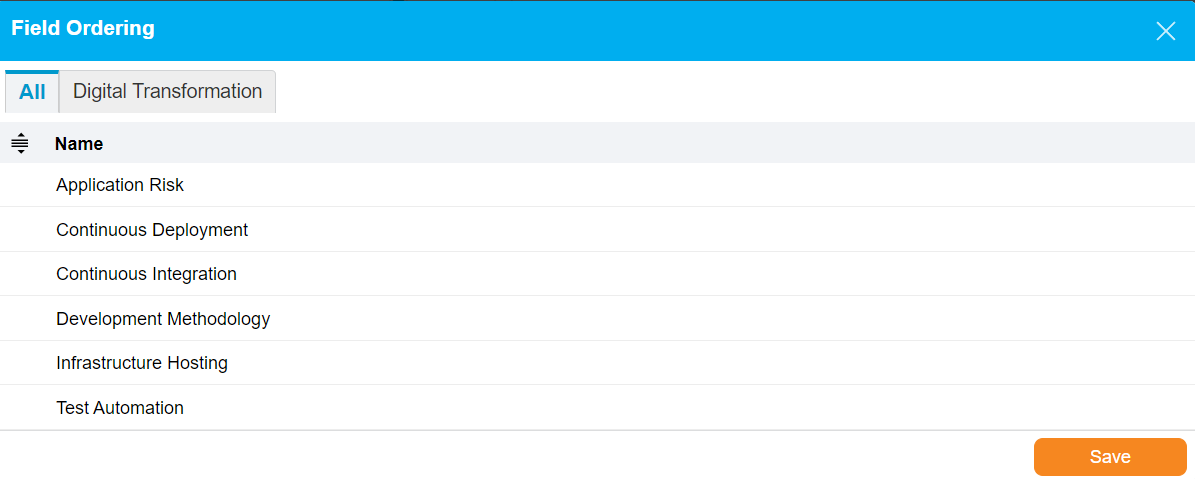
Sort Fields Inside Tabs
To sort the fields inside tabs:
- On the ‘Customization’ page, navigate to Custom Fields page.
- Click
 . ‘Field Ordering’ dialog displays.
 - Click the tab that you want to sort.
- Hover your mouse cursor over the sort column. appears.
- Drag and drop the field as you require.
- Click
 .
.
Delete System Custom Field
Deleting a System Custom Field will not delete it from the records. But it will no longer be available when adding or editing a System.
To delete a System Custom Field:
- Navigate to the ‘Customization’ page and double click Environments.
- Click System Custom Fields.
- Select the item that you want to delete or replace.
- Click
 .
. - Click .
Manage Field Permissions
Field Permissions set the view, edit, and hide permissions for each field:
- Click the checkbox next to
 to activate permissions.
 - Click . ‘Fields Permissions for field:…’ dialog display.
- From Select the permission type you would like to change drop-down menu select an option:

‘Submit’ Button
After making the required changes, ensure you click ![]() . If you click away from the ‘Customization’ page without clicking
. If you click away from the ‘Customization’ page without clicking ![]() , your changes will not save.
, your changes will not save.