
Setting up WS-Federation Services with SAML on Plutora
To set up WS-Federation Services with SAML on Plutora:
- Go to Settings > Customization > Site Settings.
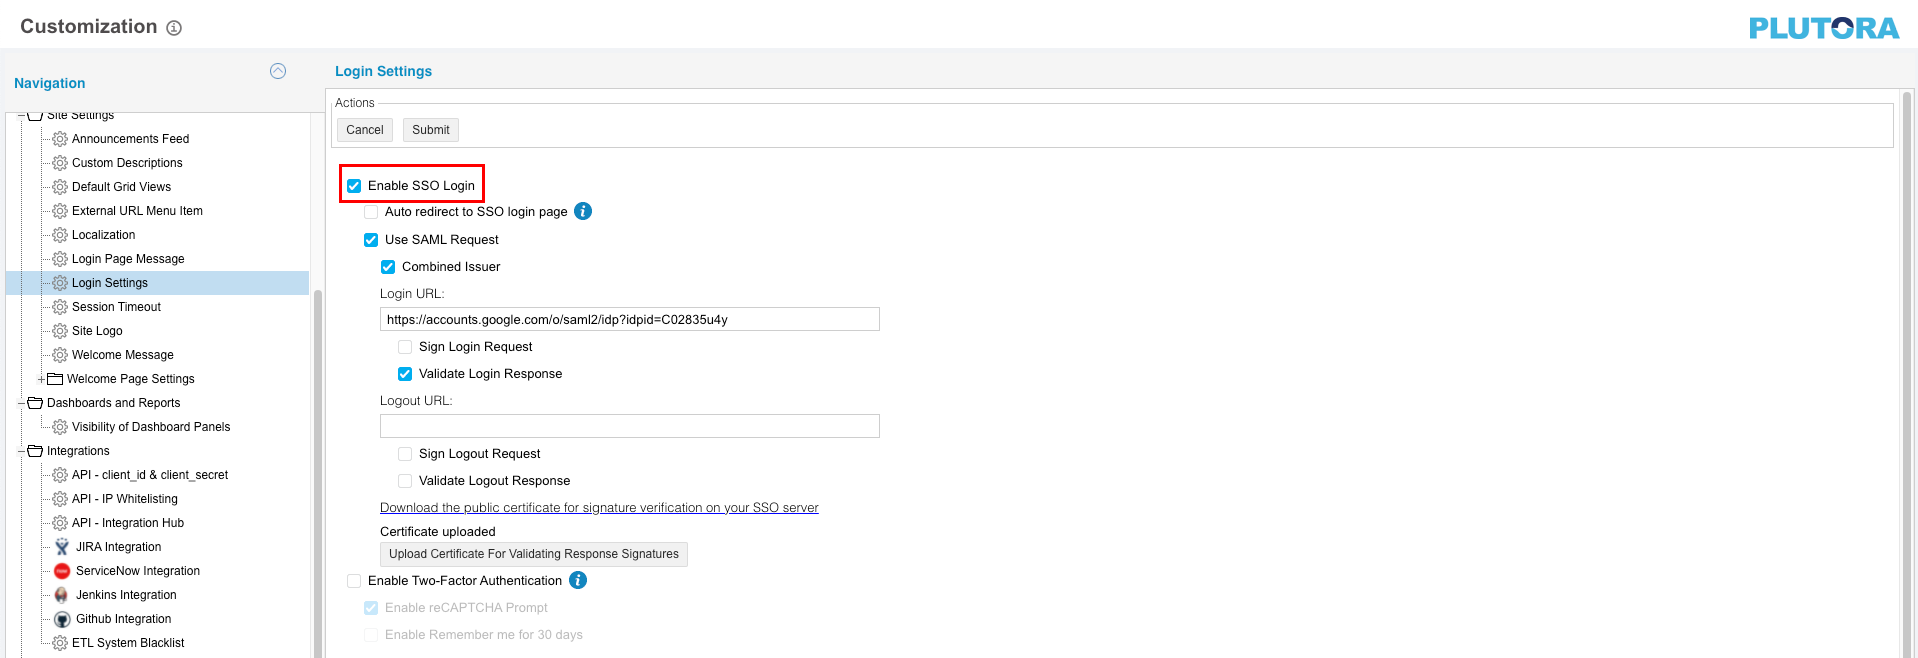
- Click Login Settings.
- Click to select the Enable SSO Login checkbox. Enable SSO Login makes the SSO Login button appear under the Plutora login form.

- Click to select the Use SAML Request checkbox.

- Click Submit.
- The yellow Your changes have been saved pop up opens and closes.
- If you click away from the Customization page without clicking Submit, your changes will not save.
- Users who log into Plutora for the first time using SSO are granted access that depends on the Requestor User Role. Administrators must update their account to give them the access they need.
- When making a bookmark to Plutora once SSO is set up, bookmark the direct link to Plutora (for example, https://companyname.plutora.com) rather than the IDP address (for example, https://idp-au.plutora.com/).

Setting Up Active Directory Federation Service (AD FS)
To set up AD FS so it can be used for Plutora with WS-Federation Services with SAML:
The following instructions assume that Active Directory and AD FS have already been installed on the server that will be your identity provider (IDP).
1a. Create an XML metadata file
First, create an XML metadata file.
1b. Import the XML file
To import the XML file into AD FS to create a new Relying Party Trust:
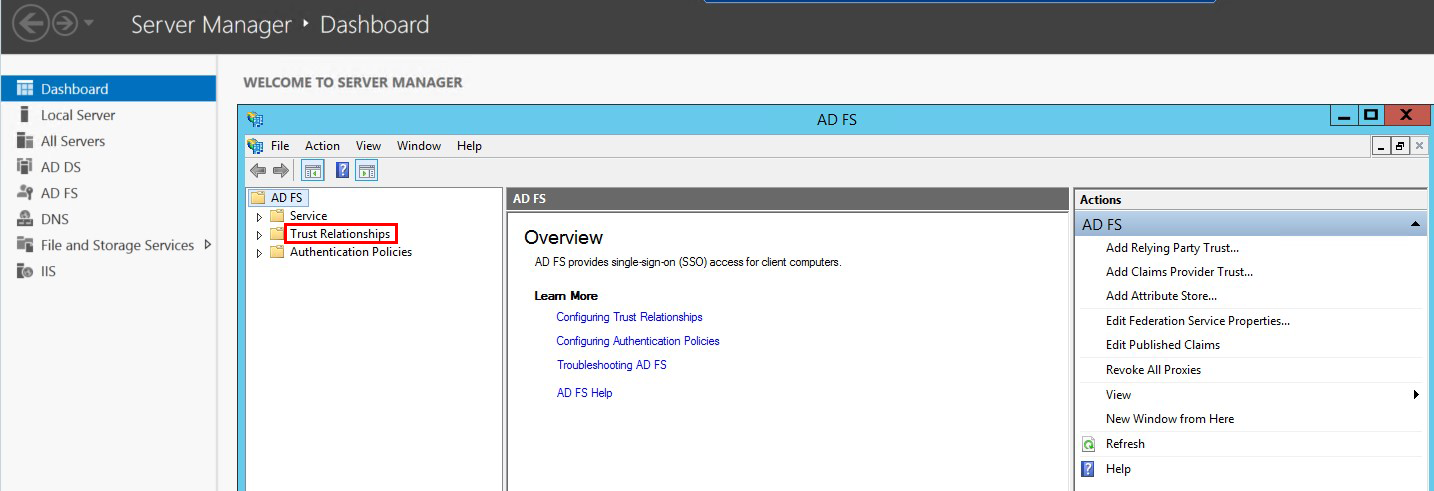
- Open AD FS on the server that has been set up to be the IDP.
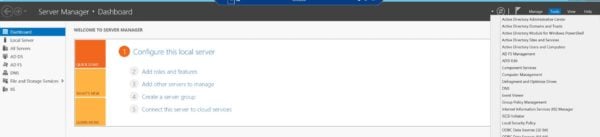
- Go to Server Manager > Dashboard > Tools > AD FS Management.
- Click Trust Relationships to open the folder.

- Right-click on Relying Party Trusts and select Add Relying Party Trust to open the Add Relying Party Trust Wizard.
- Click Start.
- Click to select the Import data about the relying party from a file radio button.
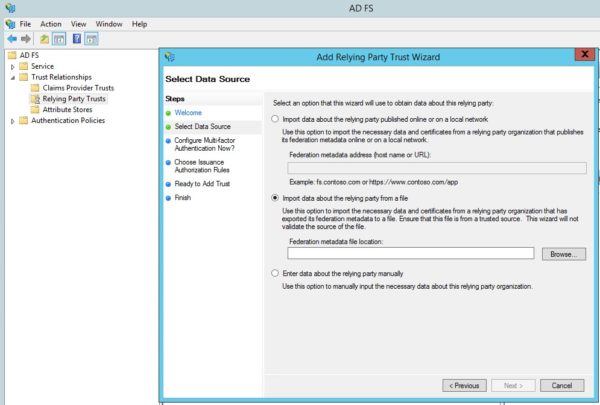
- Click Browse.
- Select the XML file you have just created and click Open.
- Click Next.
- Type the Display Name and Notes.
- Click Next.
- Click to select the I do not want to configure multi-factor authentication settings for this relying party trust at this time radio button. (If it isn’t selected already.)
- Click Next.
- Click to select the Permit all users to access this relying party radio button. (If it isn’t selected already.)
- Click Next.
- Click Next again on the Ready to Add Trust page.
- Click to select the Open the Edit Claims Rules dialog for this relying party trust when the wizard closes checkbox.
- Click Close on the Finish page.
The Edit Claims Rules pop up opens. - Edit the claim rules under the Issuance Transform Rules tab:
- Click Add Rule.
- Select Send LDAP Attributes as Claims from the Claim rule template menu.
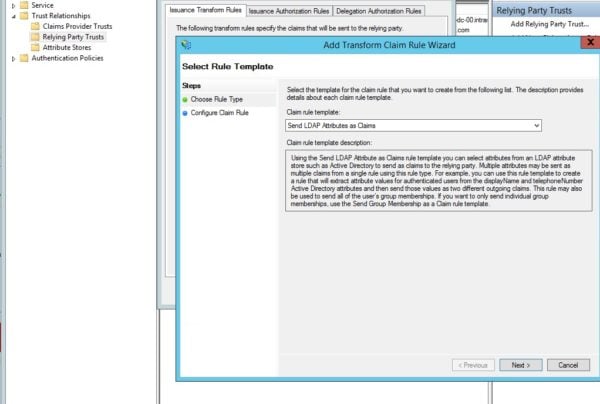
- Click Next.
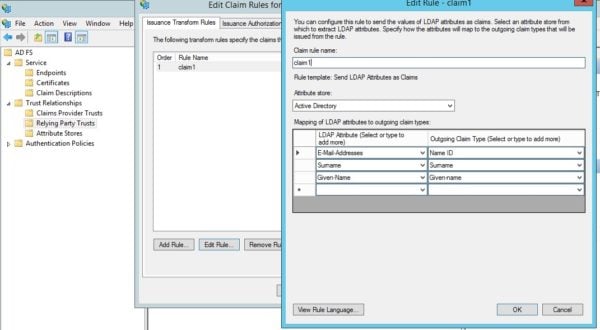
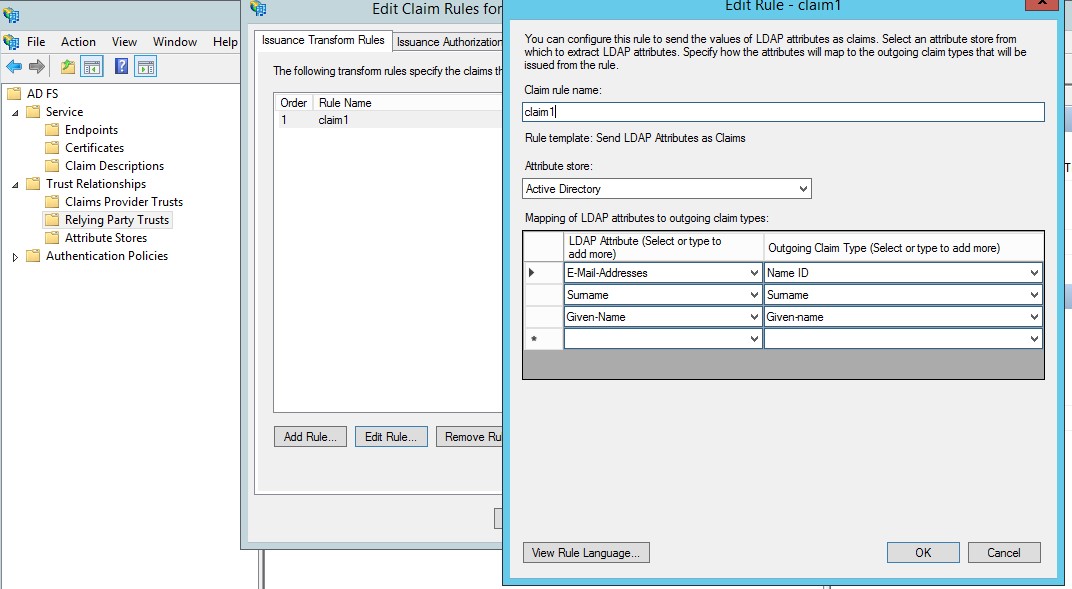
- Type a Claim rule name. (This could be something like Claim 1.)
- Select Active Directory from the Attribute store menu:
- Enter the data from f-k carefully, as a mismatch or extra space will prevent it from working.
- E-Mail-Address, Surname, and Given Name can be in any order, but they are case sensitive and should not contain any extra spaces.
- The LDAP Attribute is the information from the Activity directory database.
- The Outgoing Claim Type is the data that will be sent to the Plutora authentication system.
- The following attributes are mandatory:
- Select E-Mail-Addresses under LDAP Attribute.
- Beside E-Mail-Addresses select Name ID under Outgoing Claim Type.
- On the next row, select Surname under LDAP Attribute.
- Beside Surname, select Surname under Outgoing Claim Type.
- On the next row, select Given-Name under LDAP Attribute.
- Beside Given-Name, select Given Name under Outgoing Claim Type, then rewrite Given Name as Given-name.
- User Roles can now be set via SSO:
- To set User Roles:
- On the next row, select Roles under LDAP Attribute.
- Beside Role, select Roles under Outgoing Claim Type.
- User Roles are not mandatory.
- The following Names (case insensitive) can be used to set User Roles:
- UserRoles.
- Roles.
- UserGroups.
- Groups.
- Plutora will attempt to match User Roles to the ones on file. If no match is found, new users will be given the SSO Requestor Role and existing users will keep the roles that they already have
- To set User Roles:
- Click Finish.
- Click Apply.
- Click OK.


The XML file has now been imported.
1c. Get the Login URL
Once the XML file is imported, you can get the URL that will be pasted into the Login URL field in Login Settings Customization:
- Go to Server Manager > Dashboard > Tools > AD FS Management.
- Click the AD FS folder.
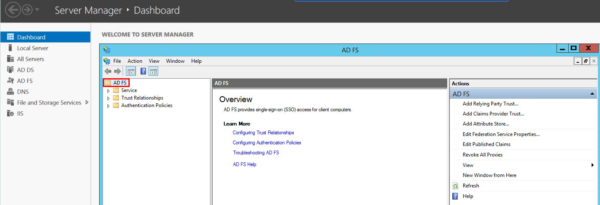
- Select Edit Federation Service Properties from the Action menu.
- Copy the Federation Service name.
- Paste the Federation Service name into the Login URL field in Login Settings Customization.The URL should begin with https and end with /adfs/ls/
For example, https://customerfederationservicename/adfs/ls/

1d. Troubleshooting
Mapping Issues
LDAP Attributes are mapped to Active Directory Attributes in the following way.
If you see the following error message in the login page:
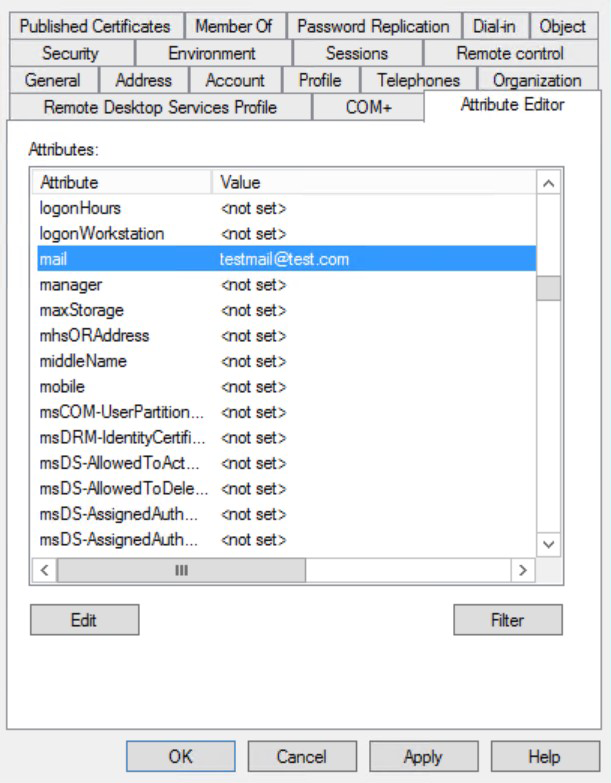
- The email address you’re using is not a valid email address: Check that Active Directory Attribute mail has been set.
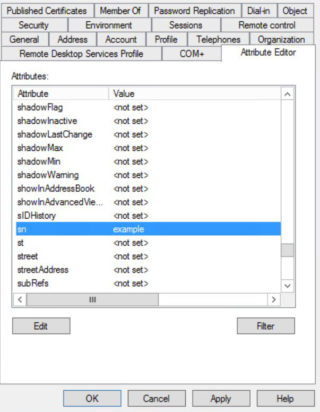
- No surname: Check that Active Directory Attribute sn has been set.
- No first name: Check that Active Directory Attribute givenName has been set.
User Issues
To check if the given name and surname of the users are present:
- Open AD FS on the server that has been set up to be the IDP.
- Go to Server Manager > Dashboard > Tools > Active Directory Users and Computers.
- Click a user name.
- Click the Attribute Editor tab. (If it isn’t selected already.)
- Check the following attributes of the user:
- mail

- sn
- givenName

- mail
- To edit the attributes (if necessary):
- Click to select the attribute.
- Click Edit.
- Edit the attribute in the pop up.
- Click OK.
- Click Apply.
- Click OK.


Server Issues
If your company has more that one Active Directory servers and an AD FS farm, ensure that they are all synced and working.