
See Quick Start Guide – Form Builder Customization for the context of this article. The previous article was 1b. Manage IM Form Size and the next article is 1d. Manage IM Form Builder Statuses.
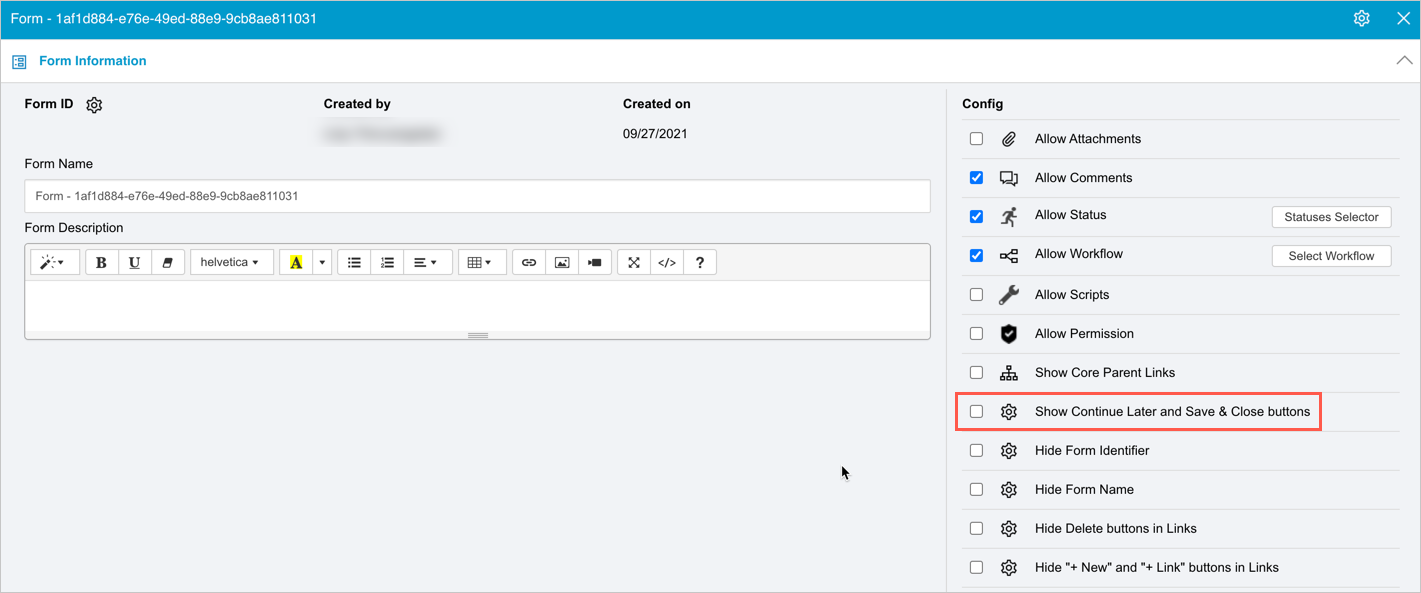
Administrators can manage the form name, whether the form can handle attachments, and much more under Form Information.
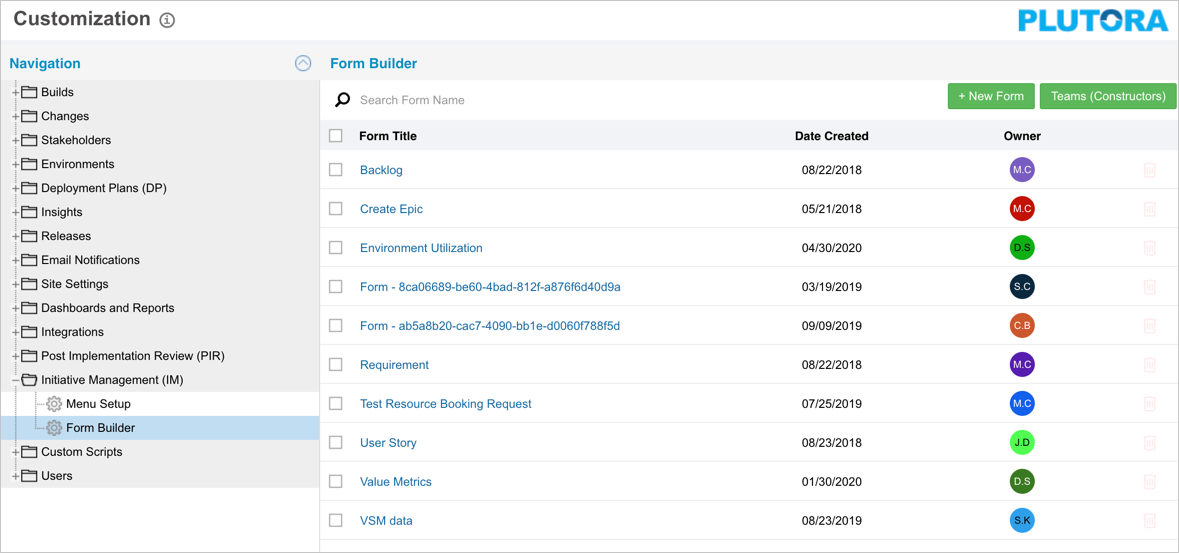
Manage IM Form Information
To manage form information:
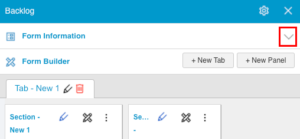
- Click the Form Information menu button.
- Manage Form ID:
- Click the cogwheel-shaped button beside Form ID.


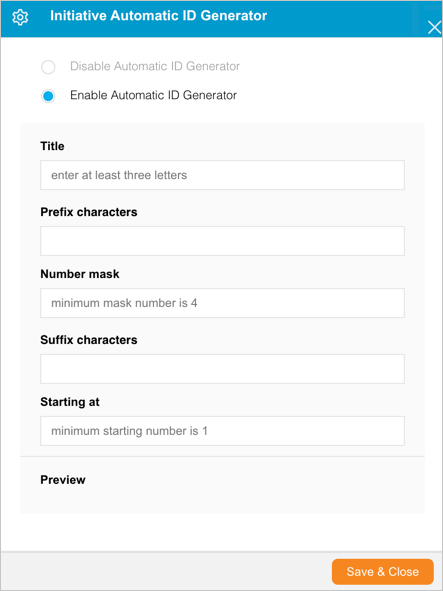
- Enable Form ID:
After Form ID has been enabled, each time form data is saved from this form, it will have a new form ID based on the form ID pattern.
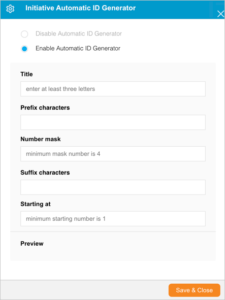
- Click to select the Enable Automatic ID Generator radio button.
- Type a Title. (Mandatory field.)
- Type the Prefix Characters: Prefix characters appear before the title, separated by a dash.
- Type the Number Mask: (Mandatory field.)
- Use the letter ‘n’ to represent the number of numbers.
- For example, nnnnn means the ID will have five numbers: 00456.
- The minimum is four numbers: nnnn.
- Type the Suffix Characters: Suffix characters appear after the title, separated by a dash.
- Type the minimum starting number in the Starting at field. The minimum starting number is 1. (Mandatory field.)
The Preview section shows an example of an automatically generated ID with the parameters in the form. - Click Save & Close.
- Disable Form ID:
When the automatic ID generator is disabled, forms will be given a globally unique identifier (GUID) instead.- Click to select the Disable Automatic ID Generator radio button.
- Click Save & Close.
- Click the cogwheel-shaped button beside Form ID.
- Type the Form Name. If no form name is specified, the automatically generated form number will be used.
- Type the Form Description.
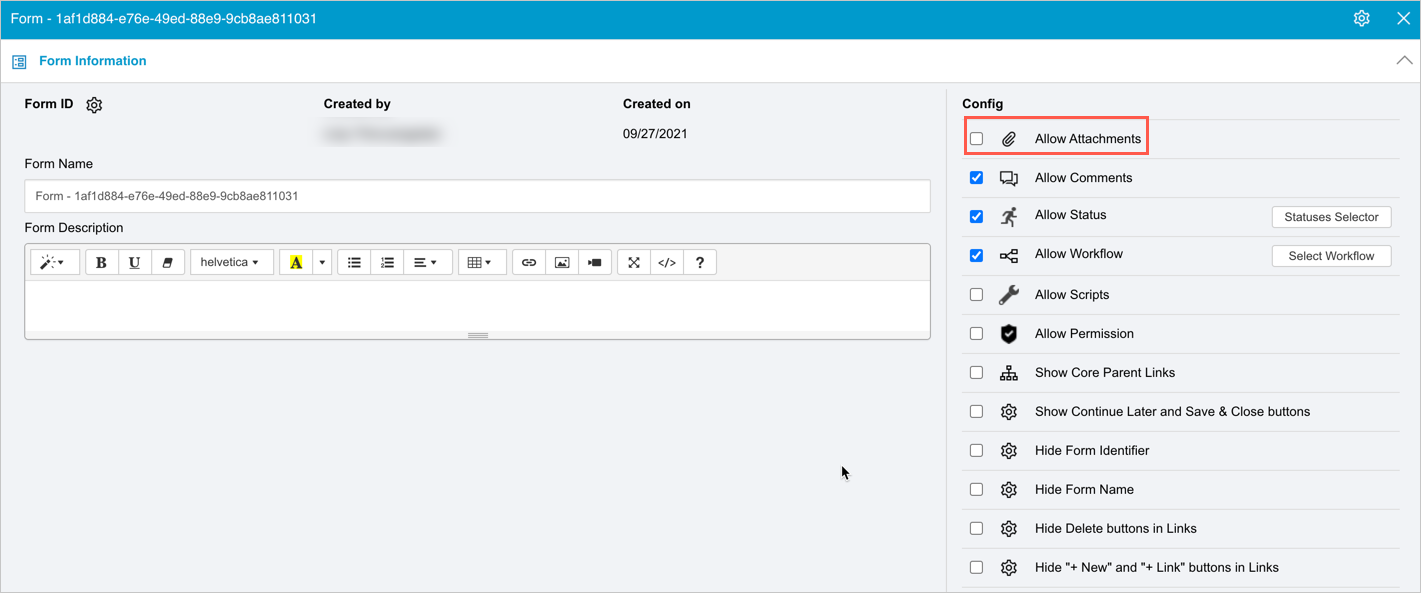
- Allow Attachments:
Initiative Management Form Instance attachments can now be managed in the external API.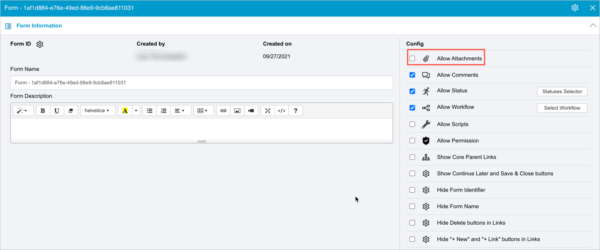
- Click to select the Allow Attachments checkbox to:
- Make the Attachments button appear on the form header.

- Allow users to upload attachments to the form by clicking the Attachment button.
- Make the Attachments button appear on the form header.
- Click to select the Allow Attachments checkbox to:
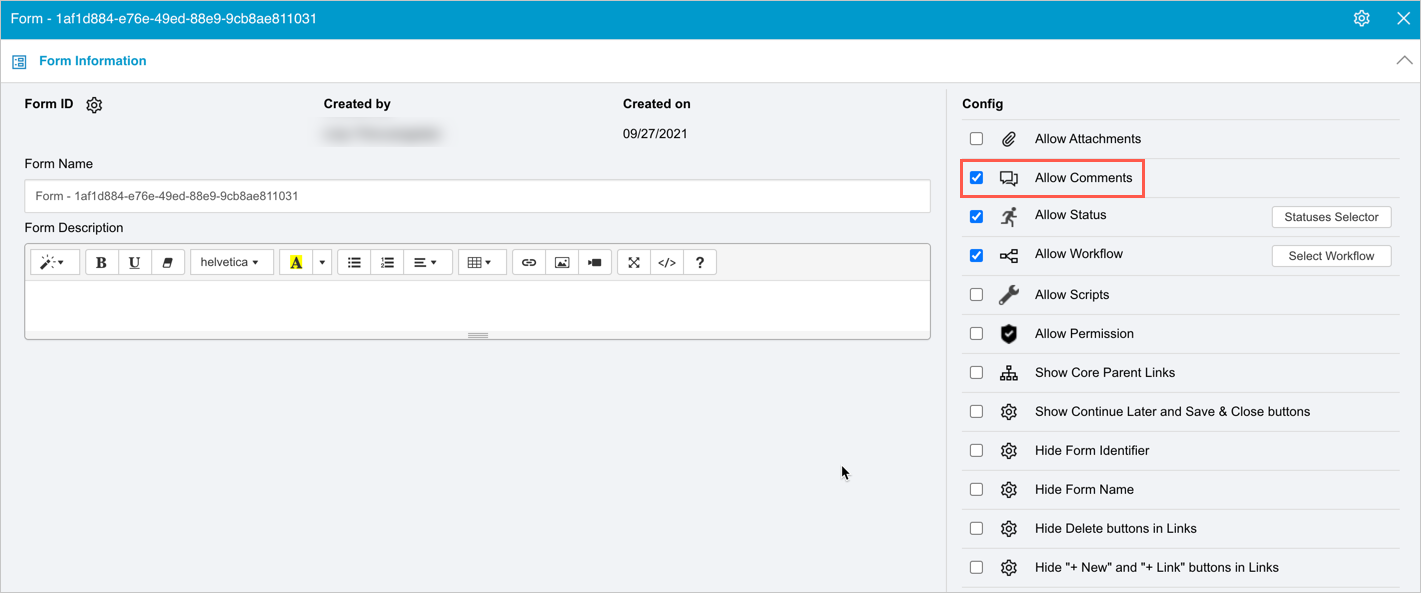
- Allow Comments:
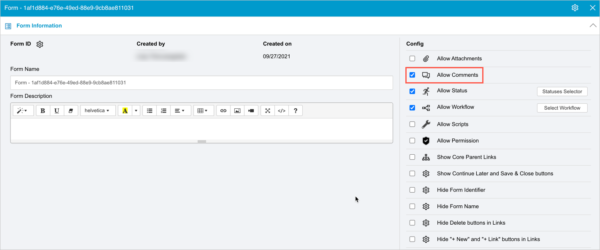
- Click to select the Allow Comments checkbox to:
- Make the Comments button appear on the form header.

- Allow users to add comments by clicking the Comments button, typing their comment, and clicking Send.
- Make the Comments button appear on the form header.
- Click to select the Allow Comments checkbox to:
- Allow Status: See Manage Form Builder Statuses.
- Allow Workflow: See Manage Form Builder Workflows.
- Allow Scripts: See Manage Form Builder Scripts.
- Allow Permission: See Manage Form Builder Permissions.
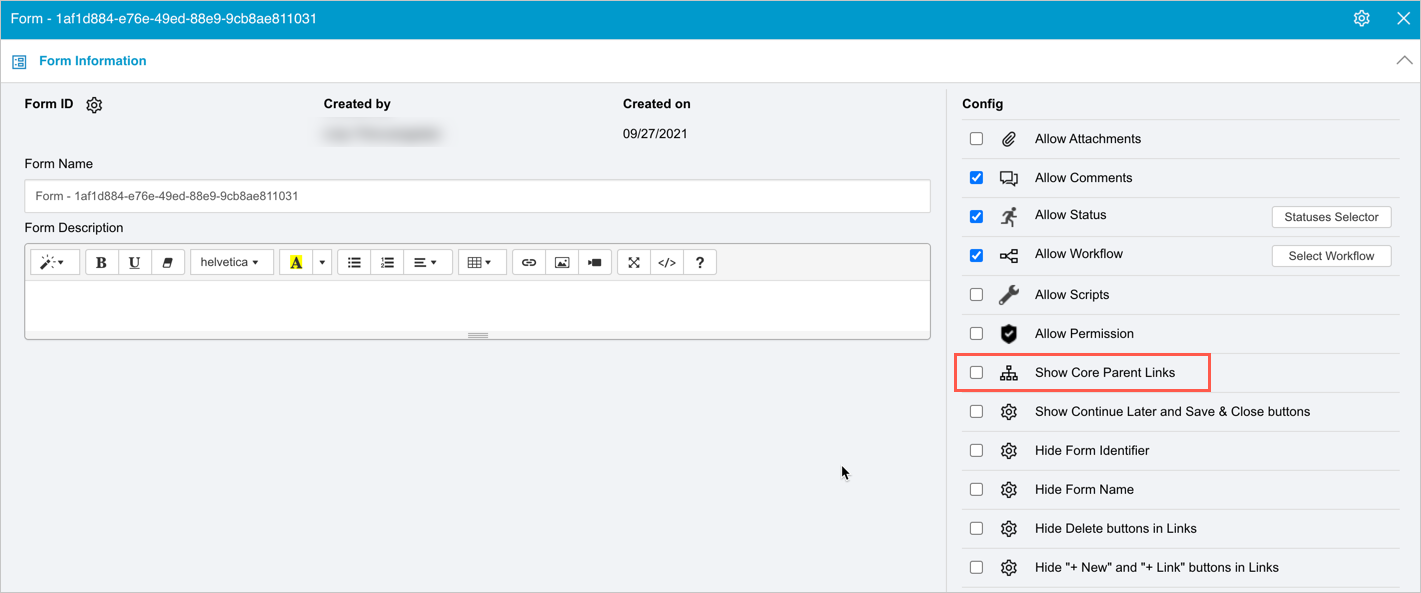
- Show Core Parent Links:
Initiative Management parent and child Form Instances can now be managed in the external API.
- Click the Show Core Parent Links checkbox to:
- Make a breadcrumb trail-like, clickable link to the Parent Form appear under the top-left corner of the form. (Under the form name and form identifier if they haven’t been hidden.)
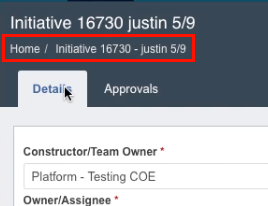
- Allow users to navigate back to the parent form from sub forms.
- Make a breadcrumb trail-like, clickable link to the Parent Form appear under the top-left corner of the form. (Under the form name and form identifier if they haven’t been hidden.)
- Click the Show Core Parent Links checkbox to:
- Show Continue Later and Save & Close buttons:
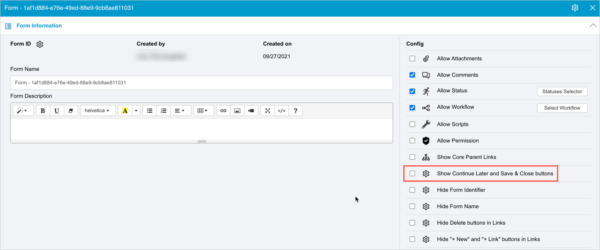
Form Builder has on-demand save. Most fields will save once the user clicks away, so it isn’t necessary to click a Save button. Administrators can still It is possible to toggle the Save & Close and Continue Later buttons.
- Click to select the Show Continue Later and Save & Close buttons checkbox to:
- Make Continue Later and Save & Close buttons appear at the bottom of the form.
- Continue Later buttons allow users to save the information that has been entered so that it will not be lost and the user can finish the form later.
- Click to select the Show Continue Later and Save & Close buttons checkbox to:
- Hide Form Identifier:
- Click the Hide Form Identifier checkbox to hide the form ID number on the top-left of the form.
- Hide Form Name:
- Click the Hide Form Name checkbox to hide the form name on the top-left of the form.
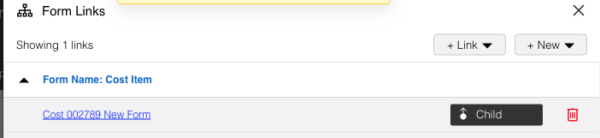
- Hide Delete button in Links:
- Click to select the Hide Delete buttons in Links checkbox to hide the red delete buttons next to each link in the list of form links so they cannot be deleted.
- Location of Links in the form header.

- Location of the red delete button in the Links pop up.

- Location of Links in the form header.
- Click to select the Hide Delete buttons in Links checkbox to hide the red delete buttons next to each link in the list of form links so they cannot be deleted.
- Hide “+ New” and “+ Link” buttons in Links:
- Click to select the Hide “+ New” and “+ Link” buttons in Links checkbox to hide the + Link and + New buttons in the Links menu so users cannot create new links.
- Location of Links in an IM form.
- Location of + Links and + New in the Links pop up.
- Location of Links in an IM form.
- Click to select the Hide “+ New” and “+ Link” buttons in Links checkbox to hide the + Link and + New buttons in the Links menu so users cannot create new links.
- Apply a mask over the content until Javascript code has completed:
- Apply a masking color over the top of content while Javascripts are running in the background. Prevents the changes the scripts are making from being visible and confusing users.
- Use minified scripts:
- Apply minification to scripts, making them run faster.
- Click to select the Show Core Parent Links checkbox to:
- Make the Links button appear on the form header.

- Allow users to view links to the parent and child IM forms and manage form links.
- Make the Links button appear on the form header.
- Possible Children: Selecting possible children locates the form in a hierarchy of forms. Links to other forms in the hierarchy can be made from Form Builder elements (such as buttons) or by scripts.
- Click to select child forms from the Possible Children drop-down menu.
- If the Show Core Parent Links checkbox is selected, these child forms will show the current form as their core parent.
- Click to select child forms from the Possible Children drop-down menu.
- Core Parents: Selecting core parents locates the form in a hierarchy of forms. Links to other forms in the hierarchy can be made from Form Builder elements (such as buttons) or by scripts.
- Click to select core parent forms from the Core Parents drop-down menu.


![]()