
Release Intake Statuses are part of the Release Intake workflow, where Child Releases added to Enterprise Releases go through an approval process.

Location of Intake Approval Workflow
To locate the Intake Approval Workflow:
- Go to Release > Manager.
- Click the Releases toggle button (if present).
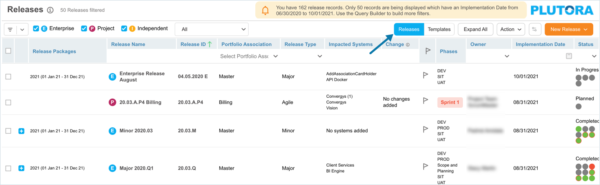
- Click to open an Enterprise Release.

Only Enterprise Releases have Intake Approval. Project and Independent Releases do not. - Click the Release Manifest tab.
- If there are no child Releases under the Enterprise Release Scope Manifest panel on the right, drag and drop Releases from the Available Items panel on the left into the Enterprise Release Scope Manifest panel:
- Child Releases start out with the default Intake Approval Status.
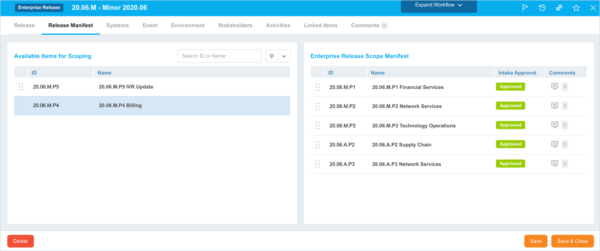
- Child Releases start out with the default Intake Approval Status.
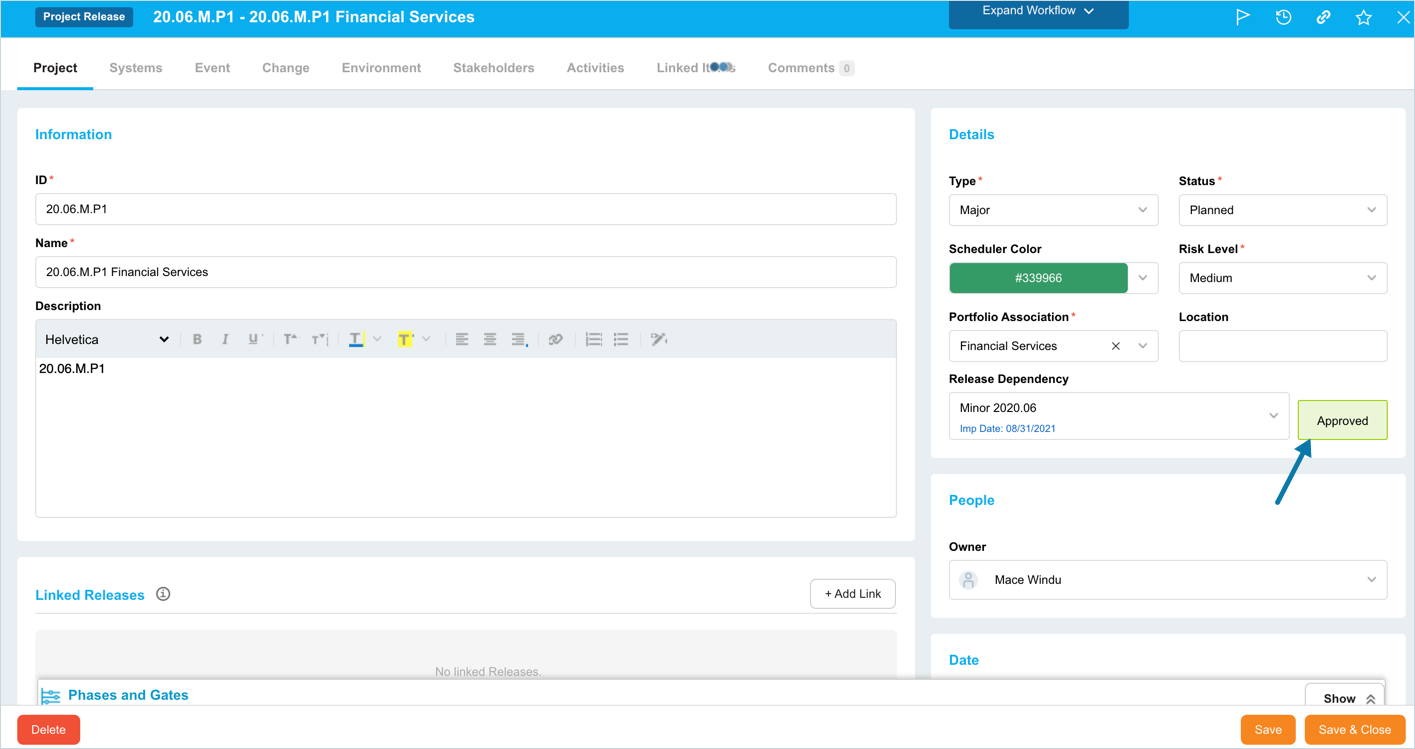
- Users with Update Release Intake Status user permission can click the Intake Approval, update the status, and click Save or Save & Close.
- The Intake Approval status then appears on the child Release beside the Release Dependency field.


Enable Intake Approval Workflow
Enabling Intake Approval Workflow means that Child Releases added to Enterprise Releases will have a default status, for example, Pending. The Child Releases must be approved before they are considered part of the Enterprise Release.
To enable Intake Approval Workflow:
- Go to Settings
 > Customization > Releases.
 - Click Release Intake Status.
- Click to select the Enable Intake Approval Workflow. (Project on-boarding to Enterprise release) checkbox.
- Click to select a Default State checkbox to make the item appear by default in the drop-down menu.
- Click Submit.
The yellow Your changes have been saved pop up opens and closes.
If you click away from the Customization page without clicking Submit, your changes will not save.
Once the Intake Approval Workflow is enabled, users with the Update Release Intake Status user permission will be able to approve Child Release intakes into an Enterprise Release
Add a Release Intake Status
To add a Release Intake Status:
- Go to Settings> Customization > Releases.
- Click Release Intake Status.
- Click Add Field.
- Type the new Release Intake Status.
- Click to select or deselect the Default State checkbox to make the item appear by default in the drop-down menu.
- Double click the Color column and select a color from the drop-down menu or enter a Hex value.
- Click Submit.
The yellow Your changes have been saved pop up opens and closes.
If you click away from the Customization page without clicking Submit, your changes will not save.
Edit a Release Intake Status
To edit a Release Intake Status:
- Go to Settings> Customization > Releases.
- Click Release Intake Status.
- Click to select the Release Intake Status.
- Click Edit Field.
- Edit the Release Intake Status.
- Click to select or deselect the Default State checkbox to make the item appear by default in the drop-down menu.
- Double click the Color column and select a color from the drop-down menu or enter a Hex value.
- Click Submit.
The yellow Your changes have been saved pop up opens and closes.
If you click away from the Customization page without clicking Submit, your changes will not save.
Sort Release Intake Statuses
Sort Manually
Sorting Release Intake Statuses manually changes their order in drop-down menus.
To sort Release Intake Statuses manually:
- Go to Settings> Customization > Releases.
- Click Release Intake Status.
- Hover your mouse cursor over the sort column.
The sort handle (six gray dots) appears.
- Left click and drag the sort handle to resort the Release Intake Status.
- Click Submit.
The yellow Your changes have been saved pop up opens and closes.
If you click away from the Customization page without clicking Submit, your changes will not save.

Sort by Column Header
Sorting Release Intake Statuses by column header only changes their order on the Customization page.
To sort alphabetically on the Customization page by column header:
- Go to Settings> Customization > Releases.
- Click Release Intake Status.
- Click a column header.
The Release Intake Statuses will revert to their previous order when you click away from the Customization page.
Delete or Replace a Release Intake Status
Deleting a Release Intake Status will not delete it from Release records. But it will no longer be available when adding or editing a Release.
Replacing a Release Intake Status will replace it in existing Release records.
To delete or replace a Release Intake Status:
- Go to Settings> Customization > Releases.
- Click Release Intake Status.
- Click to select the Release Intake Status.
- Click Delete Field.
- Choose one of the following:
- Delete and Replace:
- Select the item that will replace the deleted Release Intake Status from Replace with.
- Click Delete and Replace.
Your updates will be automatically saved. There is no need to click Submit.
- Delete:
- Click Delete.
Your updates will be automatically saved. There is no need to click Submit.
- Click Delete.
- Delete and Replace:
![]()