
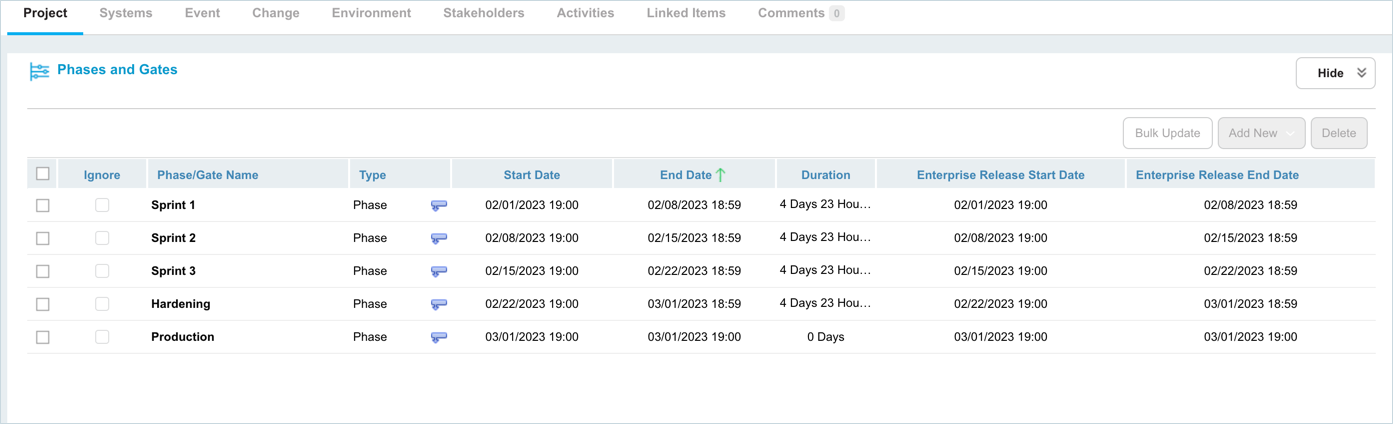
Release Gates are selected when adding or editing a release on the Release Manager page.
Location of Release Gates
To locate Release Gates:
- Go to Release > Manager.
- Click the Releases toggle button (if present).
- Click to open a Release.
- Click Show.
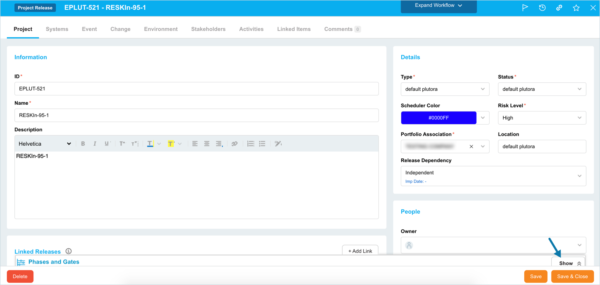
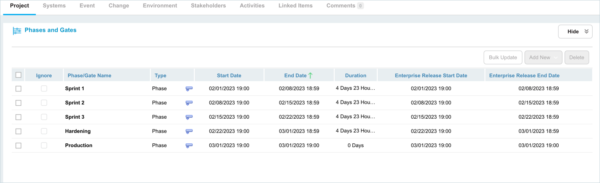
- The Phases and Gates panel opens.


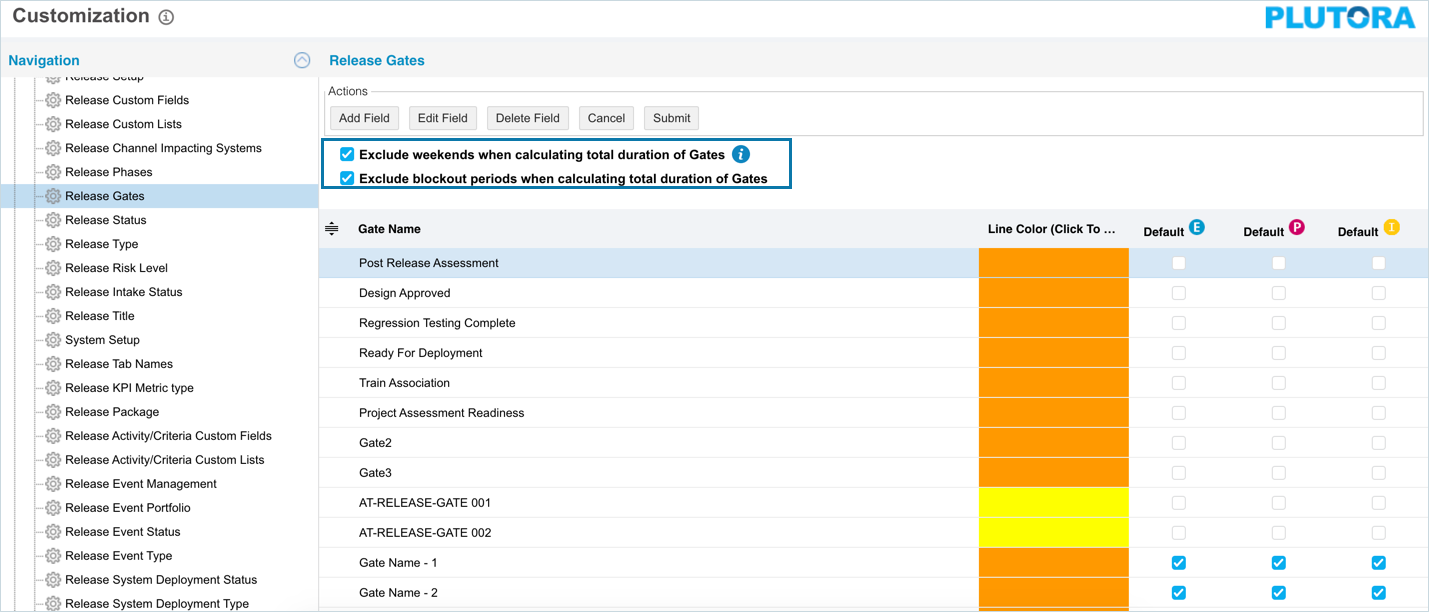
Include or Exclude Weekends or Blockout Periods in Release Gate Duration
To include or exclude weekends or Blockout Periods from Release Gates in the Duration column:
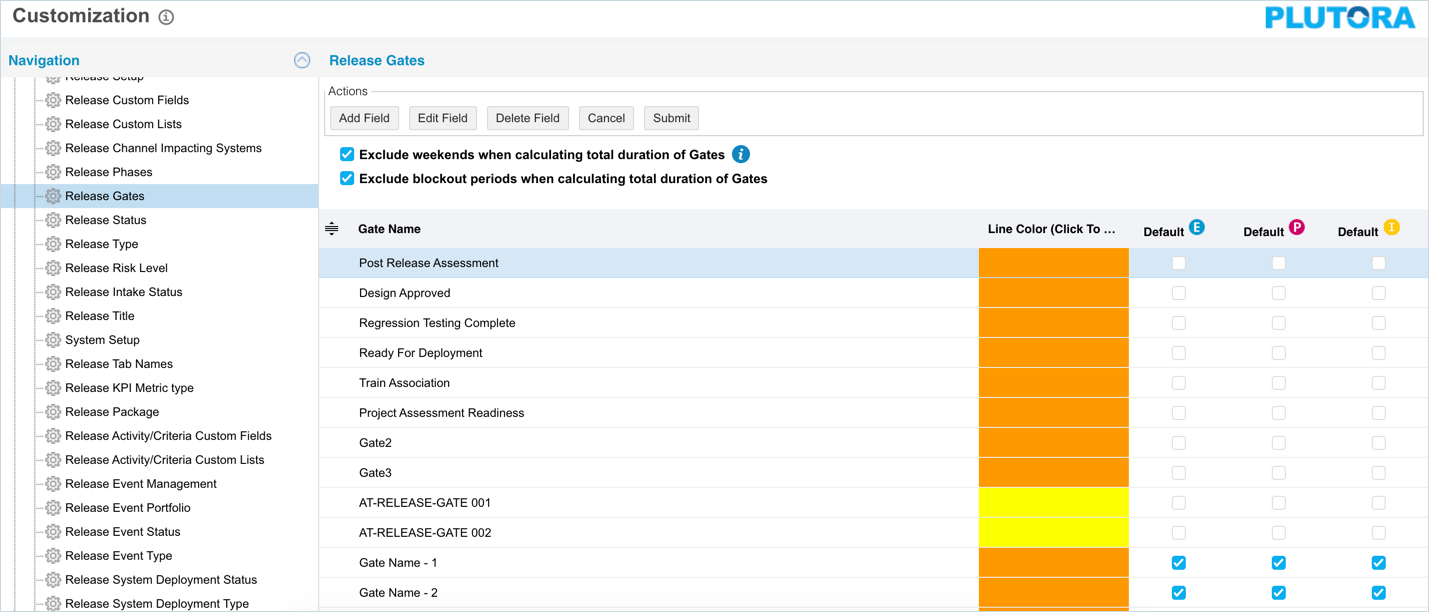
- Go to Settings
 > Customization > Releases.
 - Click Release Gates.
- Click to select or deselect one or more of the following checkboxes:

- Exclude weekends when calculating total duration of Gates.
- Exclude blockout periods when calculating total duration of Gates.
- Click Submit.
The yellow Your changes have been saved pop up opens and closes.
If you click away from the Customization page without clicking Submit, your changes will not save.
Add a Release Gate
To add a Release Gate:
- Go to Settings> Customization > Releases.
- Click Release Gates.
- Click Add Field.
- Type the new Gate Name.
- Double click the Line Color (Click to Edit) column and select a color from the drop-down menu or enter a Hex value.
- Select a Color from the drop-down menu.
- Click to select one or more of the Default checkboxes to make the item the default selection for Enterprise
 , Project
  or Independent
  Releases.
 - Click Submit.
The yellow Your changes have been saved pop up opens and closes.
If you click away from the Customization page without clicking Submit, your changes will not save.
Edit a Release Gate
To edit a Release Gate:
- Go to Settings> Customization > Releases.
- Click Release Gates.
- Click to select the Release Gate.
- Click Edit Field.
- Edit the Gate Name.
- Double click the Line Color (Click to Edit) column and select a color from the drop-down menu or enter a Hex value.
- Click to select one or more of the Default checkboxes to make the item the default selection for Enterprise , Project or Independent Releases.
- Click Submit.
The yellow Your changes have been saved pop up opens and closes.
If you click away from the Customization page without clicking Submit, your changes will not save.
Sort Release Gates
Sort Manually
Sorting Release Gates manually changes their order in drop-down menus.
Refresh your browser to sort manually after sorting alphabetically.
To sort Release Gates manually:
- Go to Settings> Customization > Releases.
- Click Release Gates.
- Hover your mouse cursor over the sort column.
The sort handle (six gray dots) appears.
- Left click and drag the sort handle to resort the Release Gate.
- Click Submit.
The yellow Your changes have been saved pop up opens and closes.
If you click away from the Customization page without clicking Submit, your changes will not save.

Sort by Column Header
Sorting Release Gates by column header only changes their order on the Customization page.
To sort alphabetically on the Customization page by column header:
- Go to Settings> Customization > Releases.
- Click Release Gates.
- Click a column header.
The Release Gates will revert to their previous order when you click away from the Customization page.
Delete a Release Gate
Deleting a Release Gate will not delete it from Releases. But it will no longer be available when creating new Releases.
To delete a Release Gate:
- Go to Settings> Customization > Releases.
- Click Release Gates.
- Click to select the Release Gate.
- Click Delete Field.
- Click Submit.
The yellow Your changes have been saved pop up opens and closes.
If you click away from the Customization page without clicking Submit, your changes will not save.
![]()