
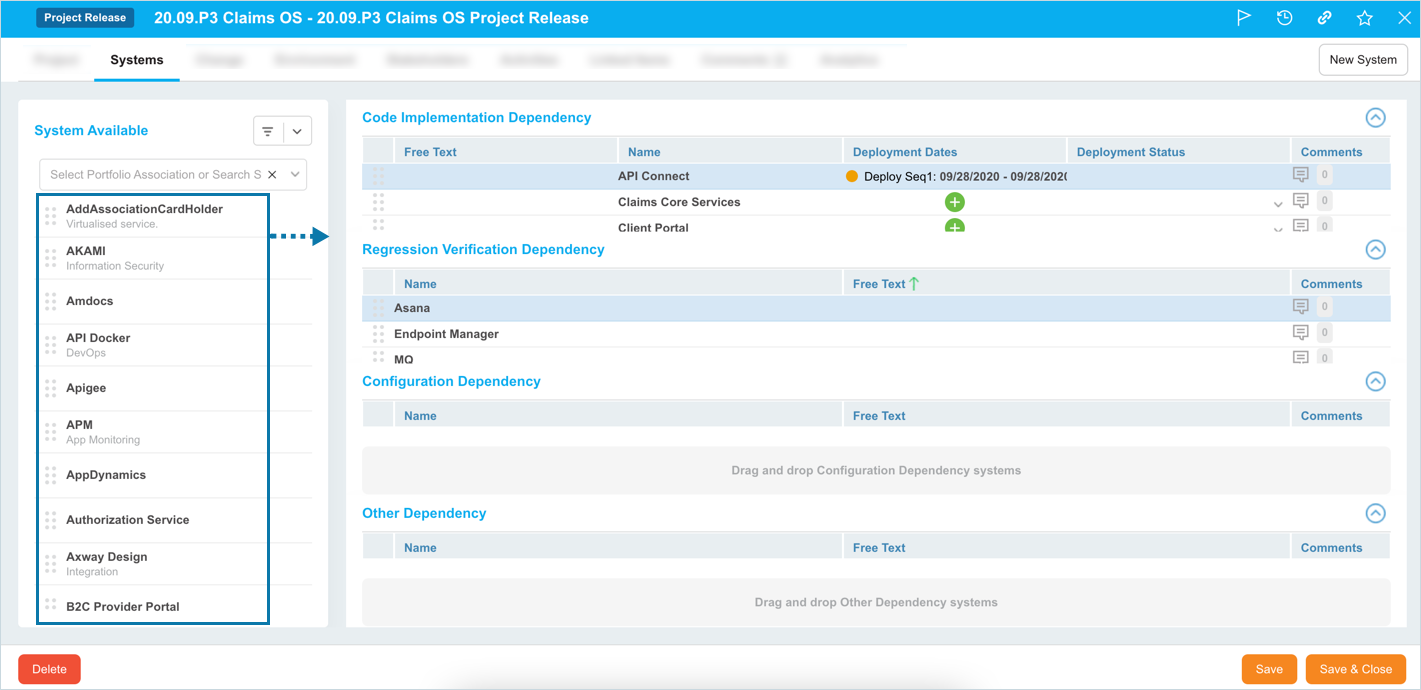
Click the Free Text field to make it editable so you can type text. Administrators can toggle the visibility and label of the ‘Free Text’ field using the Release Setup Customization.
After adding the Systems, click ![]() .
.
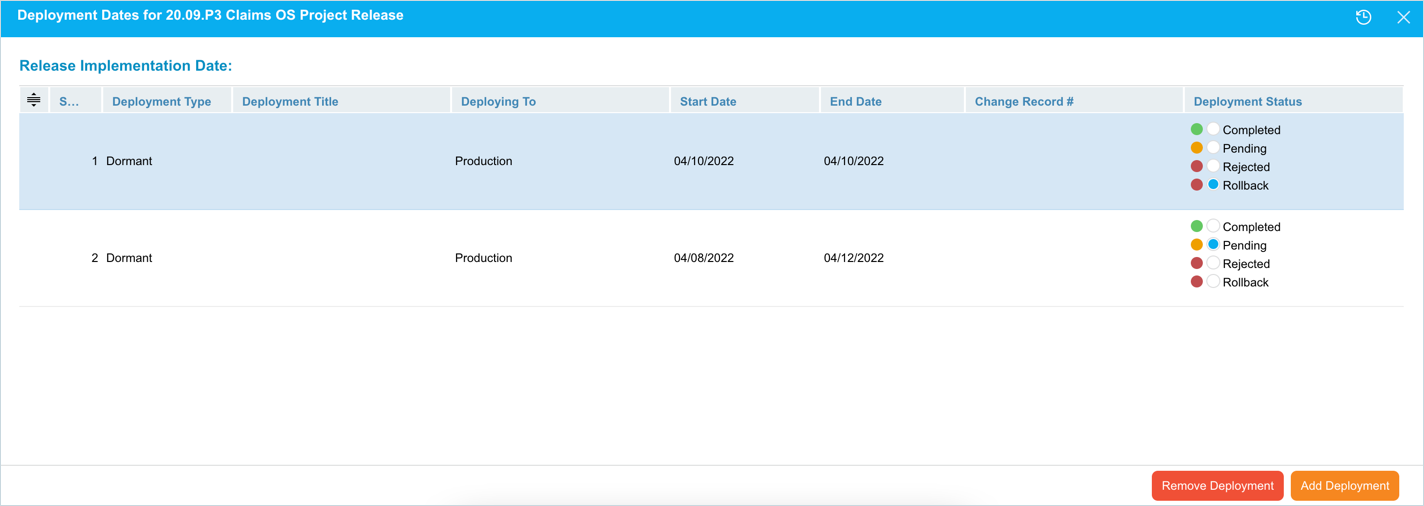
Manage Deployment Dates
Add or edit deployment dates for Systems by clicking ![]() The ‘Deployment Dates’ pop-up opens.
The ‘Deployment Dates’ pop-up opens.
- Add Deployment Date: Click
 and fill in the fields.
 - Edit Deployment Dates: Double click the deployment to make it editable and update.
- Remove Deployment Date: Click on the record that you want to delete and then click
 .
.
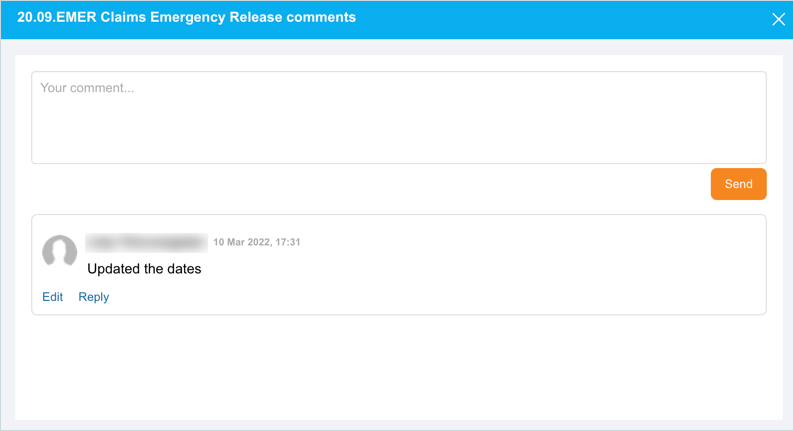
- View comments: Click the number that appears next to
 . The existing comments display with user, date, and timestamp details.
 - Add a comment: Click and enter your comment in Your comment field. Then click
 .
. - Reply to a comment: Click Reply below a comment. Enter your reply and click .
- Edit a comment: You can only edit your own comments. Click Edit below a comment. Edit your comment and click .
More Information
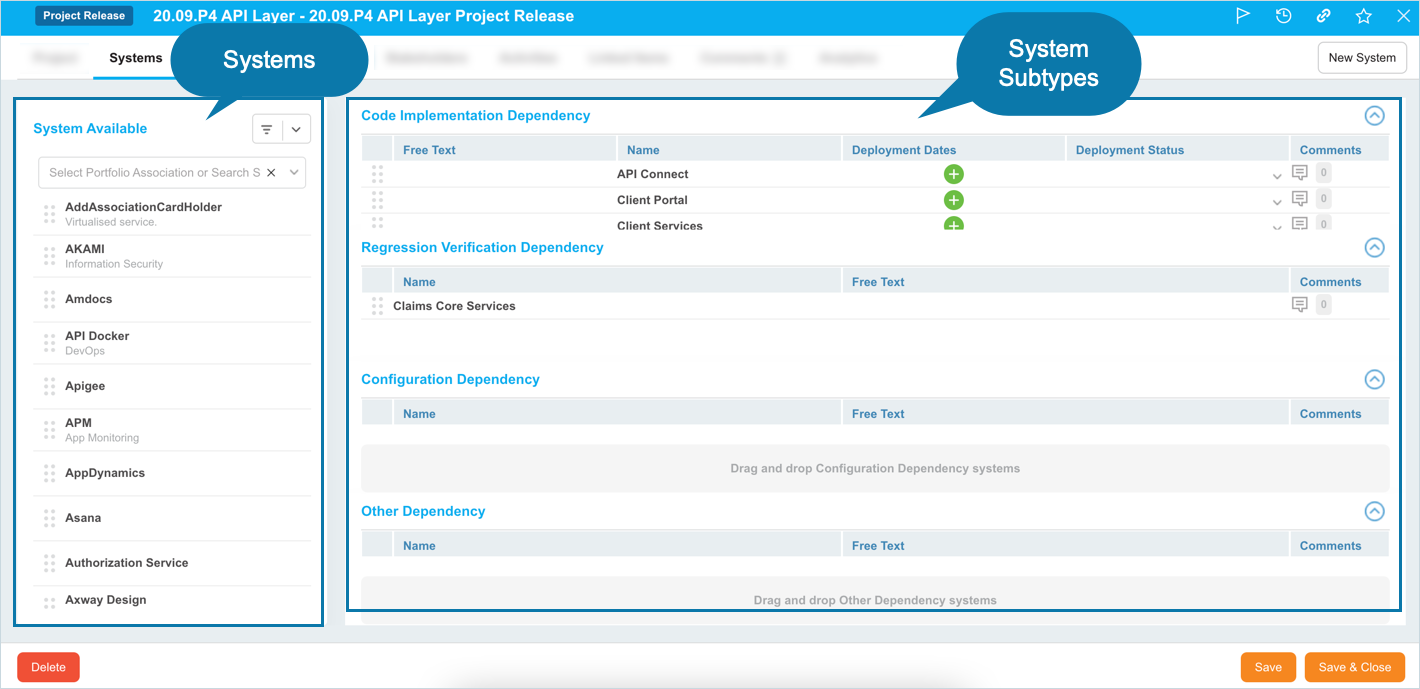
Create a New System
To create a new System, click ![]() on the top of the tab. The ‘Create New System’ pop-up displays. Fill in the fields on this pop-up to create a new System. For further details on this pop-up, see Add Or Edit Systems.
on the top of the tab. The ‘Create New System’ pop-up displays. Fill in the fields on this pop-up to create a new System. For further details on this pop-up, see Add Or Edit Systems.
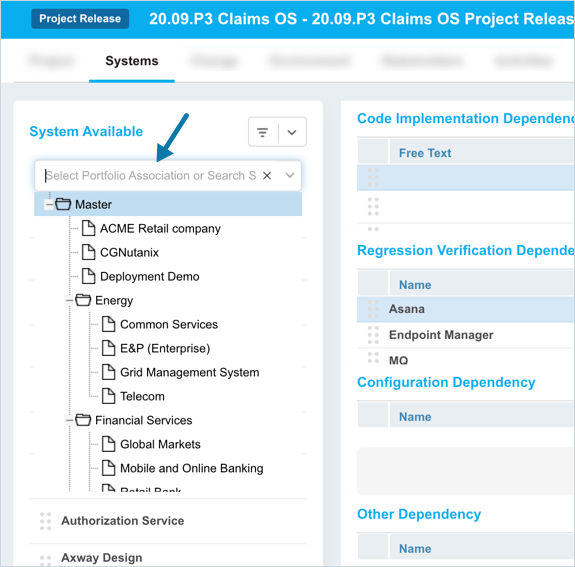
Filter Systems
Live Search for Systems or Portfolio Associations or view a tree menu of Portfolio Associations by clicking the Search drop-down menu.
You can also use Query Builder to filter the system by clicking ![]() .
.