
Use ![]() to view the complete list of legends available. The legend displayed is relevant to the data displayed on the timeline.
to view the complete list of legends available. The legend displayed is relevant to the data displayed on the timeline.
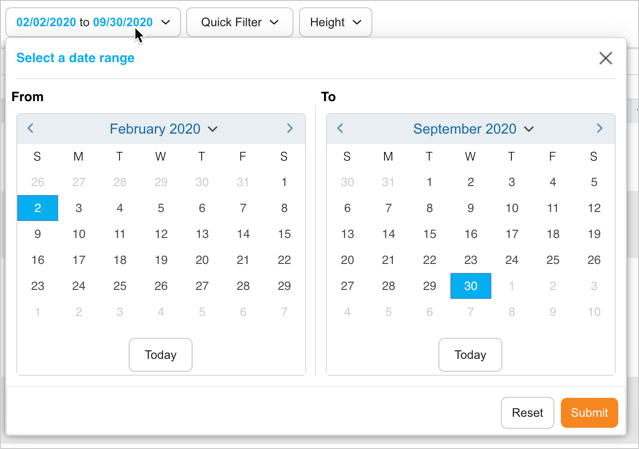
Date Range
Allow you to select the earliest and latest items that will appear in the timeline. Select a date from the From and To calendars then click ![]() or click
or click ![]() to select today’s date.
to select today’s date.
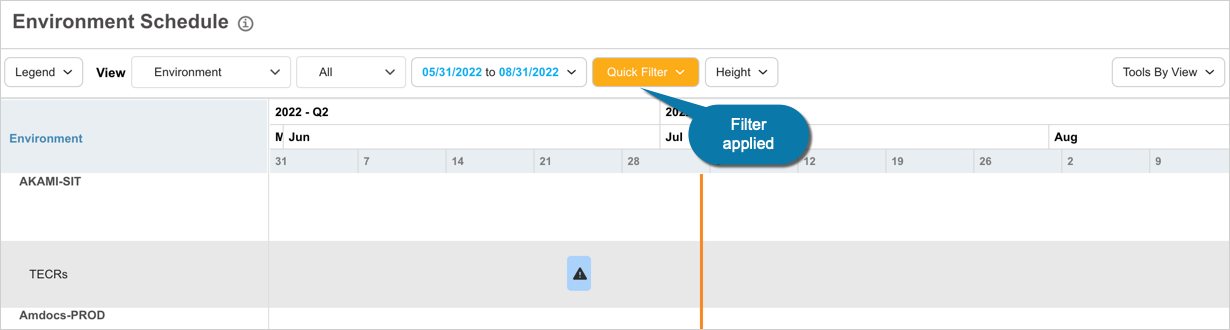
Quick Filter
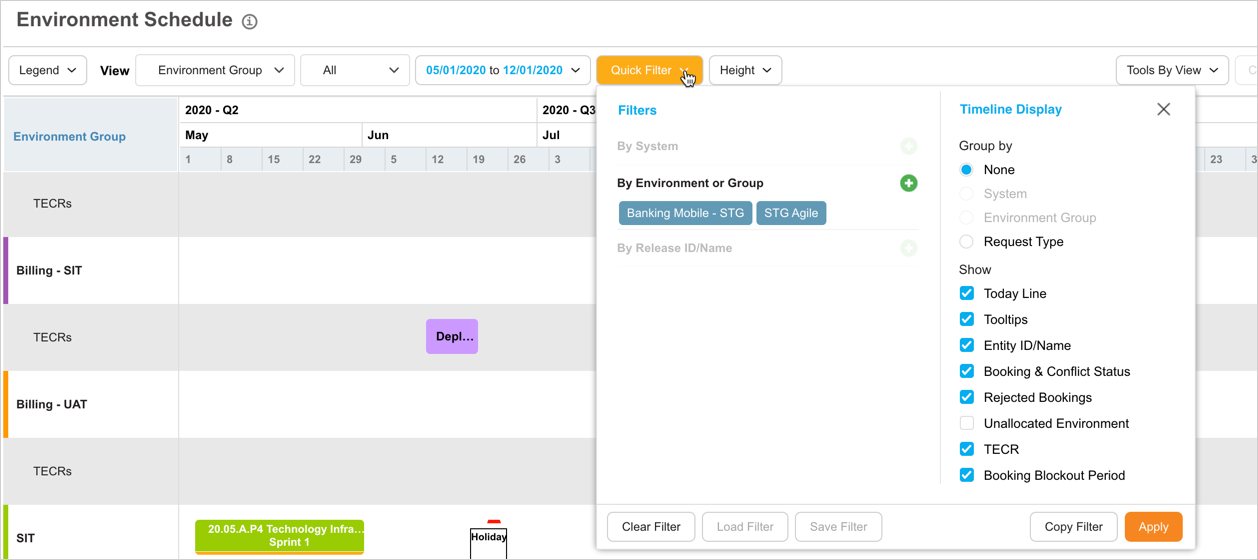
Click Quick Filter for the following filtering options:
Filter
This option allows you to filter (depending on the selected View) By System, By Environment or Environment Group, or By Release ID/Name. Not all filters are available for each view. The unavailable filters are grayed out.
To filter by System, Environment, Environment Group, Release ID, or Release Name, click Quick Filter and then click one of the ![]() .
.
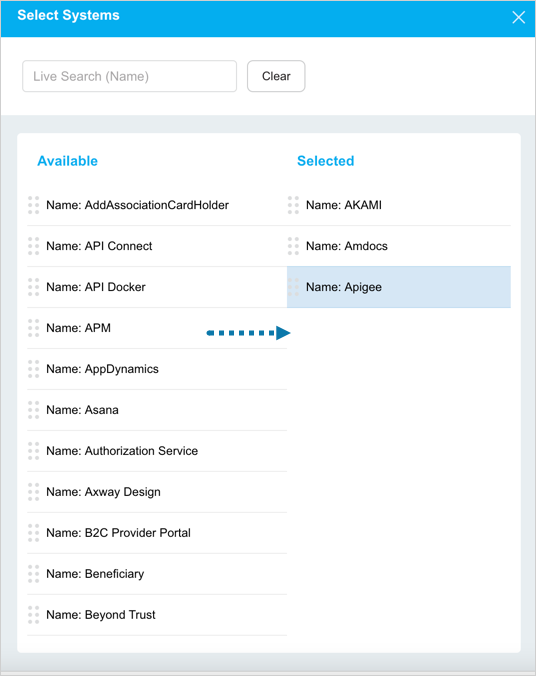
Systems:
Drag and drop the Systems from ‘Available’ to ‘Selected’ then click ![]() . You can search for the Systems on the Live Search.
. You can search for the Systems on the Live Search.
This option is disabled for Environment Group View
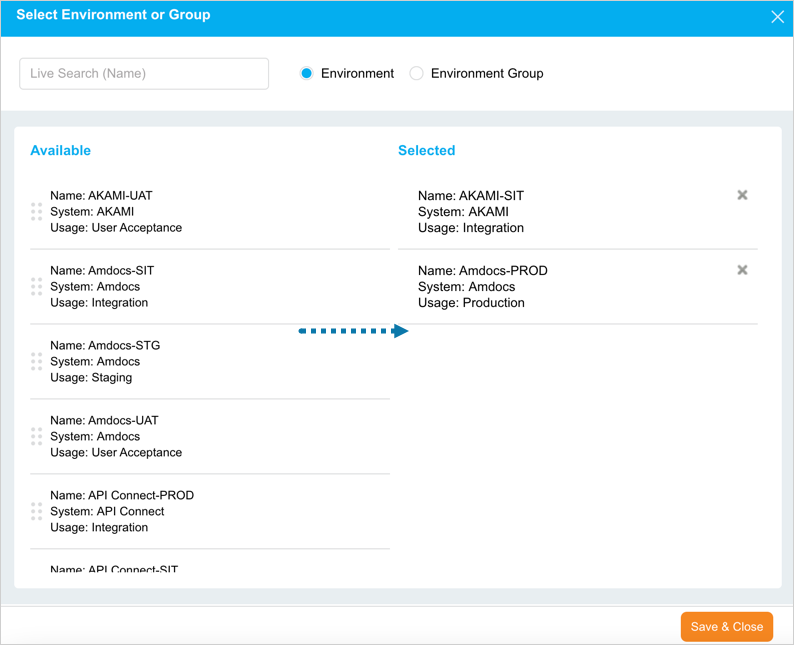
Environment or Group:
Click Environment or Environment Group. Drag and drop the Environment/Group from ‘Available’ to ‘Selected’ then click ![]() . You can search for the Environment/Group on the Live Search.
. You can search for the Environment/Group on the Live Search.
Release ID/Name:
Click the following checkboxes to filter. Drag and drop the Releases from ‘Available’ to ‘Selected’ then click ![]() . You can search for the Releases on the Live Search.
. You can search for the Releases on the Live Search.
This option is disabled for Environment Group View.

Save Filter
To save your filters (but not grouping or display options) so they can be loaded later,
- On ‘Quick Filter’ click
 .
. - Type a Filter Name.
- Type a Description.
- Select a Viewable by radio button.
- Click
 .
.
Load Filter
To load a saved filter:
- On ‘Quick Filter’ click
 .
. - Select one of your saved filters from the My Filters drop-down menu or
- Select a public filter from the Public Filters drop-down menu.
- Click Apply Filter.
Only saved filters are loaded. Not grouping or display options.
Copy Filter
Click ![]() to copy the link to Environment Schedule that contains all your filters and settings. Then paste the URL into an email or another document.
to copy the link to Environment Schedule that contains all your filters and settings. Then paste the URL into an email or another document.
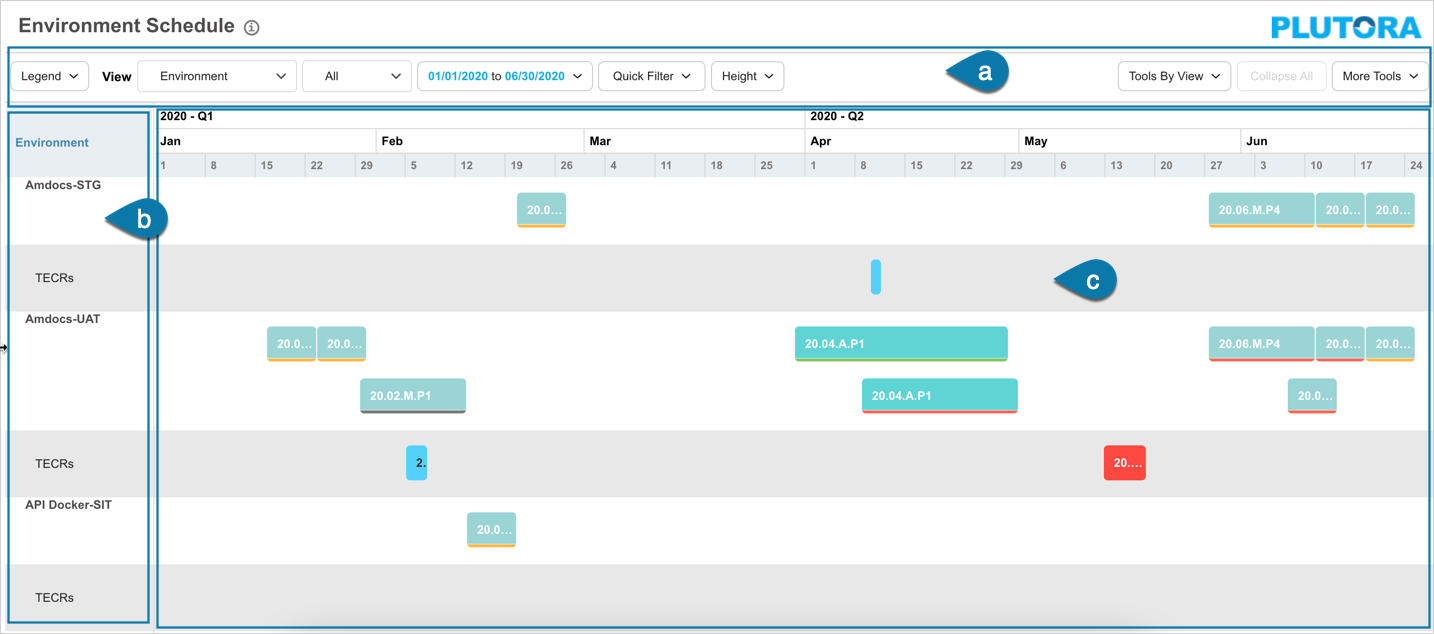
Timeline Display
The grouping and display options will be grayed out if they are not available for the selected view, or if the selected filters have not found any data.
Group by
Select a ‘Group by’ option to group the data on the timeline.
Show
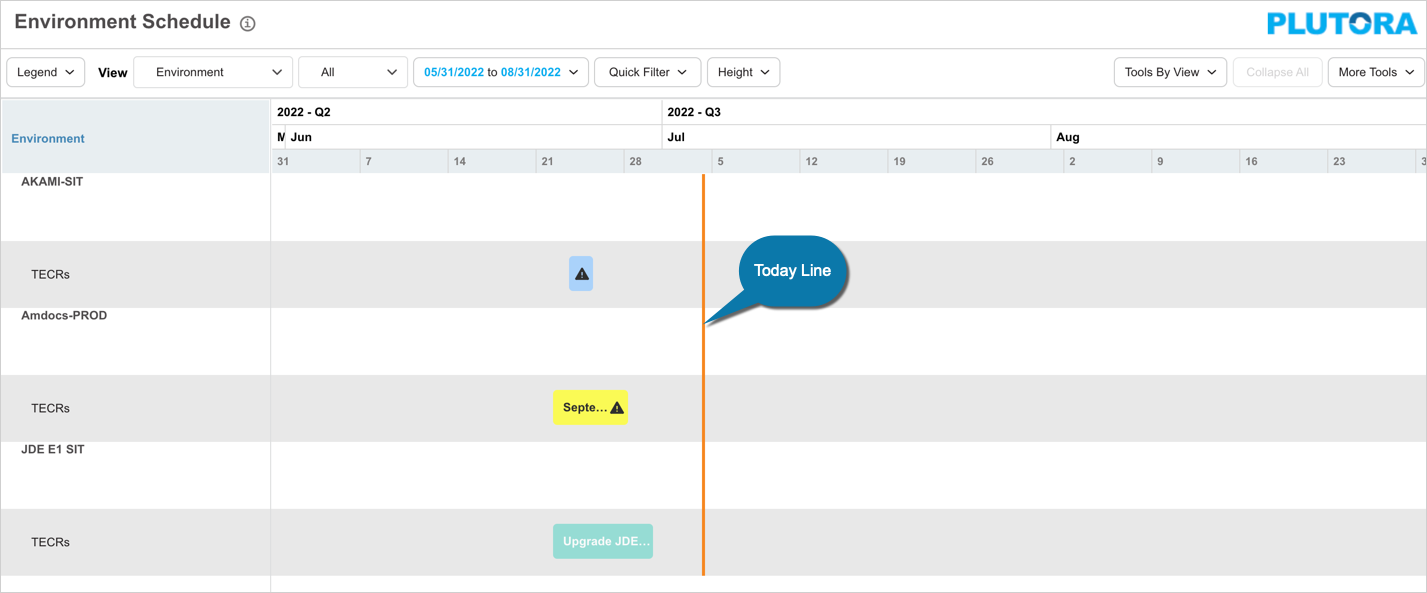
- Today Line: The Today Line shows the current day in the timeline.
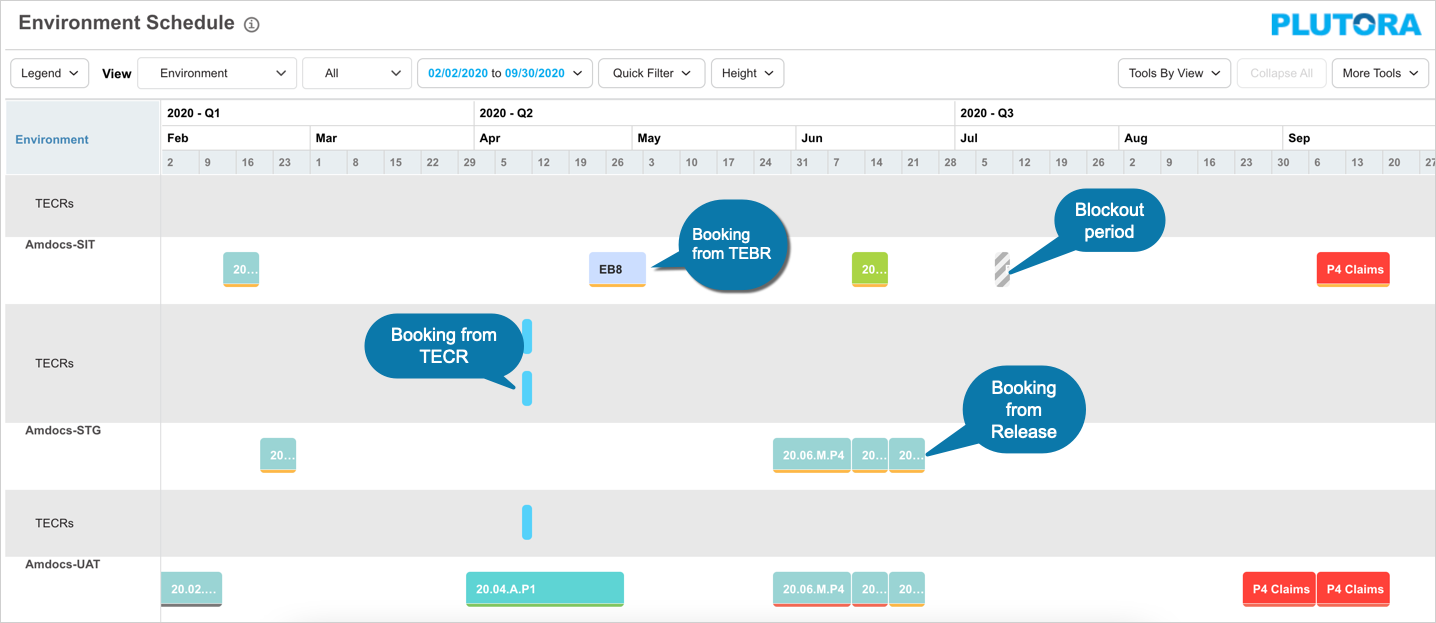
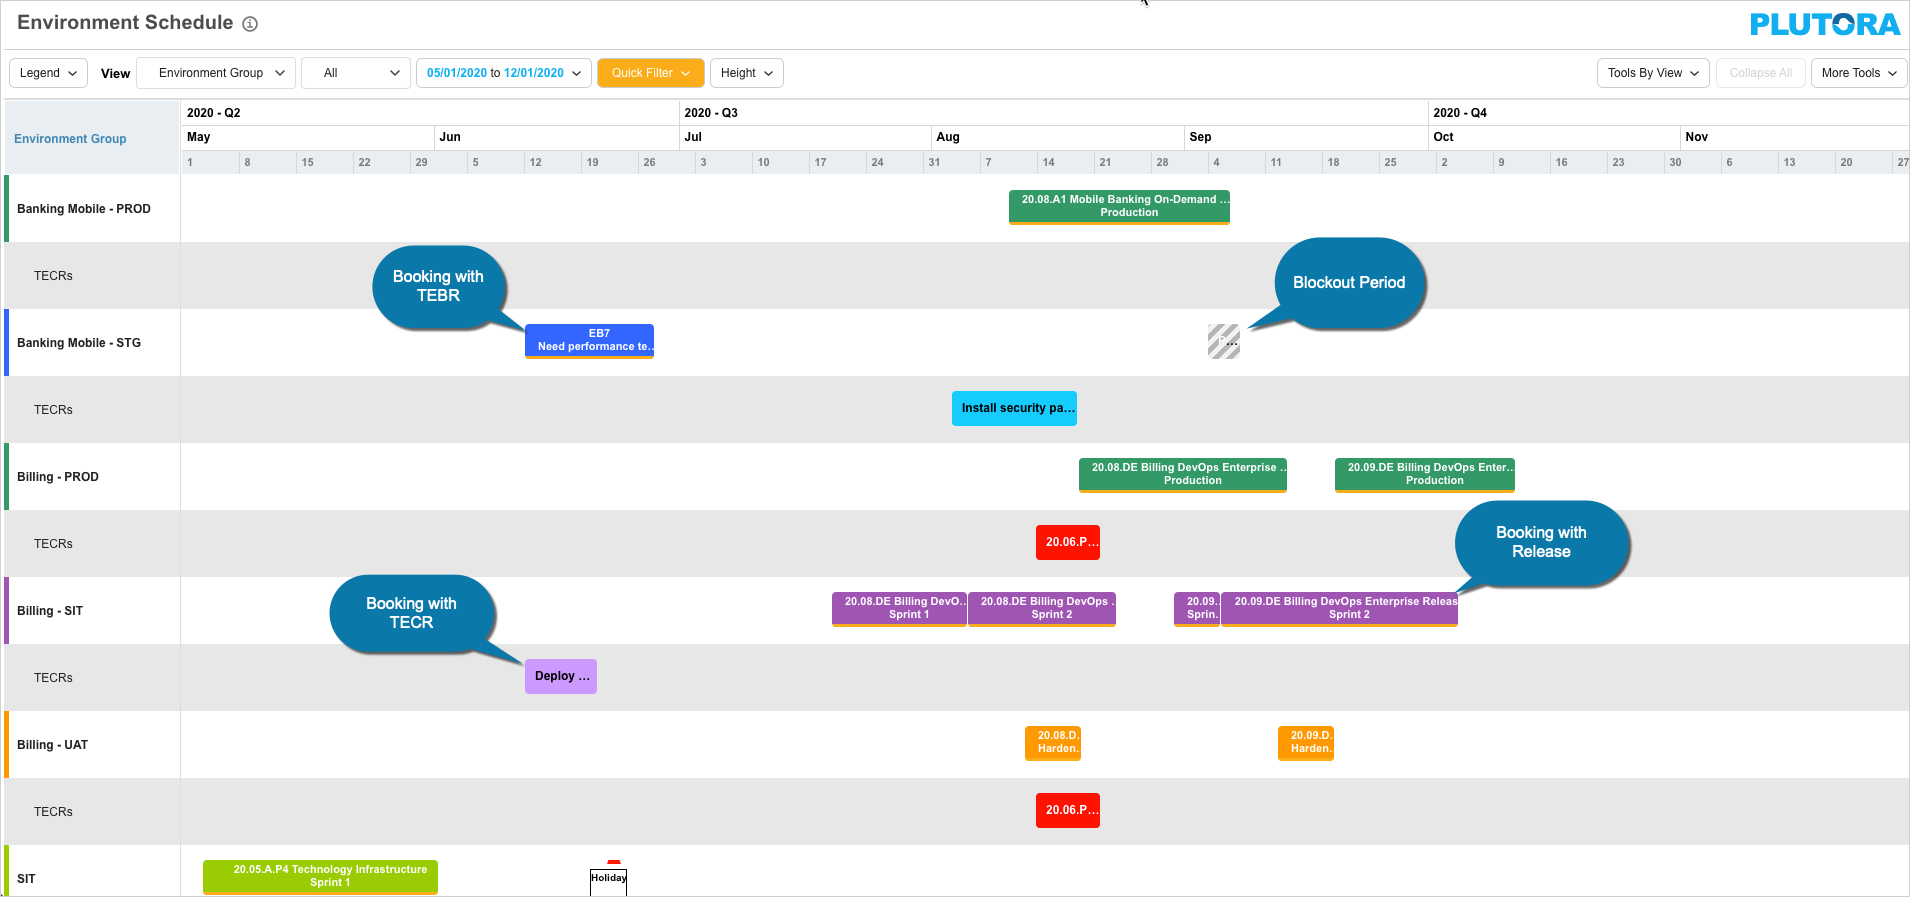
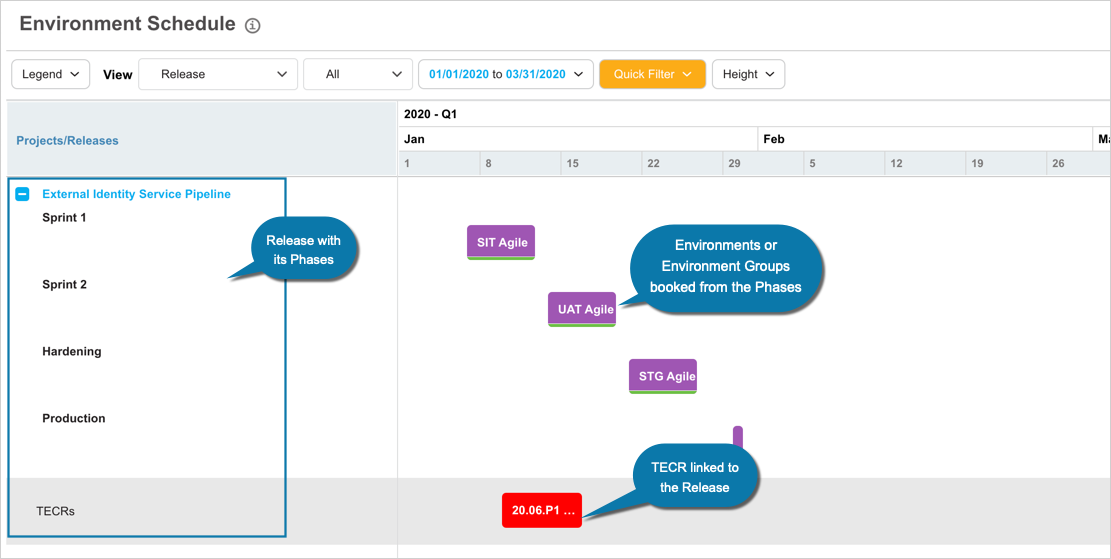
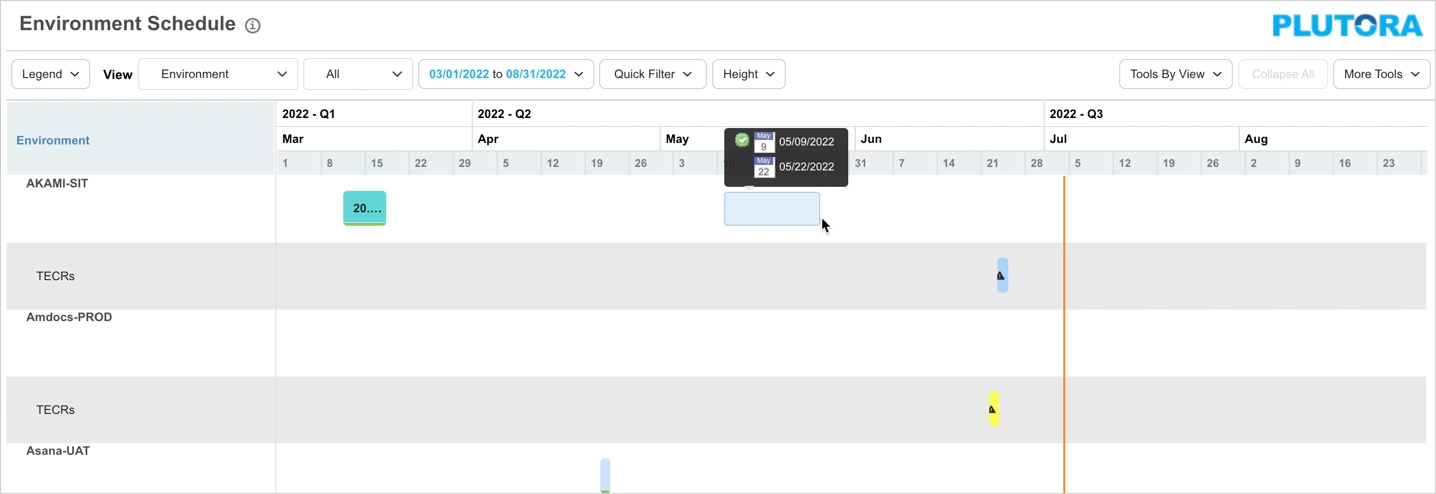
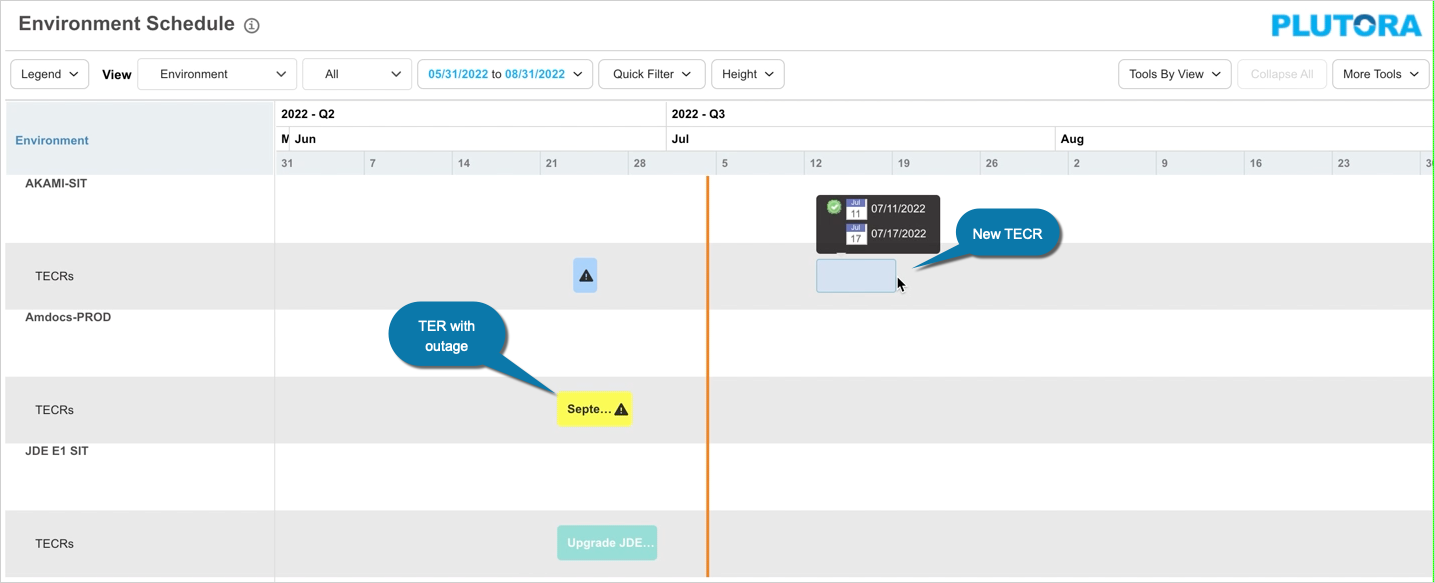
- Tooltips: Tooltips are the boxes of information that appear when you hover your mouse cursor over a Release, a TEBR without a Release, a TEBR with Release, or a TECR in the timeline.
- Entity/ID Name: Toggle between displaying the name or title of an item or its ID.
- Booking & Conflict Status: This shows the status of bookings as a colored line along the bottom of a booking. Set to a bright red if conflicts exist.
- Rejected Bookings: Toggle between displaying or hiding bookings that have been rejected.
- Unallocated Environments: Toggle the display of Environments that haven’t been allocated. This option is only available in Environment or Environment Group View while you have a filter applied for Systems, Environments, or Environment Groups. The purpose of this filter is to show Environments that are available during a selected time period.
- TECR: Toggle the display of the TECR rows. TECRs display a triangular icon when they contain an outage.
- Booking Blockout Period: This shows a time period when that Environment or Environment Group cannot be booked. Booking Blockout Period appears when a Blockout has the Category ‘Environment Booking’.

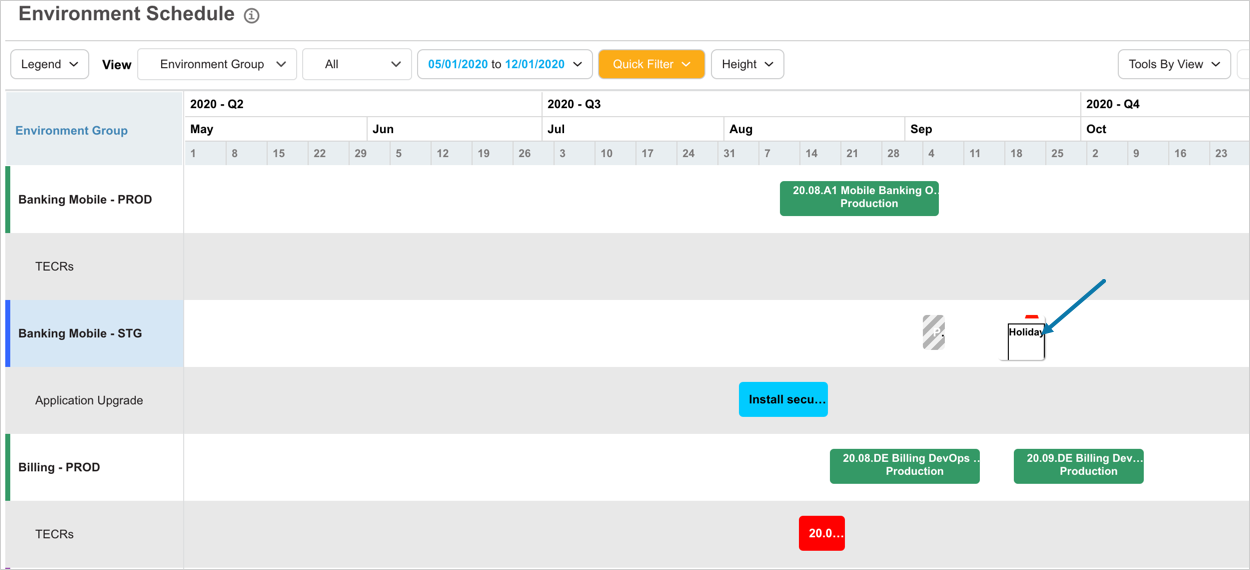
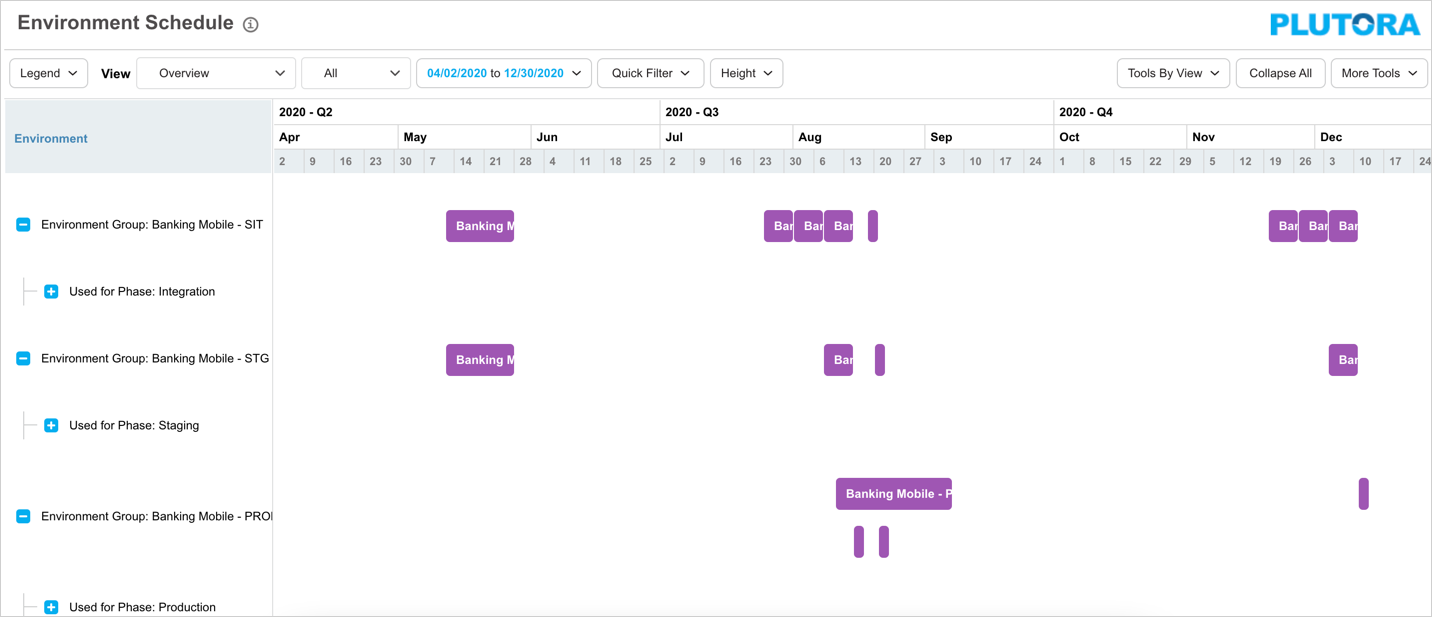
Add/Edit a Schedule Marker
Schedule Markers are labeled bars that appear on the Environment Schedule under the Environment Group View. They can be used to represent events, deadlines or other date-based occasions.
- On the Environment Schedule page, with Environment Group selected from the ‘View’ drop-down menu, click on a vacant area on the timeline.
- The ‘Add New Schedule Marker’ pop-up opens. Enter the following:
| Fields | Description |
|---|---|
| Label | Enter a label for the schedule marker to be displayed on the Environment Schedule. |
| Date | Select a date and time for the schedule. |
| Created/Requester | Uneditable fields. Displays the requester details and the date when it was created. |
| Color | Select a color to be displayed on the Environment Schedule. |
| Show label on scheduler | Check this option to view this marker on the Environment Schedule. |
- Click .
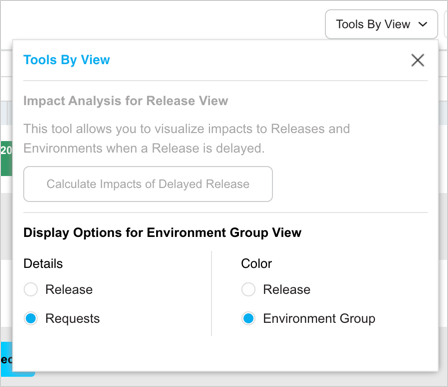
Impact Analysis
To view the impacts that would occur if an Enterprise, Project or Independent Release is delayed:
- In the ‘Release’ view, click Tools By View.
- Click Calculate Impacts of Delayed Release.
- Select an Enterprise, Project, or Independent Release (which will all have an Implementation Date in the future) from the If release drop-down menu.
- Move the slider to select the number of days the Release will move. (You cannot type a number into the text field.) The maximum number of days is 90.
- Select either:
- Show future impacts for all Environments allocated to delayed Release or
- Show future impacts only for this environment. You can select the Environment after clicking the radio button.
- Click .

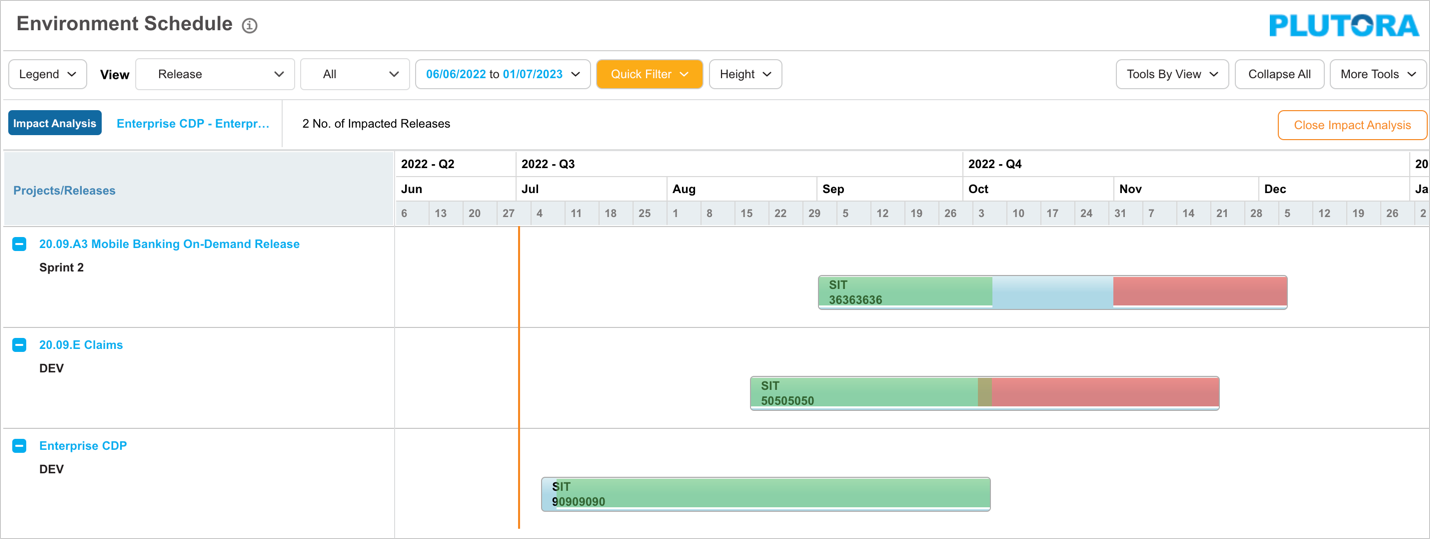
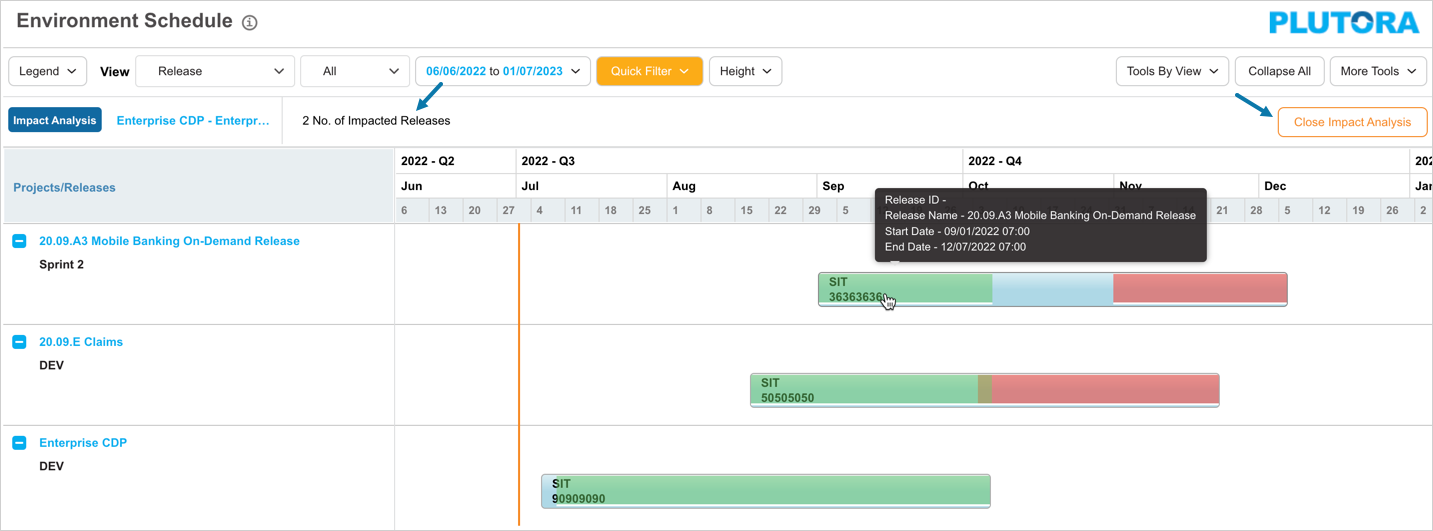
- The header of the timeline displays No. of Impacted Releases due to the delay in Release.
- Hover over the bar on the timeline to display the tooltip to view the Release details.
- On the Impacted Release:
- Green blocks show the number of days the end date of the Booking would move forward by.
- Red blocks at the end of the booking show the number of days the booking will need to extend.
- Existing conflicts (from before the date adjustment) will also show in red and will have moved by the same amount of time as the overlap.
- On the Instigator Release:
- Green blocks show the number of days the booking will need to extend.
- It is assumed that the Instigator Release will be taking longer rather than completely shifting, so only the end dates are affected.
- Where there is a gap between bookings, the overlap will be the days of slippage minus the gap. For example, if a Release is pushed 5 days forwards, and there is a 3-day gap between one of its Bookings and another Release’s Booking of the same Environment, the later booking will only need to be pushed out by 2 days.
- Where a delay results in primary impacts on multiple Releases, all those Releases will be shown on the timeline.
- Impact Analysis only identifies primary impacted Releases. For example, if you move the dates of Release 1, Release 2 will be the primary impacted Release. Moving the dates of Release 2 might impact Release 3, but Release 3 will not be shown in the Impact Analysis of Release 1.
Click ![]() to return to the Release view.
to return to the Release view.
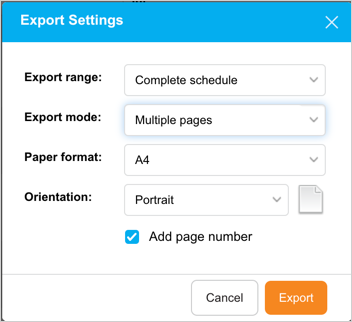
Export Environment Schedule to PDF
To export an Environment schedule to PDF:
- On the Environment Schedule page, filter your Environment Schedule using the filters in Filter Options.
- Click the More Tools drop-down.
- Click Export to PDF.
- Select a range from the Export Range drop-down menu:
- Complete Schedule: Whole schedule without filtering.
- Date Range: Select a date range.
- Current View: The current manually filtered view.
- Select an Export Mode.
- Single page: Compress the schedule to a single page.
- Multiple pages: Split the schedule into multiple landscape pages.
- Multiple pages (vertically): Split the schedule into multiple portrait pages.
- Select a Paper format
- Select an Orientation:
- Select the Add page number checkbox if you have selected multiple pages in Export Mode.
- Click
 .
.