Manage Release Environments

Introduction

The ‘Environment’ tab shows Environments organized into Environment Groups and allows you to book whole Environment Groups (or the Environments inside them).

This article provides you with an overview of the steps to book Environments and Environment Groups for a Release. 

Pre-requisite

  • You must have ‘Assign Environments’ user permission in  Enterprise/Project/Independent Release
  • Administrators can prevent you from viewing and booking Environments and Environment Groups outside your Portfolio Association by selecting the My Portfolio Association checkbox for the ‘Restrict Site-Wide View of Environments’ user permission.
  • To approve or reject an Environment booking, you must be selected as an Environment Booking Approver in the Environment’s System and have the ‘Approve Environment Allocation in Scheduler’ user permission.

Release > Manager

Access ‘Environment’ tab

To access the Environment tab:

  1. Navigate to the ‘Release Manager’ page.
  2. Search for the Release for which you want to book and manage the Environment. You can use the filter options available on this page.
  3. Open the record by clicking on the Release ID or Release Name.
  4. Click on the Environment tab.

The ‘Environment’ section in the Left-Hand Side displays the available Environments and Environment Groups that you can book for the Release. The Environments and Environment Groups displayed are related to the linked Systems.

The Environments by Phase in the Right-Hand Side displays the Phase(s) of the Release for which you can book the Environment. You can book one or more Environments per Phase.

Environment1-1

Book Environment / Environment Group

Search for the Environment/Environment Group in the ‘Environment’ section. You can use the available filter options. Then drag and drop the Environment/Environment Group to the respective Phase in the ‘Environment by Phase’ section. 
If you drag and drop an Environment Group, all the Environments in that Group will be booked for selected Phase.
Environments can have child and grandchild Environments. Dragging and dropping an Environment with child and grandchild Environments will book the parent Environment, and the child and grandchild Environments.
You can book more than one Environments by selecting the Environment checkboxes and then drag and drop the checked Environments. Checked Environments will move together when dragged and dropped.
You can book up to 100 Environments for a Phase. 
Click once you have booked the Environments.

Approve / Reject Booking

You must have the required permission to do this task. See Pre-requisites.

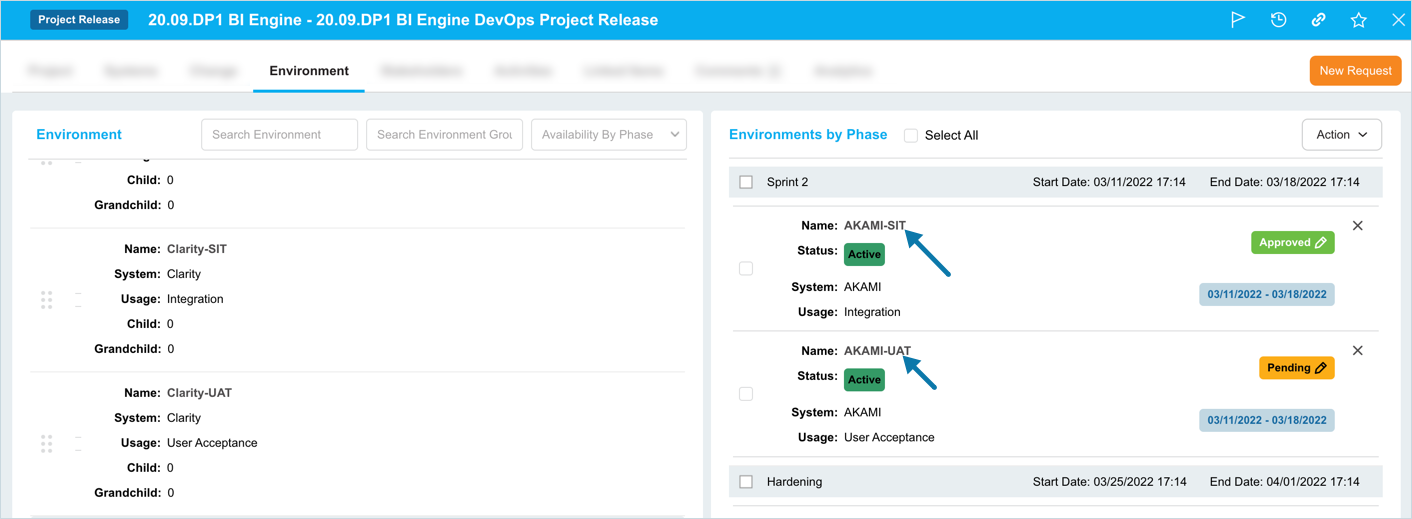
If ‘Any booking can be automatically approved?’  is selected for the Environment in Environment Details, Plutora will automatically approve the booking and it will have the status . The Environments for which the bookings need to be approved will display the status .

To approve or reject a booking, click to display ‘View/Edit Booking’ pop up.

At the bottom of the pop-up select the Status: ‘Approved’ or ‘Rejected’ and click .

The status of the booking will change to  or  as per your selection.


Manage Booking Dates

You can update the Environment Booking Start and End Dates. The new Start and End Dates must fit within the overall TEBR duration, which is set in Start Date/Time and End Date/Time above. See TEBR Mandatory Details Customization for how to allow Booking outside the TEBR duration.

To update the dates, click on the Status of the Booking to open the ‘View/Edit Booking’ pop-up. In the section ‘Booking Details’ select a new Start and End Dates. Once done, click .

The Booking displays with new dates.
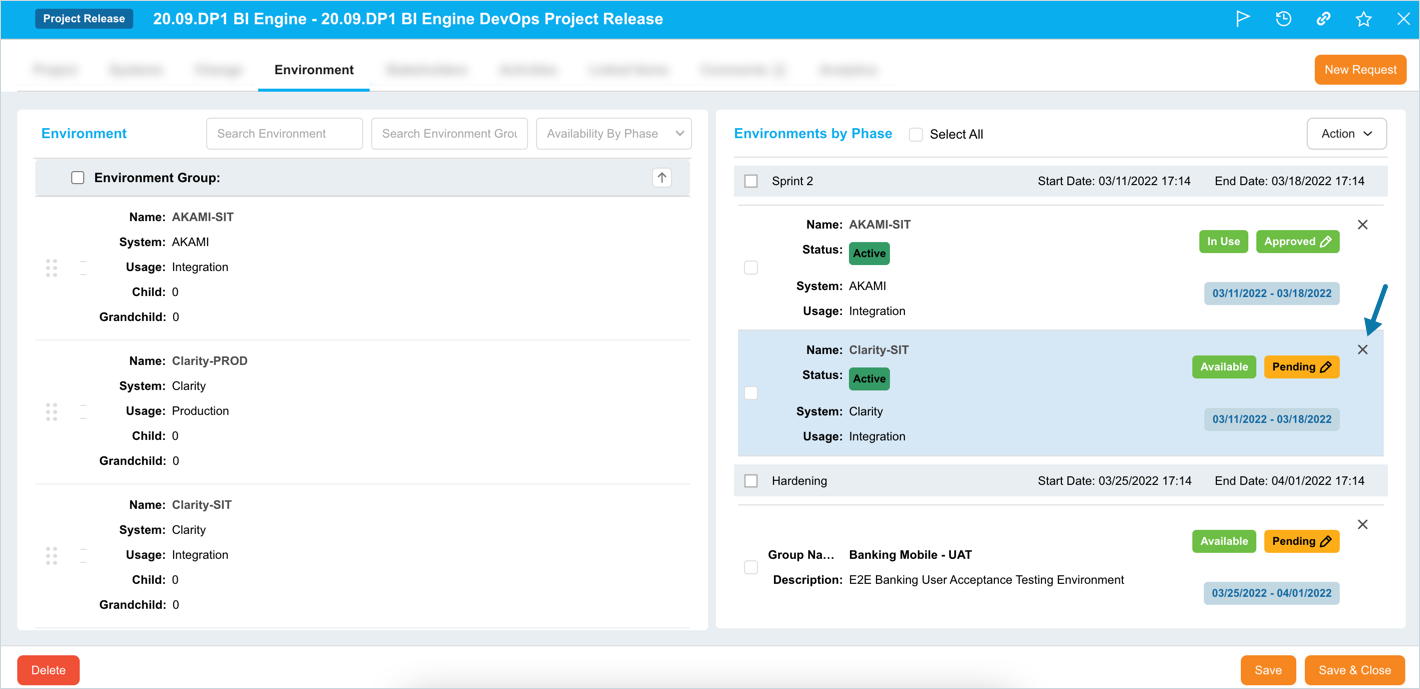
 

View / Edit Environment

To view or edit the Environment, click the Environment Name. This will open the Environment pop-up.

Environment6

Remove Bookings

Remove a Booking

To remove (or delete) a Booking, click the X on the Booking. Plutora will remove the Booking. Click to save your changes.

Remove Bookings in bulk

  1. Select the Bookings that you want to delete.
  2. Click .
  3. Click Delete.

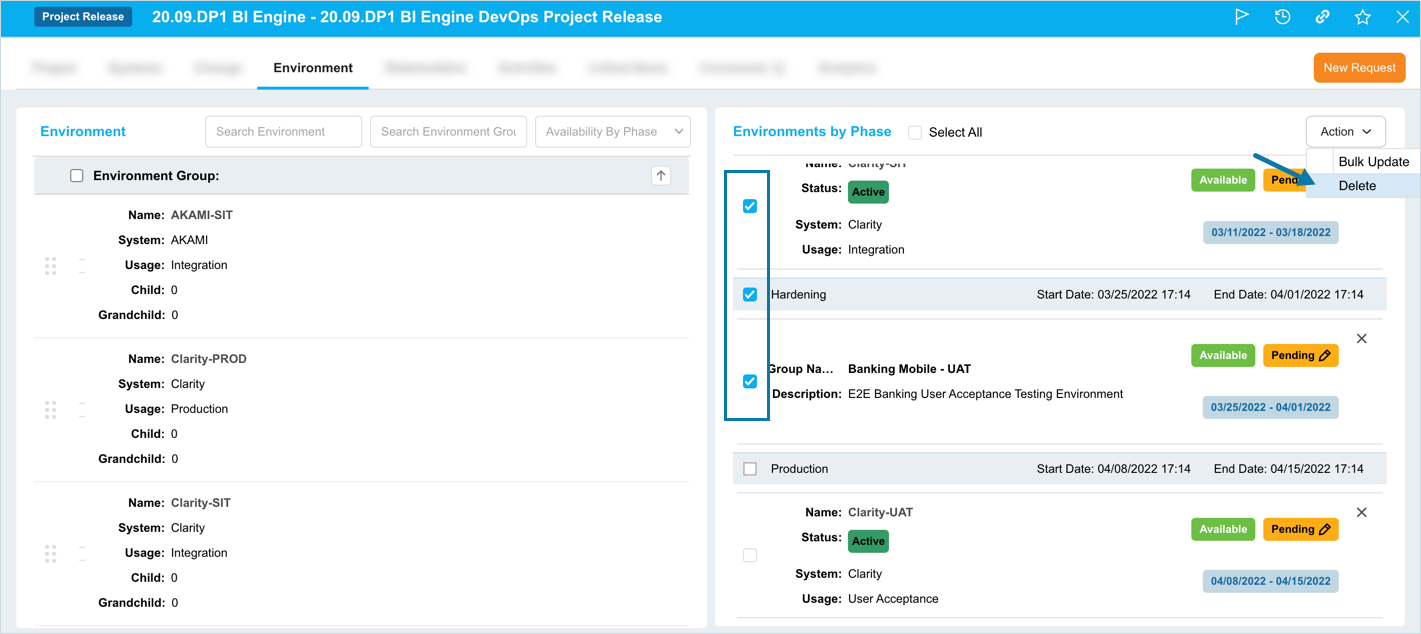
Bulk Update Bookings

  1. Select the Bookings that you want to update.
  2. Click .
  3. Click Bulk Update.
  4. The ‘Bulk Update’ pop-up displays. Update the fields as follows and click .

OptionsSteps
DatesChoose one of the options:
  • Select Shift Dates , then choose an option from the drop down and enter the number of Days. or

  • Select New Dates and enter the new Start/End Date.
StatusSelect an option.

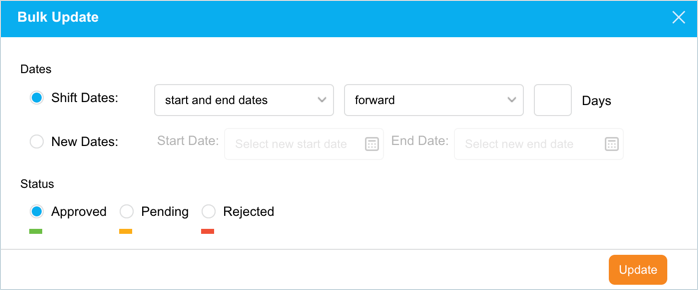
The selected Bookings will update. Click .

On bulk updating the Environment Booking status or dates, Environment Booking Requesters and the relevant Stakeholders will receive email notifications. This enables them to view the progress of their Bookings.

More Information

Filter Options

You can filter the records displayed in the ‘Environment’ section by:

  • Environment
  • Environment Group
  • Phase

Select All

The Select All checkbox in the Environments by Phase section enables you to select all the Environment Bookings with one click. This is particularly useful if you want to bulk update or bulk delete Bookings.

Related Articles

Contents

Be the first to find out about new features. Subscribe to the Release Notes email.

Was this article helpful?

Thanks for your answer!