
Introduction
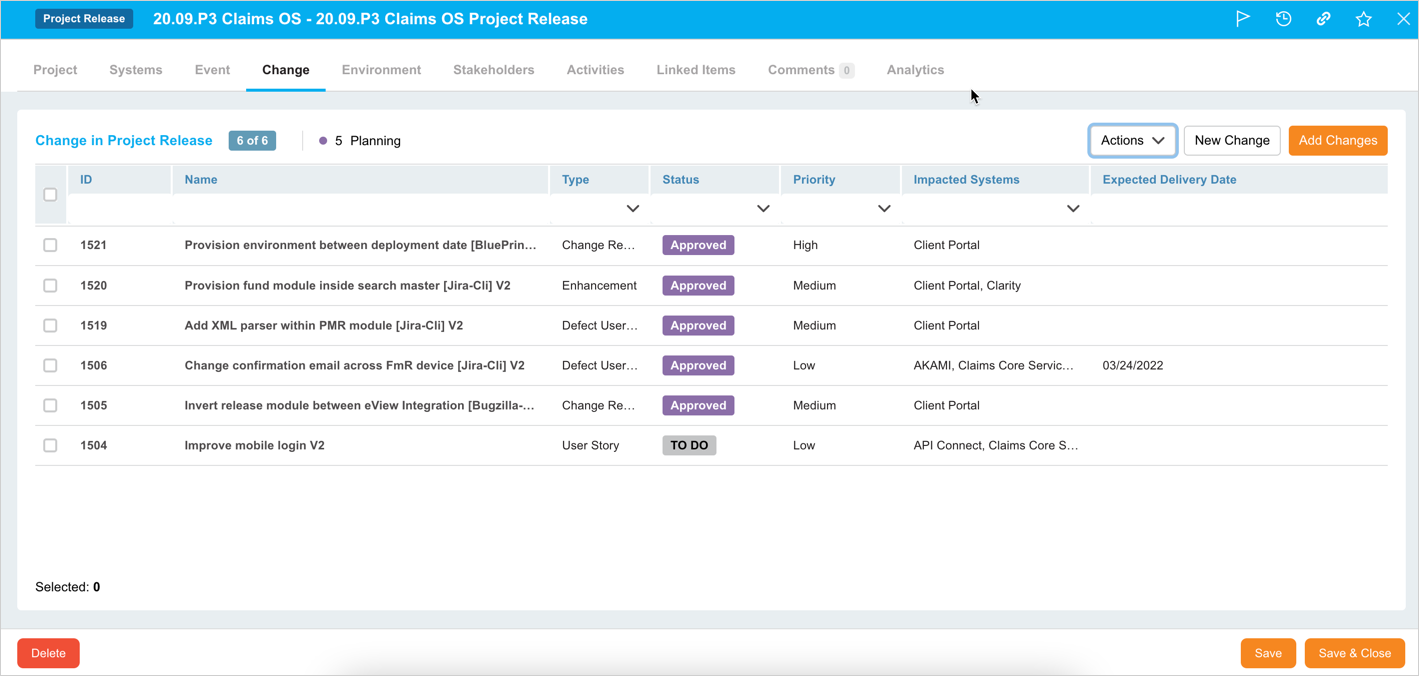
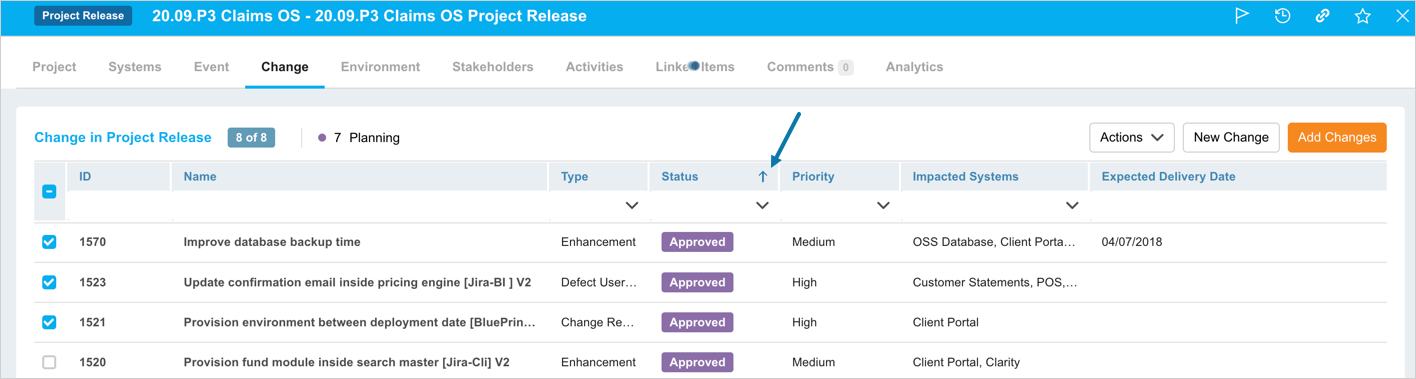
The Change tab, in Project and Independent Release, displays the Changes linked to the Release in a grid view. With this tab, you can
- see a list of the Changes that are included in the Release.
- view the status of the Change. This enables you to see the progress of your Release deliverables.
- add one or more Changes to the Project or Independent Release.
- remove one or more Changes to the Project or Independent Release.
- add a new Change directly to the Release.
- show/hide the custom fields on the grid to view the Change details.
- apply filters on the grid columns. This enables you to refine the list displayed.
- apply complex filters to date, date/time, and numeric fields. So you can filter the Change records based on date and numeric value.
You can customize the ‘Change’ tab name using Menu Setup Customization (Changes) feature.
Pre-requisite
- To be able to view the ‘Change’ tab, you must have Change Manager user permission.
Navigation
Release > Manager
Access ‘Change’ Tab
To access the ‘Change’ tab in a release,
- Navigate to Release > Manager.
- Select a Project or Independent Release from the grid
- Click the Release ID or Release Name to open the release.
- Click the Change tab.
Change Grid Layout and Features
On the Change pop up you can:
- see the list of changes linked to your release and its details.
- link Change(s) to the release.
- create a new Change.
- remove (or unlink) Changes.
- filter Changes using grid filter options.
Search and Filter Options
Grid Column Filter
To filter Changes using the Grid Column,
- Search field: Type a search term.
- Drop-down menu: Click to select a list item.
- Combo box: Click to select one or more checkboxes.
- Filter by Date/Time: Select a date or date range (explained below)
- Filter by Value: Select a value or value range (explained below)

Press the Enter key to run the filter.
Show/Hide Column
Changes grid has many default columns, you can choose to show or hide these columns. For this:
- Click
 .
. - Click Show/Hide columns.
- On the ‘Edit Columns’ pop up select/unselect the columns that you want to show/hide on the grid.
- Click
 .
.
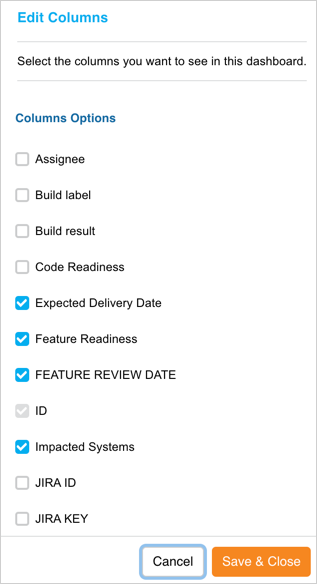
ID and Name fields are selected by default and you cannot deselect these columns.
View Changes Linked to the Release
The grid displays all the Changes that are linked to the Release. Filter and select the change that you want to view. Then click on the Change ID or Change Name.

This displays the ‘Change’ pop-up for the selected Change. Click ![]() to close the pop-up.
to close the pop-up.
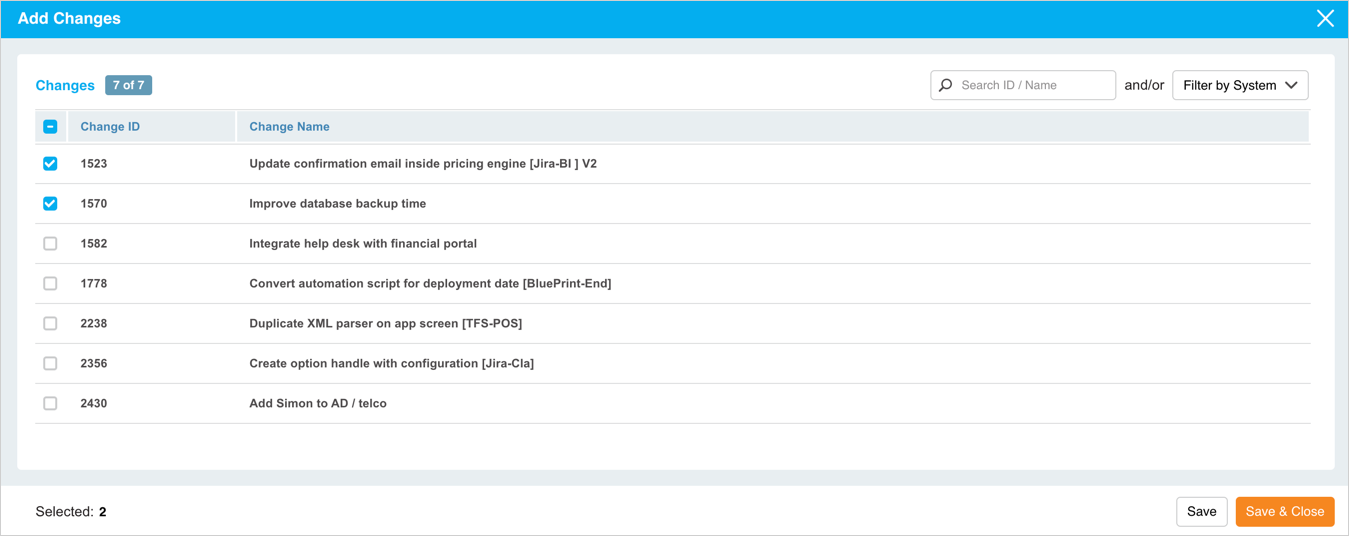
Add Changes
To add (or link) a change to the Release:
- Click
 on the top of the grid. ‘Add Changes’ pop-up displays with the available Changes that you can link. The total count of available changes is displayed next to Changes.
 - Select one or more Changes that you want to link to the Release. The footer of the pop-up displays the number of Changes you have selected. You can use the filter fields available on top of the pop-up to filter the Changes.
- Click
 .
.
The Change grid displays the selected Change(s).
Remove Changes
To remove (or unlink) a Change(s) from the Release:
- Select the Change(s) that you want to remove from the grid.
- Click .
- Click Remove Changes.
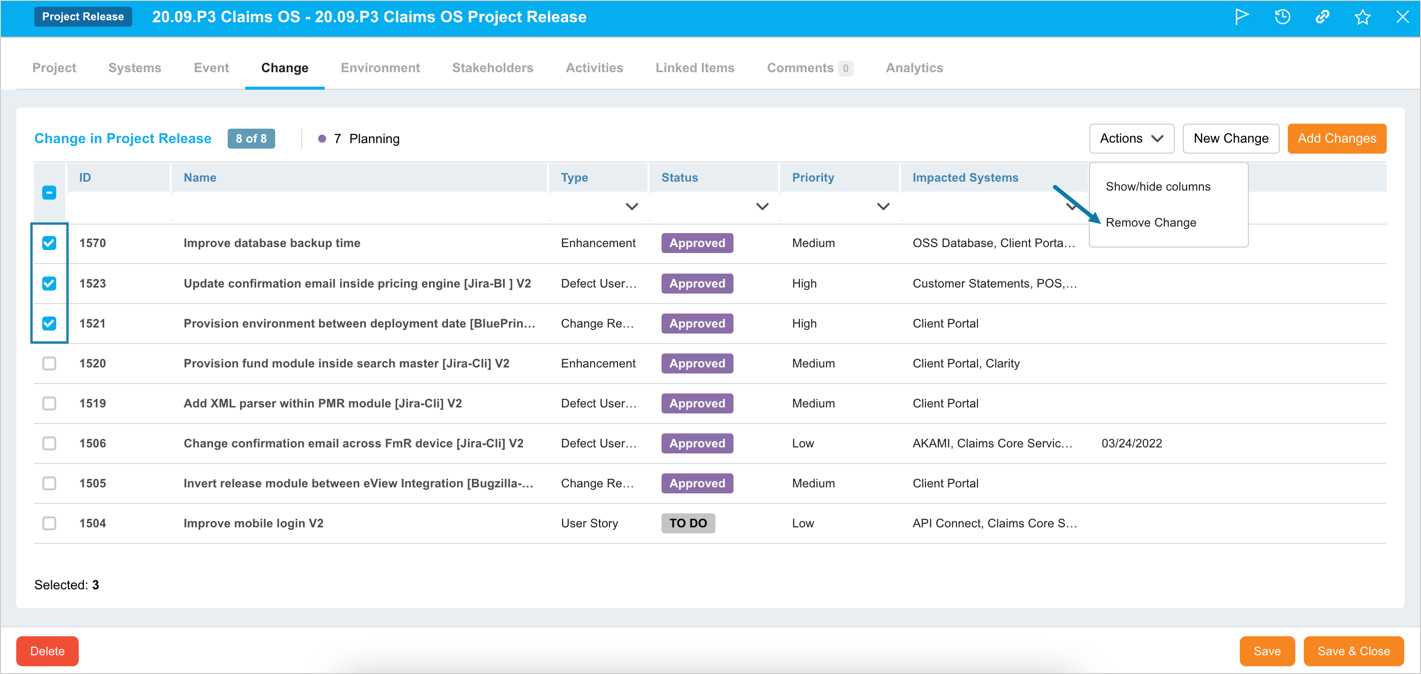
Plutora will remove (and unlink) the Change(s) from the grid. You can re-link these Changes via ![]() feature.
feature.
Create a New Change
To create a new change, click ![]() on the top of the grid. The ‘Change’ pop-up displays. Fill in the fields on this pop-up to create a new Change. For further details on this pop-up, see Add Or Edit Changes.
on the top of the grid. The ‘Change’ pop-up displays. Fill in the fields on this pop-up to create a new Change. For further details on this pop-up, see Add Or Edit Changes.
More Information
Sort by Column Header
You can sort the Changes on the grid in ascending/descending order. To sort, click on the column header. ↑ or ↓ displays indicating the ascending or descending column sort.
Search/Filter Change on ‘Add Changes’
On the ‘Add Changes’ pop-up, you can search for the Change by its ID/Name or filter the Changes by System.
