
Test Case folders appear under the Test Case Folder tab in Test Designer. Each Test Plan has its own Test Case folders, which are used to organize the Test Plan’s Test Cases.
Move Test Cases between Test Case Folders by left-clicking and dragging and dropping the Test Cases into the Test Case Folders.

Manage your Test Case Folders in Test Designer
To manage your Test Case Folders:
- Click Test Designer.

- Search for a Test Plan.

- Click to select a Test Plan in the left-hand column.
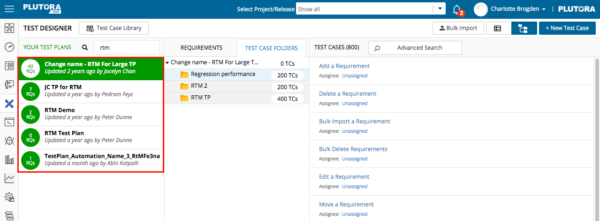
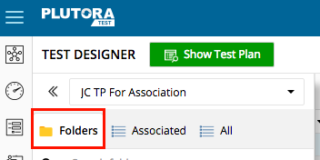
Test Designer only displays Active Test Plans. - Click the Folders View button.


- Click the Test Case Folders tab.

- Manage Test Case Folders:
All new Test Plans now have a default Test Case folder. When users add Requirements with associated Test Cases into a Test Plan, those Test Cases will be added to the default Test Case folder, where they can be moved to other folders in Test Designer.- Add a Test Case folder:
- Hover your mouse cursor over the default folder or a child folder until:

- Default folder: The new child folder button appears.

- Sub folders: The edit, new child folder, and delete buttons appear.

- Default folder: The new child folder button appears.
- Click the add new child folder button.
- Hover your mouse cursor over the new folder to make the buttons appear.

- Click the pencil icon
 to make the title field appear.

- Click the title field and type the folder name.
- Press the Enter key on your keyboard to save the folder name.
- Hover your mouse cursor over the default folder or a child folder until:
- Move a Test Case Folder:
- Left click and drag the folders by their sort handles
 (six gray dots). Your mouse pointer will change to a crosshairs cursor when hovering over sort handles.

- Make a folder into a child folder by dragging it to the right.
- Left click and drag the folders by their sort handles
- Delete a child Test Case Folder:
The Default Test Case folder cannot be deleted.- Hover your mouse cursor over the child folder until the buttons appear.
- Click the black trash bin.

- The Test Cases inside the folder will not be deleted.
- Hover your mouse cursor over the child folder until the buttons appear.
- Add a Test Case folder:


Bulk Copy and Move Test Case Folders between Test Plans
To save time recreating Test Cases, you can bulk copy and move folders containing Test Cases from one Test Plan to another.
To bulk copy and move Test Case folders and the Test Cases they contain between Test Plans:
- Click Test Designer.
- Click to select the Test Plan that is the destination for your Test Case folders.
- Click Test Case Library.

- Click the drop-down menu and select the Test Plan that is the source of your Test Case folders.
- Click the Folders tab.
- Left click and drag a folder by it sort handle (six gray dots) into the Test Case Folders Tab. Your mouse pointer will change to a crosshairs cursor.
- Release the left mouse button when the background of the Test Case Folders tab goes gray.
Hold down the Control or Shift keys if you want to select more than one Test Case folder.


Sort Test Cases Inside Folders
To sort Test Cases inside folders:
- Click Test Designer.
- Click the Test Case Folders tab.

- Click to select a Test Case folder.

- Hover the mouse cursor over the left-hand side of the Test Case until the sort handle (six dots) appears
 and the cursor changes into the cross-shaped move cursor.
 - Drag the Test Case to reorder.
- Drag Test Cases by their sort handle.


Drag Single Test Cases Between Folders
To drag a single Test Case from one folder to another:
- Click Test Designer.
- Click the Test Case Folders tab.
- Click to select a Test Case folder.
- Drag and drop Test Cases by their right-hand side (see the red rectangle below) into a folder.

- The cursor changes to a blue box when the Test Case can be dropped into a folder.

![]()