
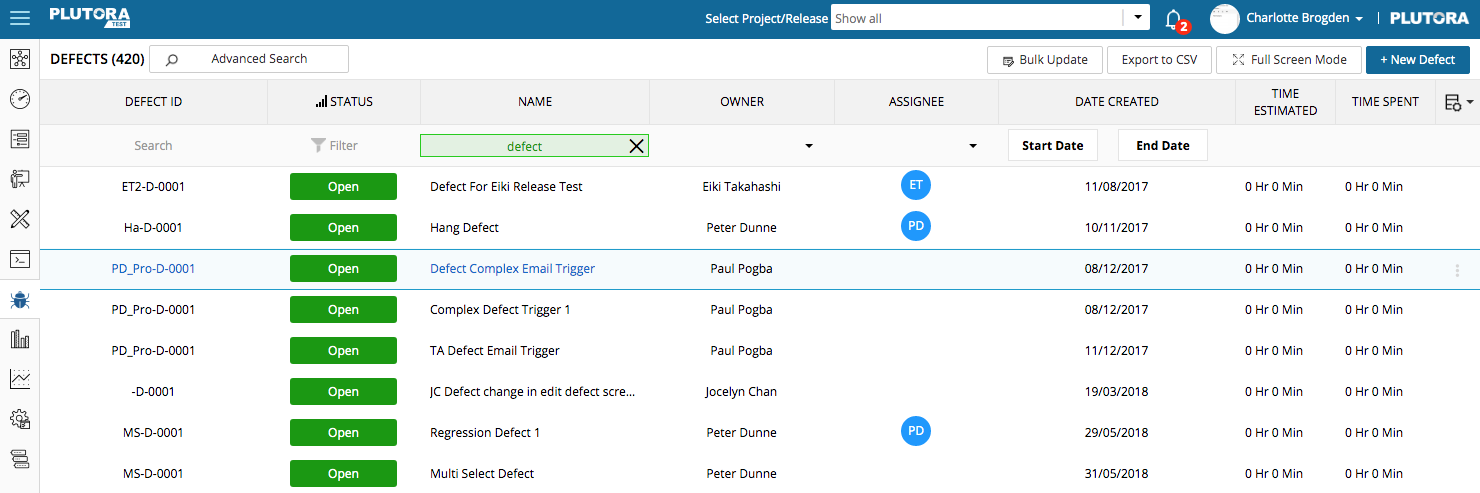
Estimation and My Actual Time Spent are now available as columns (Time Estimated and Time Spent) in the Defects grid.
My Actual Time Spent is now shown in hours and minutes instead of minutes only.
Plutora Test allows users to add Defects during the Test Execution phase or by clicking the +Add defect button.
Also see how to Quick Search and Advanced Search, Filter Defects, Duplicate Defects, and Delete Defects.
To add or edit Defects, users need the Defects Create and Defects Update user permissions.
Add or Edit a Defect
Defects are usually added during the Test Execution phase, but they can also be added separately.
To add or edit a Defect:
- Click Defects.

- Add or Edit a Defect:
- Add: Click + New Defect.

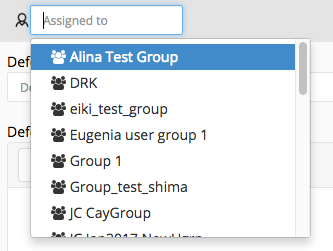
- Manage Assignees (the person chosen to fix the Defect):
- Add: Select an Assignee from the Assign to drop-down menu.
- Delete: Delete an Assignee by clicking the gray X beside their name.

- Add: Select an Assignee from the Assign to drop-down menu.
- Type the Defect Name. (Mandatory field.)
- Manage Assignees (the person chosen to fix the Defect):
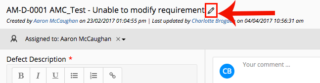
- Edit: Click the Defect ID or Name to open the Defect.
- Click the pen
 in the top-left corner to make the defect name editable.
- Press Enter on your keyboard or click outside the field to save.
- Manage Assignees (the person chosen to fix the Defect):
- Add: Select an Assignee from the Assign to drop-down menu.
- Delete: Delete an Assignee by clicking the gray X beside their name.
- Add: Select an Assignee from the Assign to drop-down menu.
- Click the pen
- Add: Click + New Defect.
- Type the Defect Description.
- Add an attachment using Plutora Test Chrome Plug-In:
To manage attachments, users need the Attachment View / Download, Attachment Access, Attachment Create, and Attachment Delete user permissions.- Add a screenshot:
- Click the black camera icon.

If the camera icon has a red dot, Plutora Test Chrome Plug-In is not installed. Click here to see the installation instructions. (You must also be using Google Chrome browser.) - Manage the screenshot using the toolbar. The tools from left to right are:

- Edit the screenshot title:
- Click the pen icon.

- Type the new file name.
- Click outside the file name field.
- Click the pen icon.
- Annotate the screenshot with the following tools:
- Selection: Select and move annotations.

- Crop: Select this tool, draw a rectangle around the area you want to keep, and click Confirm Crop.

- Arrow: Draw an arrow.

Arrows, text, rectangles, ellipses, and free draws will use the color selected in the Color tool (see below). - Text: Click to drop text and click the text to edit.

- Rectangle: Draw a rectangle.

- Ellipse: Draw a circle or oval.

- Free Draw: Draw a line.

- Undo: Undo the last action.

- Redo: Redo the last action.

- Delete: Deletes an annotation that has been selected using the Selection tool.

- Color: Click to select a color for your annotations. The button on the right opens a color wheel so you can select a color that isn’t in the menu.

- Selection: Select and move annotations.
- Click Download to download the file to your computer.
- Click Save to Attachments to save the file to Plutora Test.
- Click the X to close the pop up without saving the screenshot.
- Edit the screenshot title:
- Click the black camera icon.
- Add a video:
Videos created from Plutora Test’s Screen Capture are now saved in AWS, meaning that an unlimited number of 25 MB videos can be saved as attachments.- Click the black video icon.

If the video icon has a red dot, Plutora Test Chrome Plug-In is not installed. Click here to see the installation instructions. (You must also be using Google Chrome browser.) - Click to select which application window should record.
- Click Share.
- Click Start Recording.

- Click Stop to end the recording.
- Edit the video title:
- Click the pen icon.
- Type the new file name.
- Click outside the file name field.
- Click the pen icon.
- Click Record New Clip to discard the current video and record a new one.
- Click Download to download the file to your computer.
- Click Save to Attachments to save the file to Plutora Test.
Plutora Test can accept attachments up to 25 MB in size. If the video is larger, it cannot be saved as an attachment, but you can still download it. - Click the X to close the pop up without saving the video.
- Click the black video icon.
- Add a screenshot:
- Add an attachment manually:
To manage attachments, users need the Attachment View / Download, Attachment Access, Attachment Create, and Attachment Delete user permissions.- Click the green cross button under Attachments.

- Select a file and click Open.
The attachment uploads and appears as a circular icon.
- Click the green cross button under Attachments.
- Manage uploaded attachments:
Uploaded attachments are now sorted in descending order by upload date.- View an attachment:
- Click the view button.

- Click the X in the top right corner to close the attachment.
- Click the view button.
- Download an attachment:
- Click the download button.

Your attachment should start downloading immediately.
Save the file to your hard drive if prompted.
- Click the download button.
- Delete an attachment:
- Click the delete button.

- Click the delete button.
- View an attachment:
- Manage Associations:
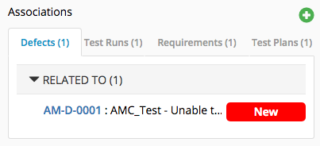
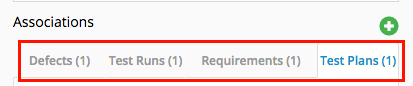
Previously, users could only manage dependencies between Defects. Now, users can manage dependencies between Defects, Test Runs, Requirements, and Test Plans.- View Defects, Test Runs, Requirements, and Test Plans:
- Click one of the following tabs to view:
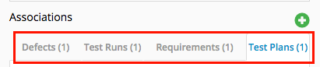
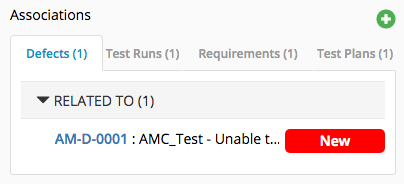
- Defects (visible by default): Shows the type (for example, Related to) and status (the red box in the screenshot below).
- Test Runs.
- Requirements.
- Test Plans.
- Defects (visible by default): Shows the type (for example, Related to) and status (the red box in the screenshot below).
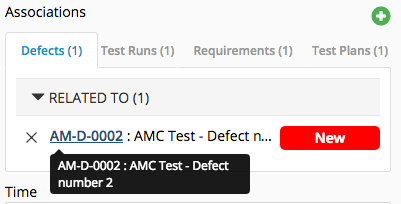
- Hover your mouse cursor over the blue-linked text to open a tooltip with the item’s ID (if applicable) and Name.

- Click the blue, linked text to open the Defect, Test Run, Requirement, or Test Plan.
- Click the X in the top-right corner of the pop up to close the Defect, Test Run, Requirement, or Test Plan and return to the previous item.
- Click one of the following tabs to view:
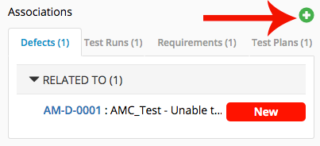
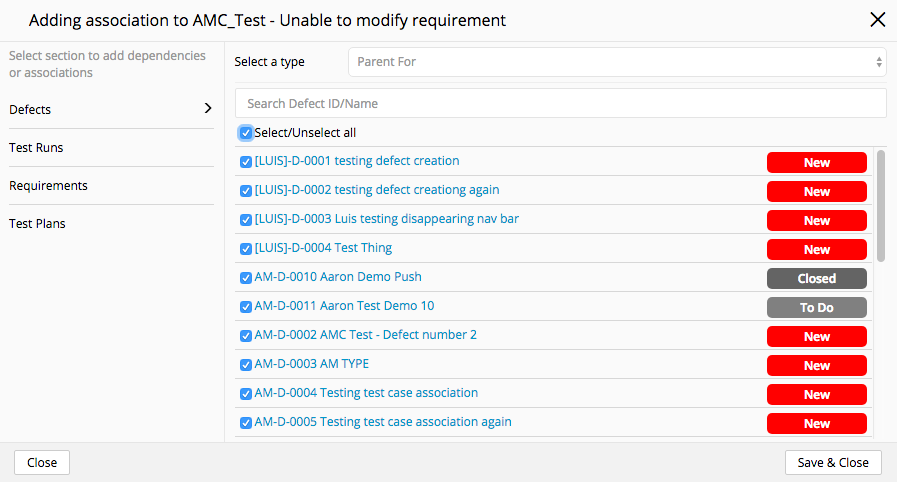
- Create associations: Click the green cross button.
- Associate Defects:
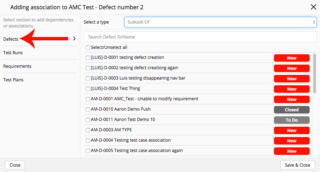
- Click Select a Type:
- Related To.
- Parent For.
- Subtask Of.
- Duplicated By.
- Duplicate Of.
- Dependent On.
- Required For.
- Filter Defects by typing a search keyword into Search Defect ID/Name.
- Click to select Defect checkboxes.
- To select or unselect all checkboxes at once, click the Select /Unselect all checkbox.

- Click Save & Close.
- Click Select a Type:
- Associate Test Runs:
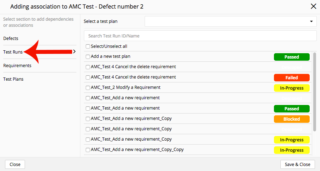
- Click Test Runs.
- Click to select or type a search term in Select a test plan.
- Filter Test Runs by typing a search term in Search Test Run ID/Name.
- Click to select Test Run checkboxes.
- To select or unselect all checkboxes at once, click the Select /Unselect all checkbox.
- Click Save & Close.
- Associate Requirements:
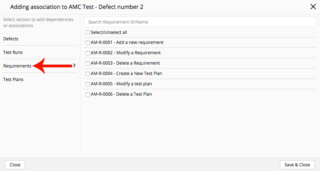
- Click Requirements.
- Filter Requirements by typing a search term in Search Requirement ID/Name.
- Click to select Requirement checkboxes.
- To select or unselect all checkboxes at once, click the Select /Unselect all checkbox.
- Click Save & Close.
- Associate Test Plans:
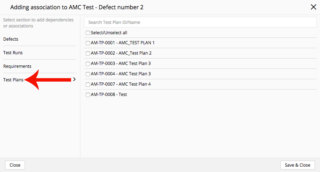
- Click Test Plans.
- Filter Test Plans by typing a search term in Search Test Plan ID/Name.
- Click to select Test Plan checkboxes.
- To select or unselect all checkboxes at once, click the Select /Unselect all checkbox.
- Click Save & Close.
- Associate Defects:
- Delete associations:
- Click the Defects tab (if it is not already open) or the Test Runs, Requirements, or Test Plans tab.
- Hover your mouse cursor over the Defect, Test Run, Requirement, or Test Plan until an X appears.
If an appears beside a Requirement or Test Plan, it means they cannot be directly deleted because they have an indirect association caused by an associated Test Run. To delete them, delete the Test Run association.
 - Click the X to delete the Defect, Test Run, Requirement, or Test Plan.
- Click Ok to confirm.
- View Defects, Test Runs, Requirements, and Test Plans:
- Manage Time (while editing a Defect only):
*NEW* Estimation and My Actual Time Spent are now available as columns (Time Estimated and Time Spent) in the Defects grid.- Estimation: Add the estimated time the Defect will take.
- Click the pen icon.
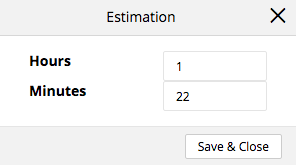
- Type the estimated Hours.
- Type the estimated Minutes.
- Click Save & Close.
- Click the pen icon.
- Spent / Remaining Time: Shows the actual time spent versus the estimated time.
- My Actual Time Spent: Add the actual time spent so far.
*NEW* My Actual Time Spent is now shown in hours and minutes, not just minutes.
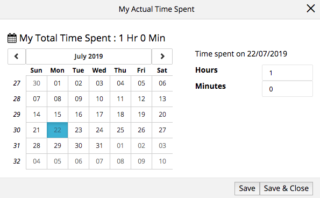
- Click the pen icon.
- Click the day in the calendar.
- Type the Hours spent.
- Type the Minutes spent.
- Click Save & Close.
- Estimation: Add the estimated time the Defect will take.
- Manage Comments (while editing a Defect only):
To manage comments, users need the Comments View, Comments Create, and Comments Update user permissions.- Add a comment by typing your comment in the Your comment… field and clicking Send.
- Click Edit to edit your comment.
- Click Reply to reply to a comment.
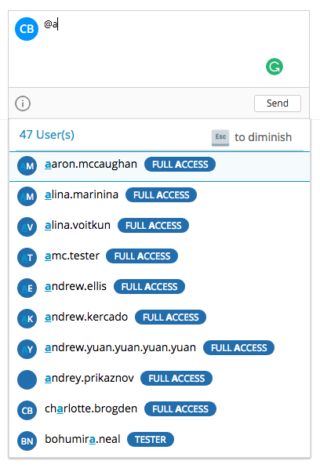
- To tag a User, so that your tagged comment appears in their Comment Stream:
- Type the @ symbol and the first few letters of their name in the comment field.
- Click to select their name from the menu that appears after you type @.
- Select a Project or Release from the Project/Release combo box by typing the first few letters. (Mandatory field.)
- Click to select a Type.
- Click to select a Status.
- Click to select a Priority.
- Click to add Followers.
- The fields under the Followers drop-down menu are custom fields created using the Defects Custom Fields Customization. Ask your administrator how to fill them in.
- Selected items in multi-select custom fields can now be deleted without opening the menu by clicking on the X next to each item.
- Click Save and Close.


View Activity History
Click the clock-shaped button ![]() on the top right of the pop up to view the Activity History of the record. To see more information about Activity History, click here.
on the top right of the pop up to view the Activity History of the record. To see more information about Activity History, click here.
![]()